Rear Differential Repair: A Step-by-Step Guide
Learn to diagnose and perform rear differential repair safely with a practical, step-by-step guide. This Home Repair Guide tutorial covers symptoms, tools, steps, and maintenance to keep your drivetrain reliable.

Goal: Diagnose common rear differential repair needs, assess noises, leaks, or vibration, and perform a safe DIY or professional repair. You’ll learn how to inspect seals, replace fluid, and tackle pinion and ring gear issues with the right tools. According to Home Repair Guide, this guide emphasizes safety, planning, and using manufacturer specs.
What is a rear differential and why it matters
The rear differential is the gear set that transfers engine power to the rear wheels while allowing them to rotate at different speeds. This is essential for stable handling during cornering. When the rear differential wears or leaks, you may notice noise, vibration, poor acceleration, or fluid dripping from the housing. In many vehicles, the rear differential is sealed and filled with gear oil; neglecting oil changes can accelerate wear and reduce efficiency. This guide explains how to approach rear differential repair safely, whether you are performing basic maintenance or a full rebuild. Throughout, we emphasize following the manufacturer’s torque specs and using the correct oil grade to prevent damage. By understanding the system and planning your repair, you reduce the risk of costly failures and save time on the road.
Common failure modes and how to spot them
Common symptoms of rear differential problems include a loud whine or clunking noise that changes with speed, vibration that worsens with acceleration, leaks around the differential housing, and a growling sound when turning. Metal particles in the oil are a warning sign of gear wear, while a constant or intermittent seepage can indicate worn seals. It’s important to confirm the exact source of the noise—whether it’s the differential, driveshaft, or wheel bearings—before starting a repair. Regular oil changes and using the correct grade reduce wear. This section helps you distinguish minor maintenance from a more involved repair, so you can plan appropriately.
Safety considerations and preparation
Safety should always come first. Park on a flat, stable surface, engage parking brake, and secure the vehicle with wheel chocks. Wear eye protection and gloves. If you’re working under a lift, ensure it is rated for the weight and use jack stands instead of relying on a floor jack alone. Drain gear oil only after the differential is cool to avoid burns. Keep a spill tray and rags handy, and never work near hot exhaust components. This preparation reduces risk while you inspect, disassemble, and reassemble parts.
Tools, supplies, and optional equipment
Prepare a robust tool kit before you begin. You’ll typically need a floor jack, jack stands, wheel chocks, a full socket set (metric and SAE), a torque wrench, a breaker bar, a drain pan, shop towels, and the correct differential oil and seals. A seal puller and prying tools help with stubborn covers, while a torque angle gauge ensures fittings are tightened to spec. Having replacement seals, gaskets, and oil on hand prevents mid-project trips to the parts store. If you’re unsure, a service manual provides exact torque values and oil capacity.
Diagnosing problems before you wrench
Start with a careful visual inspection of the housing for cracks and leaks. Check the drain and fill plugs for stripped threads. Evaluate oil condition—metal flakes or glitter indicate wear and may require bearings or gears replacement. Spin the outputs by hand (with the vehicle safely supported) to feel for roughness or binding. Compare to the manufacturer’s service notes and the oil’s level and color. Document your findings so you can decide whether to perform a simple fluid change or a full differential rebuild.
The repair workflow: rebuild vs replace
A simple fluid change and seal replacement is often enough for minor leaks, but persistent noise or metal shavings usually signals worn bearings or gears that require a rebuild or replacement of the differential assembly. A rebuild restores the internal clearances and can be cost-effective when the case is sound, whereas replacing the entire unit may be more economical on older vehicles with extensive wear. Obtain factory service specs and consider professional alignment checks if available. Proper torque, lubrication, and seal seating are critical to long-term reliability.
How to extend differential life with maintenance
Routine maintenance can dramatically extend the life of a rear differential. Change the gear oil at intervals recommended by the manufacturer, use the correct viscosity, and inspect seals for leaks during every oil change. Drive smoothly, avoid aggressive launches, and address abnormal noises early. A small investment in maintenance today can prevent expensive repairs tomorrow and keep your drivetrain quiet and dependable.
Tools & Materials
- Floor jack(Strong enough for your vehicle’s curb weight)
- Jack stands(Use in pairs; never rely on a jack alone)
- Wheel chocks(Place on both sides of the wheels)
- Drain pan(Large enough to hold used gear oil)
- Socket set (metric and SAE)(Including sockets, extension, and a variety of sizes)
- Breaker bar(For stubborn bolts)
- Torque wrench(Essential for proper fastener torque)
- Differential oil (correct type)(Confirm grade and fill capacity from manual)
- Differential seals/gasket kit(Include pinion and case seals if replacing)
- Seal puller(Helpful for stubborn seals)
- Shop towels / rags(For cleanups and oil spills)
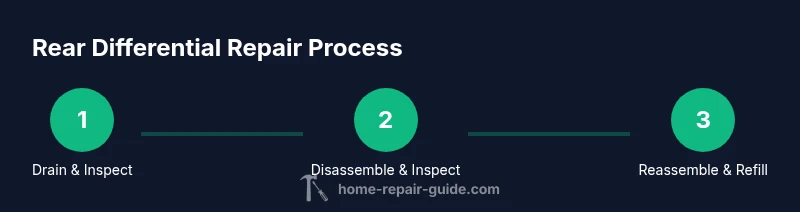
Steps
Estimated time: Total time: 2-6 hours
- 1
Secure the vehicle and prep workspace
Park on a flat surface, set the parking brake, and chock the wheels. Lift the vehicle and support with jack stands ensuring the differential is accessible. This step creates a safe baseline before you touch any components, reducing the risk of injury.
Tip: Double-check the stands’ height before crawling underneath. - 2
Drain old gear oil
Place a drain pan beneath the differential drain plug. Remove the plug slowly to avoid splashing, capturing all the old oil for recycling. Inspect the oil as it drains for metallic debris that could signal wear.
Tip: If oil is extremely dark or gritty, note it as a sign to inspect bearings. - 3
Inspect external and internal components
Look for visible leaks around the seals, check for cracked housings, and note any unusual change in venting. Remove the differential cover to inspect gears, bearings, and shims, taking photos for reference during reassembly.
Tip: Take precise notes and photos to ensure correct reassembly. - 4
Remove the differential cover and drain any residual fluid
Unbolt the cover, allowing remaining oil to drain completely. Clean the mating surfaces before inspection. This access lets you inspect gear mesh, bearing preload, and overall condition.
Tip: Keep track of bolt locations; some bolts are longer than others. - 5
Assess gears, bearings, and seals
Carefully inspect the ring and pinion gears for pitting and wear. Check bearings for roughness by rotating assembled gears. If you find wear or play beyond spec, plan replacement parts.
Tip: Compare findings to service manual specs to determine if replacement is necessary. - 6
Replace seals and service the case
If seals show wear, remove old seals and install new seals with proper seating tools. Reinstall the cover with a fresh gasket or sealant per the manual. Confirm that fasteners are torqued to spec and sealants are fully cured.
Tip: Use a torque wrench and follow rotor-bolt patterns as instructed. - 7
Refill oil and verify level
Install drain plug, refill with the correct oil until it reaches the recommended level. Re-check for leaks once the oil settles and after a short run to warm up the differential.
Tip: Do not overfill; overflow can damage seals. - 8
Test drive and final inspection
Take a cautious test drive to listen for abnormal noises. Recheck the drain and fill areas for leaks after cooling. If everything stays quiet, you’ve completed a successful rear differential repair.
Tip: Document final readings and noise levels for future reference.
FAQ
What are common signs that rear differential repair is needed?
Common signs include a whining or grinding noise, vibration, leaks around the differential housing, and changes in handling. If symptoms persist after a simple fluid change, further inspection of gears or bearings is warranted.
Watch for noise, vibration, and leaks; if they persist, inspect gears or bearings.
Can I perform rear differential repair myself?
Yes, with mechanical skill, the right tools, and a service manual. Complex gear issues may require professional equipment and expertise.
It’s doable with the right tools and manual, but some repairs need a shop.
How long does a typical rear differential repair take?
A basic fluid change and seal replacement can take a few hours. A full rebuild or gear replacement may take longer, depending on parts availability and vehicle model.
Expect several hours for a rebuild; shorter for simple fluid changes.
What oil should I use in the rear differential?
Check the vehicle’s manual for the recommended oil grade and capacity. Use the specified type to ensure proper lubrication and cooling of gears.
Always follow the manual for the exact oil type and capacity.
Is a leaking seal normal after replacing seals?
No. A properly installed seal should not leak once cured. If you see leaks after test drive, recheck seating and torque specifications.
Leaks after installation aren’t normal—recheck seals and torque.
Do I need special tools for rear differential work?
A seal puller, torque wrench, and a proper set of sockets are usually required. Some repairs may need specialty tools found in service manuals.
Most jobs need basic tools plus a seal puller and torque wrench.
Watch Video
Key Takeaways
- Identify symptoms early to avoid major rebuilds.
- Use correct oil and maintain proper fill level.
- Follow torque specs precisely for reliability.
- Safety first: proper support and PPE.
- Maintenance today prevents costly repairs tomorrow.