Rain-X Windshield Chip Repair Kit: A Practical Step-by-Step Guide
Learn how to use a Rain-X windshield chip repair kit to fix minor chips and stop cracks from spreading. This step-by-step guide covers prep, application, curing, aftercare, safety tips, and when to seek professional help.

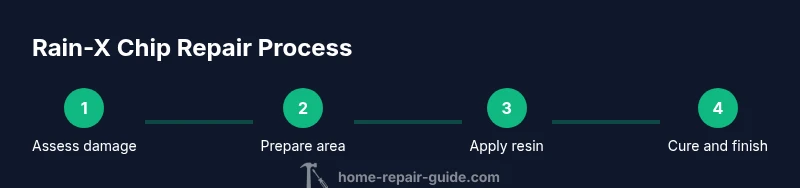
A Rain-X windshield chip repair kit lets you fix minor chips at home, slowing or stopping crack growth if used correctly. This quick guide covers prep, resin application, curing, and safety, so you can DIY with confidence and avoid premature windshield replacement when damage is small. Follow the steps and precautions to maximize durability.
What a Rain-X windshield chip repair kit can do for you
A Rain-X windshield chip repair kit is designed to stabilize small chips and hairline cracks, preventing moisture intrusion and slow spreading. When used correctly, it creates a clear resin fill that helps restore surface integrity and improves visibility through the damaged area. According to Home Repair Guide, many minor windshield flaws can be effectively repaired at home if you follow the kit instructions and environmental guidelines. The goal is to stop the damage from growing while keeping the glass structurally sound until a professional repair can be scheduled if needed. Keep in mind that these kits are not a substitute for a full windshield replacement when the damage is extensive or compromises safety. This guide will walk you through prep, application, curing, and safe handling to maximize your DIY repair success.
Safety, timing, and prep environment
Before starting any repair, set up a clean, dust-free workspace with stable lighting. Wear safety eyewear and gloves to prevent resin contact with skin or eyes. Work in a moderate temperature environment—extremely hot or cold conditions can affect resin flow and curing. Remove the vehicle from direct sunlight if possible, or shade the windshield with a soft blocker to avoid rapid curing. Clean the area around the chip with a lint-free cloth and isopropyl alcohol, ensuring the surface is dry and free of oils or wax that could hinder adhesion. If you notice any movement in the glass, or if the damage extends beyond a small chip, consider postponing the DIY repair and consult a professional. This careful prep reduces debris, improves resin performance, and lowers the risk of a cloudy or uneven fill.
Understanding kit components and how they work
A typical rain x windshield chip repair kit includes a clear resin, curing strips or pills, an injector or applicator, and a surface preparation pad. The resin fills the micro-voids within the damaged area and cures to a hardened plug that improves structural integrity and reduces pinhole leaks. Curing strips control surface leveling, while the applicator helps seat resin into the chip without trapping air. Always read the kit’s instructions, as different brands may have slight variations in part names or steps. When used properly, the kit can flatten the resin with the glass surface so the repair is less noticeable and more durable. By following these parts and steps, you maximize your odds of a successful, long-lasting fix.
Practical considerations and limitations
Not all chips are repairable with a DIY kit. Deep chips near the edge of the windshield, chips in the windshield laminate, or damage that runs through the entire pane should be evaluated by a professional. In some cases, the resin may not fully fill a curved or irregular chip, resulting in a murky appearance or a residual ripple. Environmental factors, such as heat, humidity, and sun exposure, can affect cure time and adhesion. If you're unsure about the damage, start with a visual assessment and consider a quick test on a small, inconspicuous area to gauge how the resin flows. The key is to manage expectations and avoid forcing a fix that could compromise safety.
Aftercare and long-term considerations
After curing, inspect the repaired area under bright light and wipe with a clean microfiber cloth to remove any surface residue. Avoid washing the car for the recommended cure period; your kit’s instructions will specify the required time. If you notice a minor haze, some kits allow a light polish; never use abrasive cleaners on the repaired area. For added protection, you can apply a rain-repellent coating around the repaired chip, as long as it does not disturb the resin. Regular windshield maintenance, including timely replacements of worn wiper blades and applying a protective coating, can extend the life of the repair and minimize future chips.
When to seek professional help
DIY repairs are a cost-effective option for small, isolated chips, but not for significant damage. If you observe spreading cracks, star-shaped damage, or chips near the edge, arrange a professional inspection. A certified technician can perform a proper patch, fill, and curing process that aligns with safety standards and vehicle glass warranties. Remember that repairs may impact insurance deductibles, warranties, or the integrity of your windshield. When in doubt, use the DIY kit as a first step and schedule a professional evaluation if the damage worsens.
Tools & Materials
- Rain-X windshield chip repair kit(Include resin, curing strips, and injector as provided by kit)
- Isopropyl alcohol (70% or higher)(For cleaning around the chip)
- Lint-free microfiber cloths(For cleaning and polishing)
- Safety glasses(Eye protection during work)
- Latex or nitrile gloves(Keep resin off skin)
- Masking tape(To protect surrounding glass if needed)
Steps
Estimated time: 30-60 minutes
- 1
Inspect damage and set up
Examine the chip to confirm it’s a small, isolated flaw suitable for DIY repair. Clear the workspace, assemble the kit, and lay out your tools within easy reach. Take a quick photos of the damage for reference in case you need to show it later.
Tip: Confirm that the chip is not a long crack or edge-break before proceeding. - 2
Clean and dry the area
Wipe the area around the chip with a lint-free cloth dampened with isopropyl alcohol. Remove any dust, wax, or moisture so the resin can bond properly. Let the surface air-dry completely to avoid trapping water under the repair.
Tip: Use a clean area of the cloth for each wipe to avoid spreading debris. - 3
Apply resin into the chip
Apply the resin into the chip using the kit’s injector or applicator, aiming to fill the void without overfilling. Keep the surface smooth and flush with the surrounding glass. If your kit uses curing strips, place them as directed to level the resin.
Tip: Work slowly to minimize air bubbles; a small amount of resin goes a long way. - 4
Cure and level the resin
Allow the resin to cure for the time specified by the kit under stable conditions. If required, use curing strips to maintain a flat surface while the resin sets. Avoid touching the area during curing to prevent imperfections.
Tip: Avoid direct sunlight during curing to prevent premature hardening. - 5
Remove excess and polish
Once cured, gently remove any excess resin with the edge of a plastic card or small scraper. If the kit recommends polishing, use a non-abrasive polish and a microfiber cloth to restore clarity without scratching.
Tip: Do not use metal tools that could scratch the glass. - 6
Inspect final result and test
Dazzle the area under bright light to ensure even fill and absence of new cracks. Lightly rinse the area and check for any water intrusion. If the chip remains visible or the crack worsens, consider a professional evaluation.
Tip: Document the finished repair with a photo for records.
FAQ
How effective are Rain-X windshield chip repair kits on chips vs cracks?
Rain-X repair kits work best on small chips and hairline cracks. Larger or spreading cracks may not seal properly and could require professional repair.
Rain-X kits fix small chips well, but bigger cracks often need a pro.
Can I repair multiple chips in one session?
Yes, you can repair multiple chips if they are isolated and accessible. Allow curing between applications as instructed.
Yes, but cure between applications.
Will the repair be visible after curing?
Most repairs are noticeable at the chip site but should be less visible and help prevent further spreading.
The repair is usually noticeable but reduces spreading.
Is a rain x windshield chip repair kit safe for DIY use?
When used as directed, the kit is designed for at-home use with proper safety precautions.
Yes, if you follow the directions safely.
How long does curing take?
Curing time varies by kit and conditions, typically ranging from several minutes to an hour.
Curing can take several minutes to an hour.
Watch Video
Key Takeaways
- Assess damage and use DIY kit only on small chips
- Prepare the surface thoroughly for best adhesion
- Follow curing times exactly for a strong seal
- Know when to seek professional repair