How to Use a Windshield Repair Kit: A Comprehensive DIY Guide
Learn how to use a windshield repair kit with a clear, step-by-step approach. Prep safely, apply resin correctly, cure, and know when to seek professional help for better visibility and crack control.

You can fix small chips and star cracks with a windshield repair kit if you act promptly. The kit injects resin into the damaged area to seal it and prevent propagation. According to Home Repair Guide, following the included instructions and wearing safety gear improves results and reduces the chance of introducing new flaws. This DIY approach can save money and help you avoid a costly replacement, but it’s not a substitute for windshield replacement if the damage is large or near the edge.
What a windshield repair kit can fix
Windshield repair kits are designed to address minor damage such as small chips, star-shaped cracks, and superficial scratches. When used correctly, the resin fills the void, bonds with the surrounding glass, and helps prevent crack propagation. According to Home Repair Guide, acting quickly after a chip forms increases the likelihood of a successful repair. The most important factors are the size and depth of the damage, the location (preferably not near edges or corners), and the absence of pre-existing stress around the chip. Kits provide a controlled environment for resin injection, curing, and finishing, which helps restore structural integrity and improve visibility through the affected area. Remember, DIY repairs are best for minor, contained damage and should be followed by a professional assessment if you notice any widening or new cracking.
What a windshield repair kit can fix
Small chips (often under a few millimeters in diameter) and shallow cracks are the best candidates for DIY repair. If the damage is larger than a coin, or if multiple chips cluster in a small area, professional repair or replacement may be required. Edge chips near the windshield border are less likely to hold a repair, since the glass edge bears more stress. Use the kit as a preventive measure to slow crack growth, preserve visibility, and avoid the risk of full crack spread during temperature fluctuations or road vibration. Safety first: never attempt repair if the windshield is structurally compromised or the driver’s field of vision is severely affected.
Safety considerations and prep work you should not skip
Before you start, ensure you have good lighting and a clean, dry workspace. Wear protective gloves and safety glasses to prevent resin contact with skin or eyes. Work in a shaded area or indoors to avoid rapid curing caused by sunlight, which can cause uneven filling. Remove jewelry and ensure your vehicle is stable on a flat surface. Clean the surface around the damage with a microfiber cloth and isopropyl alcohol to remove oils and dust. A dry, smooth surface helps the resin adhere properly. Finally, read the kit’s instructions thoroughly; different brands may use slightly different application steps or curing times.
How to choose the right windshield repair kit for your needs
There are several kits on the market, differing in resin viscosity, curing method (UV or ambient light), and injector design. For beginners, look for a kit with simple injector components, clear instructions, enough resin, and curing strips. If you regularly park in strong sunlight, you may prefer a kit with longer curing times or UV-resistant resin. Consider the repair’s expected outcome: some kits are designed for quick, temporary fixes, while others aim for a more durable, long-lasting seal. Always check that the kit includes a cleaning tool, resin, curing strips, and an instruction sheet. Compare brands based on user reviews and warranty, rather than price alone.
Step-by-step preparation and what to expect during the repair process
Preparation sets the stage for a successful repair. Inspect the area for damage type and severity; if a chip is spreading, move to professional repair. Clean the area thoroughly, then apply a stabilizing agent if the kit includes one. You’ll inject resin into the damaged area using the provided injector, then cap it with a curing strip or hood to force resin into the crack. A consistent cure is essential for a strong seal, which is why many kits require the resin to cure under specific lighting or UV exposure. After curing, remove excess resin with the supplied tool and polish the surface for a clear finish. A final inspection should reveal reduced visibility of the damage and no new cracks.
Step-by-step overview and decision points for DIY repair vs. professional service
DIY repair is most effective for isolated chips or small cracks, particularly when they don’t impair the driver’s line of sight. If the damage is near the edge, large, or accompanied by existing structural issues, seek a professional repair or windshield replacement. If you notice spreading after the repair, it’s a sign to consult a pro. Periodic checks after a repair help ensure durability, especially after temperature changes or road impacts. The decision to DIY vs. pro depends on damage size, location, and how the windshield is used daily.
Authority sources and further reading
For authoritative guidance, consult sources such as government and industry organizations. These references help you understand driving safety implications and when to replace damaged windshields. Always follow local regulations and insurance guidelines when considering windshield repairs.
Tools & Materials
- Windshield repair kit (resin, injector, curing strips)(Choose a reputable brand with enough resin for multiple applications)
- Isopropyl alcohol (70% or higher)(For cleaning the damaged area before repair)
- Microfiber cloths(Lint-free and reusable; use dry and lint-free cloths)
- Gloves (nitrile preferred)(Protect hands from resin and solvents)
- Safety glasses(Eye protection during resin handling)
- Plastic blade or razor(For removing excess resin after curing)
- Masking tape or edge guide(Keeps the area clean during curing)
- Lighting source(Ensure good visibility; avoid direct sunlight for curing if kit specifies)
- Chalk or marker(Mark the damage location for reference)
- Cleaner or degreaser(Pre-clean any stubborn residue)
- Trash bag or container(Dispose of used curing strips and waste properly)
Steps
Estimated time: 30-60 minutes
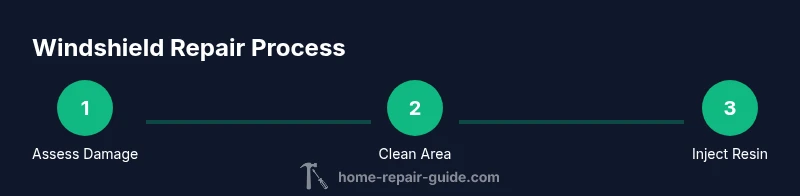
- 1
Assess damage and prepare
Inspect the chip or crack to determine if DIY repair is appropriate. Gather materials, ensure a stable surface, and wear protective gear. If the damage is at the edge or exceeds recommended size, proceed to professional options.
Tip: Take a clear photo of the damage before starting. - 2
Clean the damaged area
Use isopropyl alcohol on a microfiber cloth to remove oil, dust, and moisture. Avoid leaving fibers or moisture behind, which can affect resin bonding. Allow the area to dry completely before proceeding.
Tip: Do not rush this step; poor cleanliness leads to poor adhesion. - 3
Apply resin with injector
Attach the resin syringe to the injector per the kit’s instructions. Slowly inject resin into the damaged area until it is slightly proud of the glass surface. Avoid overfilling, which can create a dome that interferes with visibility.
Tip: Keep the injector steady and perpendicular to the windshield. - 4
Cover with curing strip and cure
Place the curing strip over the repaired area as directed. Allow the resin to cure under the recommended light exposure or UV lamp. Timing varies by product, so follow the kit’s guidance exactly.
Tip: Do not disturb the repair during curing. - 5
Remove excess resin
Gently remove the curing strip and wipe away any cured resin with a plastic blade, then polish the surface to restore clarity. Ensure the repair sits flush with the windshield surface for a seamless look.
Tip: Work slowly to avoid scratching the glass. - 6
Inspect and monitor
Check the repaired area for clarity and structural integrity. If lines remain or the crack widens, reattempt the repair or seek professional help. Continue monitoring after temperature changes or heavy driving.
Tip: If the crack reappears, prioritize safety and professional assessment.
FAQ
Can a windshield repair kit fix all chips and cracks?
No. Windshield repair kits are designed for small chips and minor cracks. Large, spreading, or edge cracks usually require professional repair or replacement. If in doubt, consult a technician to assess safety and structural integrity.
Windshield repair kits work best for small chips. For larger cracks or those near the edge, seek professional help to ensure safety.
Is a DIY repair permanent or temporary?
DIY repairs can be durable when done correctly, but they are often considered a temporary fix until a full replacement is performed. Verify the repair under different lighting and after temperature changes; if the crack grows, consult a pro.
DIY repairs can last, but they're usually a temporary solution. Watch for any growth or spreading cracks and get a pro if needed.
Do I need to remove the damaged glass before repairing?
No, you do not remove glass when using a typical windscreen repair kit. The resin fills the crack through the surface and bonds with the surrounding glass. Removal is not part of the standard DIY process.
You don’t remove glass for most DIY kits; you fill the crack with resin and let it cure.
What if the crack extends to the edge after repair?
If the crack reaches the edge after repair, the structural integrity may be compromised. In this case, professional evaluation is recommended, as edge cracks are less likely to be successfully repaired with DIY kits.
Edge cracks are tricky. If it reaches the edge, get a professional check.
How long does resin cure and when can I drive?
Cure times vary by kit and lighting conditions. Most kits require a specific curing period before exposure to moisture or driving. Follow the kit’s guidance and avoid driving until the resin is fully cured to prevent damage.
Cure time varies; wait the recommended period before driving.
Watch Video
Key Takeaways
- Assess damage to determine if DIY repair is appropriate.
- Prepare and clean thoroughly for better bonding.
- Follow kit instructions for resin, curing, and finishing.
- DIY works best for small chips; seek professionals for larger damage.
- Polish and inspect for a clear, durable finish.