RV Repair: A Practical Step-by-Step Guide for Homeowners and Campers
A practical, trusted guide from Home Repair Guide to diagnose and repair common RV issues—plumbing, electrical, and appliances—with durable, safe techniques for homeowners and renters.

By following this guide, you will diagnose and perform durable repairs for common RV problems, from plumbing leaks to electrical faults. You’ll learn safe troubleshooting, practical repair steps, and maintenance practices that keep your RV reliable on the road or at the campsite. Gather basic tools, secure power, and follow the step-by-step methods outlined here to finish with confidence.
What is r v repair and why it matters
According to Home Repair Guide, r v repair means diagnosing and fixing issues across essential systems in campers and motorhomes. The term may look unusual with spaced letters, but the concept covers leaks, electrical faults, propane safety, and appliance malfunctions that impact reliability and safety. The Home Repair Guide team emphasizes that proactive repairs save money, reduce downtime, and increase safety on the road. Whether you’re a weekend camper or full-time traveler, understanding how to assess symptoms, source quality parts, and perform durable repairs helps you stay mobile and comfortable. In this guide, we use practical language and step-by-step methods to teach you to troubleshoot, plan, and execute fixes with a focus on long-term results. The goal is to empower homeowners and renters with repeatable processes you can apply to most RV makes and models while avoiding common pitfalls.
Core RV systems you should know
A solid foundation in r v repair starts with the main systems that keep a camper comfortable and functional. Plumbing includes fresh water and gray water lines, pumps, valves, and water heaters. The electrical system covers 12V battery circuits, fuses, and shore power connections, while propane and heating involve LP gas lines and appliances like furnaces or range top heaters. The refrigeration and cooking appliances, HVAC, and venting influence comfort year-round. When you approach repairs, map out how these systems interact: a leak can drain a battery, a short can affect propane safety, and a faulty heater can stress both electrical and fuel lines. Building this mental model helps you triage issues quickly and safely.
Diagnosing common RV problems
Common RV problems span leaks, electrical glitches, and appliance failures. Start with a calm, systematic approach: confirm safety, then reproduce the symptom in a controlled way to observe when it occurs. Check for obvious water stains, damp smells, or buzzing sounds near panels. Inspect seals around doors and windows for gaps, test water fixtures for leaks, and use a multimeter to verify battery voltage when system power is on. For propane-operated appliances, perform odor checks and ensure proper venting. Document findings with notes or photos to guide repairs and future maintenance. The emphasis in r v repair is to distinguish symptoms from root causes, so you fix the underlying issue rather than applying quick, temporary fixes.
Safety, planning, and documentation before you begin
Safety is the foundation of any r v repair. Before touching any system, disconnect shore power or isolate the battery, and wear eye protection and gloves. Read schematics or manufacturer guidance for your RV’s exact model and age, noting any recalls or known weak points. Create a simple plan with a clearly defined goal, required tools, and a test method. Document serial numbers, part numbers, and repair dates to track maintenance history. If you are working with propane or LPG components, verify gas detectors are functional and check for gas leaks using soapy water or approved detectors after reinstalling lines. A well-documented plan reduces panicking mid-repair and helps you flag potential safety issues early.
Tools and workspace setup for rv repair
A dedicated, clean workspace makes rv repair safer and more efficient. Position the RV on a level surface and ensure ample lighting and ventilation. Keep a labeled toolbox with the core tools you’ll use most: a multimeter for electrical checks, screwdrivers (Phillips and flathead), adjustable wrenches, pliers, a utility knife, pipe sealant or Teflon tape, and repair clamps. Have spare parts such as fittings, o-rings, hoses, and pipe insulation on hand, along with a small flashlight, a mirror, and a battery-powered drill or driver. Organization matters: label cables and hoses, lay out spare parts in a clear parts tray, and use zip ties to bundle loose wires away from moving or hot components.
Step-by-step overview of a typical repair workflow
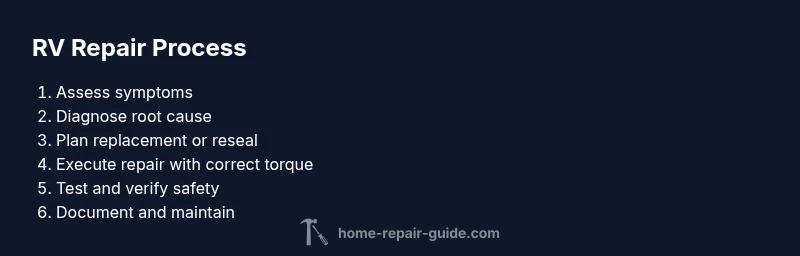
The repair workflow in r v repair follows a repeatable cycle: assess, diagnose, plan, execute, test, and document. Start by confirming the symptom and safety conditions, then isolate the faulty component. Create a simple shopping list of replacement parts and tools. Perform the repair with attention to manufacturer guidance and torque specs, then re-test all affected systems under normal operating conditions. If possible, have a test plan that includes functional checks, leak tests, and a post-repair safety verification. Finally, update your maintenance log with notes on the issue, parts used, and the outcome to ease future troubleshooting.
Maintenance habits to prevent future repairs
Prevention is the cheapest form of RV repair. Develop a routine that includes inspecting seals around doors and windows quarterly, testing water pump and hot water heater pressure relief valves, and checking the battery and alternator charge levels monthly. Schedule seasonal checks for propane appliances, test carbon monoxide detectors, and replace filters on the HVAC system. Keep hoses, clamps, and fittings in good condition and replace worn components before they fail. A simple maintenance calendar helps you stay on track, reducing the probability of unexpected failures on the road.
Troubleshooting examples and real-world tips
A typical RV repair scenario involves a stubborn leak at a shower seal or fresh-water line. Use a dry cloth to blot the area, then apply a water-safe sealant or replace the likely gasket, testing with soapy water to confirm no bubbles after tightening. If a circuit trips, inspect the fuse box or breaker panel; identify the overloaded circuit or short and correct wiring or load issues. For appliances that won’t start, verify power supply, fuses, and control panels before replacing expensive components. Remember: small steps, careful checks, and patience yield durable repairs that last.
Common mistakes to avoid in r v repair
Avoid skipping safety steps—never work on electrical or propane systems without isolating power and gas. Don’t rush repairs or use improper fittings that can cause leaks. Avoid assuming a symptom equals a root cause; confirm by testing and observing after each action. Finally, don’t neglect documentation; keeping track of repairs reduces future downtime and helps in warranty or resale discussions.
Tools & Materials
- Multimeter(Digital preferred; measure voltage and continuity)
- Screwdriver set (Phillips & flathead)(Assorted sizes)
- Wrench set / adjustable pliers(Combination wrenches and pliers)
- Teflon tape / pipe thread sealant(Gas-safe if working with LPG lines)
- Utility knife and scissors(Cut hoses and trim insulation)
- Marine-grade sealant or sealant compatible with RV materials(Waterproof sealing for leaks)
- Replacement hoses, fittings, O-rings(Keep compatible sizes for your model)
- Leak detector solution or soapy water(For quick leak checks)
- Safety gear (gloves, eye protection)(Protect from sharp edges and chemicals)
- Battery jumper cables or portable power source(For testing isolated circuits safely)
Steps
Estimated time: 90-180 minutes
- 1
Power down and secure the RV
Stop all active systems, disconnect shore power, and isolate the battery where applicable. Remove accessories away from the work area and wear safety gear. This step reduces the risk of shocks, short circuits, or gas hazards while you inspect.
Tip: Always verify power is off at the source before you touch any wiring. - 2
Identify symptoms and isolate the affected system
Reproduce the issue or observe the symptom in a controlled setting. Use a flashlight and a mirror to inspect hard-to-reach joints. Document locations and signs of wear to guide the repair.
Tip: Take photos from multiple angles to reference during reassembly. - 3
Consult schematics and plan the repair
Refer to the RV’s manual or manufacturer schematics to locate routing and torque specs. List needed parts and tools, and determine whether to replace a whole assembly or reseal a gasket first.
Tip: Avoid mixing incompatible parts; confirm compatibility with model year. - 4
Perform the repair with proper tools
Execute the replacement or reseal the component using the correct torque and fit. Use Teflon tape on threads and verify fittings are snug but not over-tightened.
Tip: Work methodically, checking alignment before final tightening. - 5
Test the repair and verify safety
Restore power, run the affected system, and check for leaks or abnormal noises. For propane, perform a controlled test with detectors and soapy water on joints.
Tip: Test each system separately to isolate potential new issues. - 6
Document the repair and plan maintenance
Record part numbers, dates, and outcomes in your maintenance log. Schedule follow-up checks on a seasonal basis and set reminders for filter changes or seals.
Tip: Your notes save time on future troubleshooting and resale discussions. - 7
Cleanup and secure the workspace
Dispose of waste materials properly, clean tools, and return panels to their original positions. Ensure there are no loose wires or tools left inside living spaces.
Tip: Always double-check that panels are re-secured and vents are clear before driving.
FAQ
What is the most common RV repair problem and how can I prevent it?
Leaks from seals and connections are among the most frequent RV repair tasks. Regular inspections, resealing around windows and doors, and testing water systems can prevent many leaks from becoming emergencies.
Leaks top the list of common RV repairs; inspect seals regularly and reseal as needed to prevent bigger problems.
When should I call a professional for an RV repair?
If the repair involves propane, high-voltage systems, or structural concerns, contact a certified technician. For simple leaks or sealant applications, basic repairs can be done safely with proper precautions.
Call a pro if propane or electrical safety could be compromised; otherwise, follow guided steps for smaller repairs.
Are RV electrical repairs dangerous?
RV electrical work can be dangerous due to live 12V and potentially higher shore power. Always disconnect power before working, use insulated tools, and verify circuits with a multimeter.
Electrical work in an RV can be risky; make sure power is off and use proper insulation and tools.
What maintenance helps minimize repairs between trips?
A quarterly or semiannual inspection focusing on seals, hoses, batteries, and propane detectors reduces surprises. Keep a maintenance log and replace worn parts before they fail.
Do regular checks on seals, hoses, and detectors to cut down on unexpected repairs.
How long should a typical RV repair take?
Repair duration varies by complexity, typically from 60 minutes for minor fixes to several hours for major replacements. Plan for testing and re-inspection.
Most repairs take from an hour to a few hours depending on complexity; always test afterward.
Watch Video
Key Takeaways
- Identify root causes before replacing parts
- Safety always comes first in rv repair
- Document repairs to simplify long-term maintenance
- Regular maintenance reduces urgent repairs
- Plan, test, and verify each fix before finishing