Printer Repair: A Practical Step-by-Step Guide
A comprehensive, educator-friendly guide to diagnosing and repairing common printer issues, from jams to connectivity. Learn safe repair methods, essential tools, and proactive maintenance to extend your printer's life.

This guide shows you how to diagnose and repair common printer problems, from paper jams and misfeeds to connectivity issues. You’ll learn to safely unplug the printer, inspect the rollers, clean the internal paths, replace consumables if needed, and run a test print. Follow the step-by-step process for durable, cost-effective results.
Why printer repair matters
Printers are common household and small-office workhorses, delivering essential printouts for bills, recipes, and school projects. When a printer starts skipping pages, jams, or connections drop, it interrupts your day and can lead to higher replacement costs. According to Home Repair Guide, investing time in printers repair and proactive maintenance can reduce downtime, extend device life, and lower ongoing supply costs. The goal is to build a durable, repeatable process for diagnosing problems, addressing the most likely causes, and avoiding unnecessary disassembly. In this section, we’ll outline why repairs matter, what can typically go wrong, and how a methodical approach can save both time and money over the life of your printer. By understanding the core subsystems—paper path, media handling, the ink or toner delivery, and the electronics—you’ll be prepared to tackle issues with confidence and safety.
Common printer problems and quick diagnostics
Most printers fail for a handful of repeatable reasons: paper jams in the feed path, misfeeds that stall output, ink/toner quality issues, and connectivity problems that break the print chain. Start with a quick visual check: are there torn sheets, stray fibers, or visible debris in the paper path? Listen for abnormal motor sounds, which can indicate a roller or belt wear. If you’re dealing with color problems, confirm cartridge installation and run a calibration. For network or USB issues, verify cables, drivers, and printer status on the host computer. Remember, practical printers repair focuses on mechanical wear and consumables—often the simplest fixes yield durable results.
Tools, parts, and safety before you start
Before you open a printer, gather essential tools and safety gear. Working on printers typically requires basic hand tools, a multimeter, compressed air, and lint-free wipes. Set up a clean workspace with good lighting and a container to hold screws. Safety first: unplug the printer, disconnect all cables, and discharge any capacitors as recommended in the model’s manual. If you must touch fuser or high-temperature parts, use heat-resistant gloves and avoid metal tools that could nick sensitive components. This phase also includes locating model-specific service manuals or vendor parts lists to identify the exact rollers, belts, or seals you may need. Planning ahead prevents unnecessary disassembly and stress during repair.
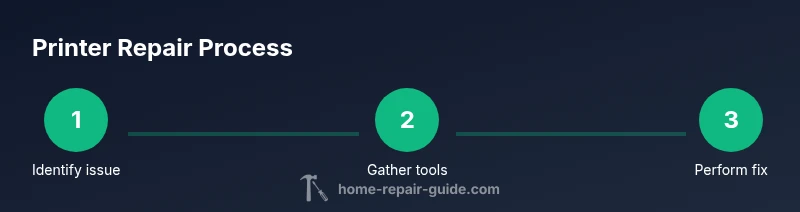
Step-by-step diagnostic workflow
A structured workflow makes printer repair efficient and repeatable. Begin with a simple baseline test by printing a calibration page to identify obvious defects. Next, remove any obvious jams and clear the paper path using gentle, steady motions. Inspect feed rollers for wear and clean them with isopropyl alcohol and lint-free wipes. Check toner or ink cartridges for proper seating and alignment; consider replacement if printing is streaky or faded. Finally, update drivers and run a print test again to verify whether the issue persists. Each step narrows down the cause, minimizes unnecessary disassembly, and helps you decide whether professional service is warranted.
Cleaning and maintenance techniques
Regular cleaning reduces the likelihood of jams and misfeeds. Use compressed air to remove dust from internal vents, avoiding direct contact with the fuser, gears, and belts. Wipe surfaces with lint-free cloths lightly dampened with isopropyl alcohol. Clean the paper path, rollers, and upper feed area, then allow all parts to dry before reassembly. Avoid using household cleaners that could leave residues. Schedule a maintenance cycle every few months or after a heavy print job batch to keep print quality consistent and prevent long-term wear.
Replacing consumables and components
Consumables such as toner cartridges, ink cartridges, and transfer belts wear out and can cause print quality issues. Always replace consumables according to the manufacturer’s guidelines and use genuine or model-compatible parts recommended by the maker. When replacing components like rollers or fusers, confirm compatibility with your printer model. After installing new parts, run a calibration sequence and print a test page to check color balance, alignment, and density. Keeping a small stock of consumables on hand can reduce downtime during busy periods.
Recalibration and print quality checks
After any repair or replacement, recalibration is essential. Start with the printer’s built-in calibration options: color balance, alignment, and density tests. Print a sample page and inspect for streaks, color shifts, or misregistration. If issues persist, re-run calibration, re-seat consumables, or revisit the paper path to ensure no obstructions. Regular calibration helps maintain sharp text, accurate colors, and consistent density across pages. When done correctly, you’ll notice improved print quality and fewer follow-up calls for tweaks.
When to DIY vs professional repair and costs
DIY printers repair is often cost-effective for straightforward issues like jams, dirty paths, or exhausted consumables. If the problem involves high-voltage components, the fuser, or complex electronics, professional service is safer and more reliable. Use a model-specific parts list and the manufacturer’s guidance to assess repair feasibility. Keep in mind that accumulated DIY fixes can add up in time; if the printer is older or the repair cost approaches a new unit’s price, replacement may be the smarter choice. This decision can also consider energy efficiency, warranty status, and the device’s value for your needs.
Authoritative sources and follow-up steps
For further reading and validation, consult reputable sources on electronics safety, DIY repair guidelines, and consumer guidance. See materials from recognized institutions and publications to inform your approach and verify safety practices. Always cross-check model-specific instructions before attempting any repair. The Home Repair Guide team recommends maintaining a conservative scope and seeking professional help when unsure.
Tools & Materials
- Phillips screwdriver set (size #1 and #2)(6-inch handles recommended; precision bits minimize damage)
- Flathead screwdriver(Small width for panels)
- Non-conductive plastic pry tools(Prevent panel scratches)
- Anti-static wrist strap(Grounds you while handling electronics)
- Multimeter(For checking continuity and voltage in accessible circuits)
- Compressed air can(Clear dust from vents and path without touching components)
- Lint-free wipes(For cleaning rollers and internal surfaces)
- Isopropyl alcohol (at least 70%)(Wet wipes and cleaning swabs)
- Replacement rollers or belts (model-specific)(Only if you identify wear during inspection)
- Model-specific service manual or parts list(Helps identify exact parts and torque specs)
Steps
Estimated time: 60-90 minutes
- 1
Power down and unplug
Power off the printer, unplug the power cord from the outlet, and disconnect any USB or network cables before opening the case. This prevents electrical shock and protects internal sensors during inspection.
Tip: Wait 60 seconds after unplugging to discharge residual energy. - 2
Open access panels and locate jams
Carefully remove the outer panels or access doors to reach the paper path. Look for jammed sheets, torn fragments, or trapped foreign objects without forcing any parts.
Tip: Use both hands to gently guide jammed paper along the feed, avoid tearing sheets further. - 3
Clear jams and inspect the paper path
Remove jammed paper and debris from the path. Inspect rollers for wear or glazing and clean with isopropyl alcohol and lint-free wipes. Do not spray cleaner directly on rollers.
Tip: If a roller feels smooth or slick, it likely needs replacement rather than cleaning. - 4
Check cartridges and alignment
Remove and reseat ink or toner cartridges, ensuring they click firmly into place. Run a cartridge alignment check if the printer supports it and verify no leaks or misfeeds occur.
Tip: Never touch cartridge nozzles if you’re uncertain—handle by the ends to avoid damage. - 5
Inspect cables and drivers
Verify all cables are secure and undamaged. On the computer, check the printer status, reinstall or update drivers, and run a test page to evaluate the result of changes.
Tip: Use the manufacturer’s driver utility to perform a diagnostic page if available. - 6
Run a calibration and test print
Access the printer’s calibration menus and run color alignment and density tests. Print a few test pages to verify consistency across different regions of the page.
Tip: Document any persistent issues for a more targeted fix or professional evaluation. - 7
Reassemble and perform final checks
Reassemble covers securely, reconnect cables, and run a final full-page print. Confirm no new issues arise before closing the project.
Tip: Keep a small notes log of what you did and observed for future reference.
FAQ
What are the most common printer problems?
Jams, misfeeds, ink/toner issues, and connectivity problems are the most frequent. Many can be resolved with proper cleaning and consumable replacement.
The most common problems are jams, misfeeds, toner issues, and connectivity; cleaning and replacing worn parts usually fixes them.
Is it safe to repair printers at home?
Yes, with proper unplugging, static precautions, and following the model manual. Avoid opening high-voltage components such as the fuser without training.
Yes, as long as you unplug and follow safety steps and use caution around the fuser.
Do I need special tools?
Basic hand tools, a multimeter, compressed air, lint-free wipes, and model-specific parts. Do not force parts or use metal tools to pry components.
Mostly common tools and the manual; avoid prying with metal tools.
When should I replace the printer instead of repairing?
If repair costs exceed 50-60% of a new unit or the printer is outdated, replacement is often more economical. Consider energy efficiency too.
If repair costs are high or the model is old, replacement may be better.
How can I prevent future jams?
Use quality paper, avoid overloading trays, keep rollers clean, and perform routine maintenance as per the manual.
Keep a routine maintenance schedule and use proper paper.
Will replacing toners/inks fix print quality?
Sometimes, but misalignment or dirty paths can cause streaks; ensure correct cartridge installation and run calibration after changes.
Sometimes toner replacement helps, but you may also need alignment and cleaning.
Watch Video
Key Takeaways
- Power down before any access to internal parts
- Identify whether the issue is mechanical or software-based
- Test print after each fix
- Know when to seek pro help
- Regular maintenance prevents jams