Repair Printer Near Me: Practical Local Fix Guide
Learn how to find trustworthy printer repair services near you, compare DIY vs professional options, and prevent future issues with practical maintenance tips from Home Repair Guide. This guide covers diagnostics, safety, costs, and how to choose the right local help.

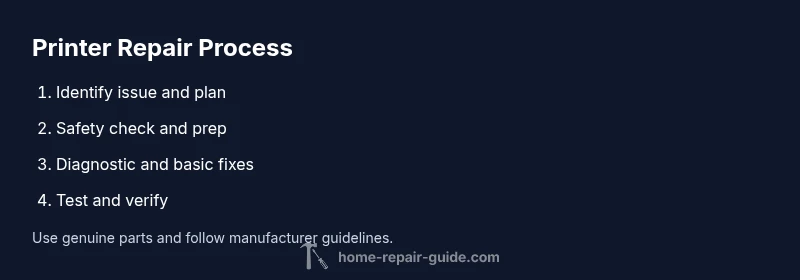
To repair a printer near you, start by identifying the exact issue (paper jams, connectivity, or print quality). Gather basic tools and any manufacturer-recommended parts, then decide between DIY fixes or professional service. Compare local quotes, turnaround times, and guarantees, and verify safety guidance before starting. Begin with simple steps and escalate only if needed.
Identifying the Problem and Local Repair Options
When you search for repair printer near me, the first step is to pin down the exact symptom and gather essential information. Common issues include paper jams, streaks or smudges, ghosting, missing colors, network connectivity problems, or printer not responding. Start by noting the model number from the label on the printer and confirm you’re diagnosing the correct device if you own multiple units. If you can reproduce the error on a test page, record the error message and any blinking lights; these details help you decide whether the fault is mechanical, electronic, or software-related. The Home Repair Guide team emphasizes a structured approach: classify the problem into mechanical jams, software/drivers, and consumables (toner/ink and media). Simple maintenance tasks—like cleaning rollers, updating firmware, ensuring the cartridge is seated properly—solve many problems. Keep a log of symptoms, steps attempted, and the results to avoid repeating work and to share with a technician if you hire one. If the unit is under warranty, check the service terms to see what’s covered and whether a third-party repair could affect coverage. Finally, map out the closest options for professional service: the manufacturer’s authorized service network, local independent repair shops, or mobile technicians who can come to your home. A careful triage saves time, reduces downtime, and minimizes unnecessary service visits.
Safety First: Handling a Printer Repair Safely
Printers contain electrical components and sometimes high-voltage sections inside, so safety cannot be ignored. Before opening panels, unplug the printer and disconnect all cables. If you must move the device, lift with two hands and avoid tipping the unit. Work in a dry, clean area and keep liquids away. Use the manufacturer’s manual for warnings specific to your model and avoid disassembling power supplies or boards if you are not trained. When cleaning, use compressed air in short bursts from a distance and never spray liquids directly on internal parts. Wear eye protection if a risk of debris exists, and handle tiny screws with a magnetic tray or labeled container to prevent loss. This cautious approach reduces the risk of electric shock, short circuits, or sensor misalignment. If you’re unsure about disassembly, seek professional help rather than taking risky shortcuts. Remember that voiding the warranty or causing a short could lead to costly repairs.
DIY vs Professional: Weighing Your Options
DIY fixes can save money and downtime for simple problems such as jam removal, cartridge seating, or firmware updates. They save money and downtime, but they require care and a steady hand. Start by consulting the printer’s official troubleshooting guide and only attempt steps you feel confident performing. If your issue involves the print head, electronics, or power supply, or if you notice unusual odors, sparks, or smoke, stop immediately and call a professional. The decision often comes down to cost versus risk: a DIY repair that goes wrong can lead to additional parts damage or a longer outage than a professional repair would have. For many households, a phone consultation with a local repair service can help you decide if in-person service is warranted. If you do proceed on your own, document each step and set a clear stop point to avoid over-adjusting or damaging sensors.
Preparing for a Service Visit: Questions to Ask and What to Bring
Preparing for an in-person visit or remote support improves outcomes. Note down the printer model, serial number, and current symptoms. Gather any error codes, recent firmware versions, and a list of installed drivers. Take photos of the inner components if possible, and share them with the technician to speed up the diagnostic process. Ask about the technician’s experience with your model, expected turnaround time, warranty on repairs, and the availability of replacement parts. Confirm the pricing structure, whether the visit includes diagnostic time, and if there is a diagnostic fee. Bring or have handy your purchase receipt and warranty paperwork, the printer’s user manual, and any consumables (like new toner or ink). If the shop offers remote diagnostics, ask how they handle data security and remote access. Being prepared reduces delays and increases the likelihood of first-visit resolution.
Maintenance and Best Practices to Prevent Recurring Problems
Regular maintenance can reduce downtime and extend the life of your printer. Schedule periodic cleanings of feed rollers, check for firmware updates, and run test pages to catch issues early. Use genuine or manufacturer-approved consumables to minimize clogging and print quality problems. Store your printer away from heat, humidity, and dust, and keep cables organized to prevent accidental disconnections. Establish a simple maintenance routine: check for firmware updates quarterly, replace cartridges on a known schedule, and perform a printer test monthly. By adopting these habits, you’ll cut down on avoidable service calls and keep your device performing reliably over time. The Home Repair Guide emphasizes that prevention is cheaper than repair and that small, consistent care pays off over the device’s lifespan.
Cost Considerations, Warranty, and When to Decide on Replacement
Understanding cost ranges helps set expectations when you search for repair printer near me. Professional service fees vary by region and complexity, often including diagnostic time, parts, and labor. If a repair would cost more than a replacement, consider the overall value, including printer age, compatibility with your needs, and ongoing maintenance costs. Many printers reach the end of meaningful life after several years due to wear and rapid tech updates. Always check your warranty status before authorizing any repair; a covered issue could significantly lower out-of-pocket costs. If you operate in a business environment, request a service-level agreement that guarantees response times. Based on Home Repair Guide Analysis, 2026, planning ahead and comparing multiple providers can reduce surprises and help you choose the most cost-effective route. A careful calculation should include expected downtime, parts availability, and the likelihood of head replacements in the near future.
AUTHORITY SOURCES
Recommended reads and official references
- https://www.nist.gov
- https://www.osha.gov
- https://www.consumer.ftc.gov
Tools & Materials
- Official printer manual for your model(Contains model-specific service steps and warnings)
- Phillips head screwdriver (PH2)(For service panels and screws)
- Flat-head screwdriver (size small)(Assists with prying or lid removal)
- Tweezers or needle-nose pliers(Handle small components safely)
- Canned air or a gentle cleaning brush(For dust and debris; avoid overuse)
- Isopropyl alcohol (70%)(For cleaning contacts; use sparingly)
- Anti-static wrist strap(Recommended if working with sensors/PCBs)
- Replacement consumables (toner/ink)(Use genuine parts when possible)
- Multimeter (for voltage checks)(Only if you’re comfortable with electrical testing)
Steps
Estimated time: 30-60 minutes
- 1
Power down and unplug
Power off the printer and disconnect all cables before any inspection. This reduces the risk of electric shock and prevents data loss in connected systems. Wait at least 60 seconds after unplugging to allow capacitors to discharge.
Tip: Always unplug from the wall outlet, not just from the computer. - 2
Open access panels and inspect for jams
Carefully remove access doors to reveal rollers and paper paths. Look for jammed sheets, torn bits, or foreign objects. If you see a jam, proceed slowly to avoid tearing the paper or damaging sensors.
Tip: Use both hands to gently free jammed paper; avoid tearing it further. - 3
Remove jams and realign media
Gently pull out jammed sheets in the direction of print travel. Check rollers for foreign objects and clean with canned air if needed. Realign media guides to match the paper size.
Tip: Never yank paper; this can ripple media paths. - 4
Check cartridges and print head alignment
Inspect toner or ink cartridges for proper seating and replace if low. Run printer’s built-in alignment or cleaning cycle if print quality is poor.
Tip: Run a nozzle check after cleaning to confirm alignment. - 5
Test connectivity and firmware status
Verify network or USB connections and check for any driver updates. If the printer is on a network, ensure the IP address is stable and the driver matches the device.
Tip: Update firmware only from the manufacturer’s site. - 6
Run diagnostics and test print
Use the printer’s diagnostic page or software to run a test print. Record the results and compare to a baseline to identify improvements or remaining issues.
Tip: Document any persistent issues for the technician.
FAQ
What should I do first when my printer stops working?
Begin by identifying the symptom (paper jam, no power, or strange output). Check cables and power, then consult the manual for model-specific steps. If the issue persists, consider professional service to avoid further damage.
Start with the symptom, check cables and power, and consult the manual. If it persists, seek professional help.
Can I repair a printer myself or should I hire a professional?
Many simple issues can be fixed at home, such as paper jams and cartridge seating. Complex problems like power supply or motherboard faults often require a professional technician. Always weigh the cost and downtime before proceeding.
DIY is fine for simple fixes; complex issues usually need a pro.
How long does printer repair typically take?
Turnaround depends on the problem and parts availability. Basic diagnostics and common fixes can be completed in a day, while multiple parts or on-site service may take several days.
Diagnostics and simple fixes can be quick; more complex repairs may take days.
Will repairing affect my warranty?
Opening the printer or using non-genuine parts can void some warranties. Check the terms and, if under warranty, contact the manufacturer or an authorized service center to avoid losing coverage.
Warranty rules vary; consult the terms and use authorized service.
What are typical costs for local printer repair?
Repair costs vary by region and issue. Expect diagnostic fees, parts, and labor, but compare quotes from a few technicians to ensure fair pricing. Consider replacement if the device is older.
Costs vary; compare quotes and consider replacement if older.
Should I replace toner or ink cartridges before repair?
Yes—start by replacing or reseating cartridges. Poor print quality is often caused by low-quality cartridges or misalignment, which is inexpensive to fix.
Try cartridges first; misalignment or low ink is common.
Watch Video
Key Takeaways
- Identify issues clearly before acting
- Balance DIY fixes with safety and warranty considerations
- Prepare with the right tools and parts
- Get a written estimate before major work
- Follow these steps, as recommended by The Home Repair Guide team