HP Printer Repair: A Practical DIY Guide for Homeowners
Learn practical HP printer repair steps to troubleshoot jams, firmware issues, and driver conflicts. This Home Repair Guide-friendly guide provides safe, step-by-step methods and maintenance tips to keep your printer reliable.

According to Home Repair Guide, you can diagnose and repair HP printer issues with a safe, step-by-step approach. This quick guide outlines common problems—paper jams, sensor faults, low ink/toner, and driver conflicts—and the essential tools you'll need. Follow the steps to save time, avoid service calls, and extend your printer’s life.
Diagnosing HP Printer Failures and What You Can DIY
HP printer repair begins with a focused assessment of the symptom. In many cases, the fix is straightforward and does not require professional service. For hp printer repair, common causes include simple paper jams, dirty or misaligned sensors, outdated firmware, and driver conflicts. According to Home Repair Guide, most issues can be resolved using a calm, methodical approach rather than a full teardown. Start by noting the exact error messages, unusual noises, streaks, or misfeeds. This will guide your triage toward mechanical, electronic, or software problems. With the right tools and a patient mindset, you can accomplish meaningful repairs at home. Always unplug the device before opening any panels and handle internal components gently. If you detect burnt smells or damaged connectors, stop and seek professional help.
Common Issues and Root Causes in HP Printers
Many hp printer repair scenarios revolve around paper jams, misfeeds, or degraded print quality from clogged nozzles. Sensor problems can cause missing lines or ghosting, while driver or firmware conflicts can trigger error codes or halted print jobs. HP printers often share symptoms across models, so a systematic check of paper path, rollers, and ink/toner paths is essential. Home Repair Guide analysis shows that firmware conflicts and jam-related failures are among the most frequent HP printer repair scenarios. Keep an eye on error codes and ink levels, as these frequently point to the root cause. Regular alignment pages and nozzle checks are helpful preventative steps. Remember, a clean machine runs more reliably and quietly. For homeowners and renters, understanding these patterns reduces downtime and extends device life.
Safety, Prep, and Tools for HP Printer Repair
Before you begin, power down and unplug the printer, then discharge any residual static electricity by touching a grounded metal surface. Work on a clean, flat surface with good lighting. Use anti-static precautions and avoid liquids near electrical components. Gather tools such as small screwdrivers, microfiber cloths, isopropyl alcohol, canned air, and optional replacement parts. Label screws and keep panels organized to simplify reassembly. If a panel is stubborn, avoid forcing it; consult the printer's service manual or HP support to prevent panel damage. Safety first keeps you and your printer out of harm’s way and reduces the risk of further faults.
Step-by-Step Troubleshooting and Fixes
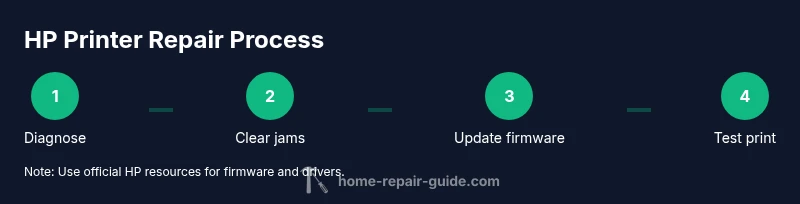
This section outlines a practical approach you can adapt to many HP printer repair scenarios. Begin with basic checks (paper jams, sensor cleanliness, and cable connections), then proceed to firmware and driver considerations. If a problem persists after jam removal and sensor cleaning, update the printer firmware and reinstall drivers from HP’s official site. Finally, run calibration and a test print to verify results. This section complements the separate STEP-BY-STEP guidance and helps you decide when to escalate to professional service. Keeping a repair log with dates and outcomes improves future troubleshooting and supports warranty claims if applicable.
Maintenance Tips to Extend HP Printer Lifespan
Proactive maintenance reduces the frequency of hp printer repair incidents. Use a soft, lint-free cloth to wipe the exterior and ink paths; avoid touching nozzles directly. Schedule regular printhead cleanings and nozzle checks if your model requires them, and store the printer in a dust-free environment. Use quality paper to minimize feed problems and keep rollers clean and free of adhesive residues. Keep firmware updated and periodically run alignment pages to ensure crisp printing. Finally, protect cables and connectors from bending or stress; a neat, organized workspace prevents accidental damage during maintenance.
When to Seek Professional HP Printer Repair Service
If you encounter persistent faults after following basic troubleshooting, or if the device is under warranty with unresolved issues, seek professional HP printer repair service. Complex problems such as faulty fusers, damaged drive gears, or problematic high-voltage components typically require certified technicians. Before calling for service, gather model information, recent error codes, and a record of steps you’ve attempted. In many cases, a professional repair can extend the device’s life more cost-effectively than a premature replacement.
Tools & Materials
- Phillips and flathead screwdrivers(Small sizes #1-#2; vary by model)
- Lint-free microfiber cloths(For cleaning sensors and glass)
- Isopropyl alcohol (70% or higher)(For cleaning contacts and rollers)
- Compressed air canister(Dust removal without touching parts)
- Antistatic wrist strap(Reduces static risk during internal work)
- Replacement parts (as needed)(Fusers, rollers, or cartridges matched to model)
- USB cable or maintenance software(Firmware updates or diagnostics)
Steps
Estimated time: 45-60 minutes
- 1
Power down and unplug
Completely power off the printer and disconnect all cables. Allow any residual charge to dissipate for about 60 seconds before opening panels.
Tip: Keep screws in labeled containers to prevent loss during reassembly. - 2
Open access panels and check for jams
Carefully remove jammed paper and any debris from the paper path. Use gentle, steady motions to avoid tearing paper or damaging rollers.
Tip: Always feed paper in the direction indicated by the printer to prevent snags. - 3
Inspect and clean sensors/rollers
Wipe sensors and rollers with a microfiber cloth lightly dampened with isopropyl alcohol. Inspect rollers for wear or shiny patches that indicate replacement is needed.
Tip: If rollers are worn, plan for replacement to prevent future jams. - 4
Update firmware and reinstall drivers
Connect to a stable internet source and download the latest firmware and printer drivers from HP's official site. Install, then restart the printer.
Tip: If installation stalls, temporarily disable antivirus and ensure a stable connection. - 5
Run calibration and test page
After updates, perform a printer calibration and run a test page to verify alignment, color accuracy, and print quality.
Tip: Document any deviations in a repair log for future reference. - 6
Deep hardware inspection if needed
If issues persist, check internal cables and the fuser/drive area for loose connections or signs of wear. Reconnect securely and re-test.
Tip: Take photos before disconnecting anything to aid reassembly. - 7
Decide on repair vs replacement
If problems persist or repair costs approach replacement value, consider upgrading to a newer model.
Tip: Check warranty status and total cost of ownership before deciding.
FAQ
What are the most common HP printer problems?
Most HP printer issues involve paper jams, misfeeds, print quality problems from clogged nozzles, and driver/firmware conflicts. A systematic approach helps you identify the root cause and apply the right fix.
Most HP printer problems come from jams, misfeeds, nozzle clogs, or driver conflicts. A system-based approach helps you fix them.
Can I perform HP printer repair myself?
Yes for many simple issues like jams, alignment, and firmware checks. More complex hardware faults may require professional service.
Yes, you can fix jams, alignment, and firmware problems yourself; bigger hardware faults need expert help.
Do I need special tools for HP printer repair?
Most repairs use common tools and cleaning supplies. Specialized HP service tools are rarely needed for basic DIY fixes.
Typically, you don't need fancy tools—just basic screwdrivers, cleaning cloths, and canned air.
When should I replace an HP printer instead of repairing?
If repair costs exceed the printer’s value or the device is aging, replacement is often more economical in the long run.
If repairs cost more than a new model or the printer is old, consider replacement.
Is firmware updating safe for HP printers?
Firmware updates are safe when downloaded from HP's official site and installed with a stable connection; back up settings first.
Yes, as long as you use official HP sources and a stable connection.
Watch Video
Key Takeaways
- Diagnose symptoms before taking apart.
- Always unplug and ground yourself prior to repair.
- Firmware updates fix many printer issues.
- Weigh repair costs against replacement value.
- Keep a repair log and safety gear on hand.