Needs Repair or Repairing: A Practical Home DIY Guide
Learn to identify repair needs, assess safety, plan fixes, and complete durable home repairs with confidence. A practical guide for homeowners and renters.

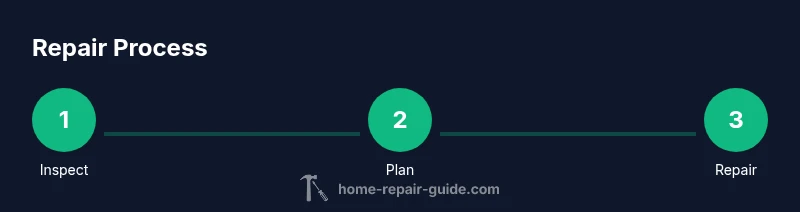
By the end of this guide, you will confidently identify items that needs repair or repairing, assess safety risks, and determine repair scope. Start with a structured inspection for wear, leaks, or misalignment; categorize fixes by priority; estimate time and cost; and assemble a step-by-step plan, tools, and safety gear before you start.
Understanding why needs repair or repairing matters
Repairs are a natural part of maintaining a functional home. The term needs repair or repairing covers a wide range of situations, from cosmetic wear to safety-critical faults. Homeowners and renters who learn to identify early signs can prevent small issues from escalating into costly problems. According to Home Repair Guide, recognizing patterns—like persistent leaks, unusual noises, or furniture shifting—helps you distinguish temporary fixes from durable solutions. In this section, you’ll learn how to classify issues based on severity, potential risk, and repair complexity, so you can plan with confidence.
Distinguishing minor fixes from major projects
Not every repair is equally urgent or complex. Minor fixes, like replacing a worn gasket or reseating a loose hinge, can often be completed with common tools and minimal disruption. Major projects—structural repairs, electrical rewiring, or plumbing leaks—usually require more planning, a higher skill level, and sometimes professional oversight. By separating issues into cosmetic, functional, and safety categories, you’ll know where to start and how much help you’ll need. Home Repair Guide emphasizes documenting your scope and constraints to avoid scope creep and budget overruns.
Safety first: assessing risks and protective gear
Safety is non-negotiable when any repair is involved. Begin by turning off power to circuits you’ll touch, shutting water supplies where relevant, and clearing the work area of trip hazards. PPE such as gloves, safety glasses, a dust mask, and sturdy footwear reduces injury risk. If you encounter asbestos, mold, or unknown substances, stop and consult a professional. The goal is to minimize exposure and prevent accidents, not to rush through a quick fix. Home Repair Guide advises a conservative approach to risk assessment.
Planning your repair project: scope, timeline, and budget
Create a written plan that defines the problem, the desired outcome, and the steps to reach it. Break tasks into logical phases, estimate time for each, and set a realistic budget with a contingency. Include a list of tools and materials, and identify any permits or inspections that may be required. Good planning reduces surprises and helps you track progress over days or weeks rather than hours alone.
Tools, materials, and workspace setup
A basic, reliable toolkit covers most home repairs. At minimum, assemble a flashlight, a set of screwdrivers, adjustable wrench, tape measure, utility knife, pliers, and safety gear. Keep extra batteries, consumables (sandpaper, screws, washers), and a clean workspace nearby. Organize parts by task and label containers to speed up later work. A well-organized shop reduces mistakes and lost time during repairs.
Step-by-step approach to diagnosing and addressing common issues
A practical approach starts with root-cause analysis rather than chasing symptoms. Inspect the area for moisture, misalignment, wear, or loose connections. Verify by testing after small adjustments before moving to bigger interventions. Document changes with photos and notes, so you can retrace decisions if needed. This mindset helps you handle frequent problems like leaks, squeaks, gaps, or sticking hardware with confidence.
Quality checks and verification after repairs
After completing a repair, run a functional test to verify the fix. Check for leaks, test electrical outlets with a circuit tester, and ensure doors or windows seal properly. Look for new signs of wear and record results in your maintenance log. If issues persist, reassess scope, revisit safety checks, and be prepared to escalate to a professional if needed. Continuous verification prevents latent issues from resurfacing later.
Maintenance to prevent future needs repair or repairing
Preventive maintenance is cheaper than reactive fixes. Schedule seasonal inspections, clean filters, reseal joints, and replace worn hardware before it fails. A simple maintenance calendar helps you stay proactive, while a clear, up-to-date record of repairs makes future tasks easier and faster. By building good habits now, you reduce the likelihood of unexpected breakdowns and extend the life of your home systems.
Tools & Materials
- Bright LED flashlight or headlamp(Hands-free lighting advisable)
- Screwdrivers set (flathead and Phillips)(Medium and small sizes)
- Adjustable wrench(Crescent wrench, 6-12 inch range)
- Tape measure(At least 5 meters/16 feet)
- Utility knife(Sharp blade; replace blades as needed)
- Safety goggles(Eye protection)
- Work gloves(Cut-resistant if handling sharp edges)
- Dust mask(N95 or equivalent for dusty tasks)
- Pliers (needle-nose and slip-joint)(Grip and bend wires or nails)
Steps
Estimated time: 2-6 hours
- 1
Inspect and Define Scope
Carry out a structured walk-through to identify all issues. Note visible damage, leaks, misalignment, and wear. Create a prioritized list based on risk, function, and urgency.
Tip: Take clear photos of each issue before starting. - 2
Gather Tools and Safety Gear
Assemble essential tools and PPE in one accessible area. Verify batteries and blade freshness, and check that safety gear fits properly.
Tip: Lay out tools in the order you’ll use them. - 3
Prioritize Tasks and Plan
Group issues into quick fixes and larger projects. Estimate time and cost for each, and define success criteria for completion.
Tip: Set a realistic budget with a contingency. - 4
Execute Repairs Safely
Begin with low-risk tasks to build confidence. Follow manuals or manufacturer guidance, and stop if you encounter unknowns or hazards.
Tip: Never bypass safety steps for speed. - 5
Test and Verify
Confirm fixes by testing functionality and checking for leaks or faults. Document outcomes and adjust if needed.
Tip: Test in a controlled, incremental way. - 6
Clean Up and Document
Return tools, dispose of waste responsibly, and log what was repaired with dates and photos for future reference.
Tip: Keep a running repair log for future maintenance.
FAQ
What does 'needs repair' mean in a home context?
It means a condition requiring corrective action to restore function, safety, or efficiency. Severity varies from cosmetic wear to safety risks.
It means a condition needs corrective action to restore function and safety, with varying urgency.
When should I DIY versus hire a professional?
Evaluate task complexity, risk level, and local codes. Simple, low-risk fixes are often DIY; complex or hazardous repairs benefit from a professional.
For simple tasks, DIY is fine; for complex or risky jobs, hire a pro.
What safety gear is essential for common repairs?
Basic PPE includes gloves, safety glasses, and a dust mask. Add hearing protection or a respirator for dusty or loud tasks.
Wear gloves, goggles, and a mask; add extra protection if needed.
How can I prevent future repair needs?
Regular inspection and maintenance, quick fixes for small wear, and a written maintenance calendar reduce surprises.
Regular checks and timely maintenance prevent big repairs.
What documentation should accompany repairs?
Keep receipts, take before/after photos, and note dates and parts used. This helps future maintenance and warranty claims.
Save photos and notes to track what you fixed.
Watch Video
Key Takeaways
- Identify issues early to control repair scope.
- Plan with safety and budget in mind.
- Document changes for future maintenance.
- Verify repairs with practical testing.