Repairing: A Practical Home Repair Guide for Homeowners
Learn reliable techniques for repairing common household items. This educational, step-by-step guide covers diagnosis, tools, safety, and when to hire a pro to help homeowners and renters perform durable, safe fixes.

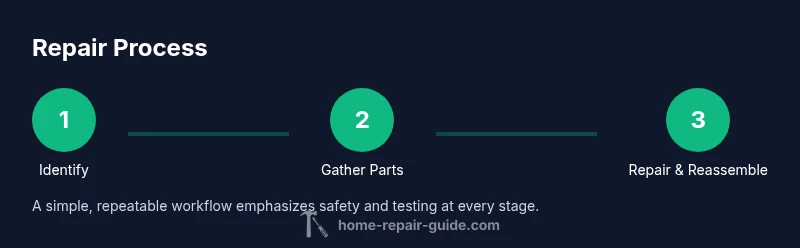
According to Home Repair Guide, repairing is a practical skill homeowners use to extend the life of appliances, fixtures, and systems. This quick answer outlines what you will accomplish: a safe, repeatable process for diagnosing problems, sourcing the correct parts, and executing fixes with confidence. By following these steps, you minimize disruption and maximize durability.
What repairing means for homeowners
In a broad sense, repairing is the act of restoring function to items that wear out with use. In Home Repair Guide's experience, repairing isn't about perfection on the first try; it's about controlled iteration, documentation, and safety. The term encompasses appliances, fixtures, plumbing, electrical components, and structural elements. The practice keeps households running smoothly and reduces waste by extending product life. When you commit to repairing, you shift from passive consumption to active maintenance, which lowers long-term costs and environmental impact. The keyword repairing signals a mindset: observe symptoms, verify root causes, gather reliable parts, and execute with care. This article uses practical language and transparent methods so homeowners and renters can tackle tasks confidently, with an eye toward durable results and safety.
Core principles of durable repairs
Reliable repairs rest on a few steady rules. First, diagnose before you replace; second, use the correct parts and fasteners; third, document what you did for future maintenance; and fourth, test thoroughly before deeming a job complete. According to Home Repair Guide, durable repairs also require a clean, organized workspace and attention to safety, especially when working with electricity or water. Plan your steps, wear appropriate PPE, and avoid patchy work that leaves hidden weaknesses. By embracing these principles, you’ll improve safety, reduce rework, and extend the life of your home systems. This approach fits DIY repairs and more complex tasks alike, and it aligns with best practices in home maintenance and general safety.
Diagnosing problems: a systematic approach
A solid repair starts with a clear diagnosis. Begin by reproducing the symptom in a controlled way, then observe what happens when you intervene. Check for obvious wear, corrosion, leaks, or loose connections, and consider whether multiple systems contribute to the issue. Keep a notebook or photos to track observations and parts removed. Avoid jumping to conclusions based on a single sign; root causes are often multi-factor. If you’re unsure, split the problem into smaller, testable hypotheses and validate each one with simple checks. This method minimizes unnecessary replacements and helps you verify that a repair will be durable over time.
Essential tools and materials for repairing
A well-rounded toolkit makes repairing easier and safer. Essential items include a screwdriver set, an adjustable wrench, pliers, a utility knife, a tape measure, a flashlight, and a voltage tester for electrical work. For plumbing and sealing tasks, keep plumber’s tape, silicone sealant, and a small mallet on hand. Use safety gear like gloves and eye protection at all times. Optional but useful additions include heat-resistant gloves, a magnetic parts tray, a cordless drill, and spare fasteners of common sizes. Building a reliable kit supports DIY repairs and reduces trips to the hardware store. Remember to store items in labeled containers to stay organized and efficient.
Preparing the workspace and safety setup
Before you start any repair, clear the working area and turn off power to the relevant circuit and shut off water if needed. Remove children and pets from the room, and lay down a drop cloth or tarp to catch debris. Use proper lighting and ventilation, especially when dealing with solvents or dusty components. Keep a bucket for small parts and a waste container for broken pieces. By establishing a clean, controlled environment, you reduce risk and make the task smoother. As you work, document wiring, tubing, and fastener locations to simplify reassembly and future repairs.
Common repair scenarios and how to approach them
Household repairs span many domains. A dripping faucet usually involves checking for worn gaskets or seals and replacing them; an electrical outlet that feels warm may require testing for overload and replacing the receptacle; a squeaky door hinge often needs lubrication and proper pin alignment. For each scenario, start with a quick safety check, inspect the components, and verify if the part is available or reusable. Document the steps you take and keep track of any measurements or part numbers. By approaching each scenario with a repeatable method, you’ll gain confidence and reduce the likelihood of repeated failures.
Repair workflow and documentation
A repeatable repair workflow saves time and improves outcomes. Begin with a plan: identify the problem, gather parts, and assemble a simple sequence of actions. Take before-and-after photos, label screws and connectors, and measure critical dimensions. Maintain a parts tray to avoid misplacing small components. Keeping a repair log helps track what was done, when it was performed, and any notes about performance. This habit benefits future repairs and supports DIY repairs and home maintenance routines. Consistent documentation also makes it easier to hand off tasks to a professional if needed.
Testing and quality assurance
After finishing a repair, test the system in a controlled way to verify functionality. For electrical work, use a voltage tester to confirm de-energization before touching conductors, then recheck the circuit once reassembled. For plumbing, slowly reintroduce water and check for leaks at all joints. Run the device or system through its normal operating cycle and listen for unusual noises, vibrations, or smells. If a fault persists, recheck connections and seals, then retest. Quality assurance is about catching issues early and validating that the repair withstands typical daily use.
Maintenance and prevention
An ounce of prevention reduces the need for future repairs. Schedule regular inspections of critical systems, like plumbing, electrical, and HVAC, to catch wear before it fails. Clean components, replace worn seals, and lubricate moving parts per manufacturer guidance. Keep a spare parts kit and knowledge of part numbers to expedite future fixes. By building maintenance into your routine, you extend durability and comfort in your home. Emphasize safety and proper disposal of any hazardous materials.
When to hire a professional and tips for choosing
Not every repair should be a DIY project. When the task involves high voltage, natural gas, structural components, or uncertain measurements, consider hiring a licensed professional. Look for a contractor with clear credentials, transparent pricing, and a written plan. Ask for a brief written estimate, obtain multiple quotes, and request references. If a problem recurs after a repair, a pro can diagnose underlying causes you might have missed. Knowing when to call a pro saves time, reduces risk, and helps ensure long-term reliability.
Tools & Materials
- Screwdriver set (flathead and Phillips)(Cross-head and flat-head, magnetized preferred; include small and large blades)
- Adjustable wrench(9–12 inch range is versatile for most home fittings)
- Pliers (needle-nose and slip-joint)(Grip, twist, and hold small components; keep jaws clean)
- Utility knife(Fresh blade; replace if dull to avoid slips)
- Tape measure(Minimum 8 feet; metric equivalents are fine too)
- Flashlight or headlamp(Good lighting reduces mistakes in tight spaces)
- Voltage tester(Non-contact tester is acceptable for many tasks)
- Safety gear (gloves, goggles)(Protect hands and eyes during repairs)
- Plumber’s tape and silicone sealant(Useful for quick sealing and pipe connections)
- Magnetic parts tray(Keeps small screws and fasteners organized)
- Spare fasteners and washers(Collect common sizes you encounter)
Steps
Estimated time: 60-90 minutes
- 1
Identify the problem
Observe symptoms, reproduce them safely, and note what changes when you intervene. This step sets the direction for the entire repair.
Tip: Document the symptom with a photo or short video for reference. - 2
Power down and isolate energy sources
Turn off the main circuit or shut off relevant valves to prevent shocks or leaks. Verify the area is de-energized before touching components.
Tip: Use a voltage tester to confirm de-energization at the worksite. - 3
Gather parts and tools
Collect the exact parts identified during diagnosis and assemble your toolkit. Having everything ready saves time and reduces missteps.
Tip: Label containers for screws and small parts by location. - 4
Disassemble components safely
Remove covers, casings, or fittings with care, avoiding forcing parts that may break. Keep track of screws and connectors.
Tip: Take a photo before disassembly to guide reassembly. - 5
Inspect and clean parts
Check for wear, corrosion, and damage. Clean parts as needed and replace seals or gaskets if degraded.
Tip: A small brush and isopropyl alcohol help remove grime without damaging parts. - 6
Replace, repair, or reseal
Install new parts or repair components with appropriate adhesives or sealants. Ensure compatibility and proper seating.
Tip: Avoid over-tightening fasteners to prevent distortion. - 7
Reassemble and secure connections
Put components back together in the reverse order of disassembly. Reconnect wires and fittings securely and neatly.
Tip: Replace any damaged insulation or tape where needed. - 8
Test operation and document results
Restore power or water, run the device, and check for proper operation and leaks. Record results for future reference.
Tip: Test under normal operating loads to confirm durability.
FAQ
What is repairing and why should I learn it?
Repairing is restoring function to worn items around the home. Learning it saves money, reduces waste, and improves safety by fixing problems properly rather than patching them.
Repairing is fixing things at home so they work again. It saves money and makes your home safer when done correctly.
Do I need to turn off power and water before starting repairs?
Yes. Shut off power for electrical work and close water valves for plumbing tasks before touching components. This reduces the risk of shocks and leaks.
Always shut off power and water before you start; safety first.
What are the essential tools for a beginner repair kit?
A basic kit includes screwdrivers, adjustable wrench, pliers, utility knife, tape measure, flashlight, voltage tester, and safety gear. Add optional items as you tackle more tasks.
Start with a screwdriver set, pliers, wrench, tape measure, and a voltage tester.
How can I diagnose issues without replacing parts unnecessarily?
Break the problem into testable parts, verify symptoms across related systems, and compare old parts with new ones. Document observations before replacing anything.
Diagnose in steps, test each change, and document what you observe before replacing parts.
When should I call a professional?
If the task involves high voltage, gas lines, structural components, or you’re uncertain about safety, hire a licensed pro. A pro can diagnose root causes beyond DIY scope.
Call a professional if it involves safety-critical systems or uncertainty about the repair.
How can I prevent future repairs after fixing something?
Apply manufacturer guidelines for maintenance, schedule regular inspections, and replace worn parts proactively. Preventive care reduces the likelihood of recurrent issues.
Keep up with maintenance and replace worn parts before they fail.
Watch Video
Key Takeaways
- Plan before you touch anything.
- Use the right tools for each task.
- Label and document every step.
- Test thoroughly before calling it done.
- Know when to hire a pro to stay safe.