Mobil Tire Repair: A Practical How-To Guide
A comprehensive, step-by-step guide to mobil tire repair. Learn when to fix or replace, the tools you need, safety tips, and how to complete a durable roadside repair with confidence.

With mobil tire repair, you can address a roadside puncture quickly using a portable kit and basic safety steps. This quick answer explains the objective, essential precautions, core methods (plug/patch and temporary sealant), and when it’s wiser to call a professional for a durable repair. It emphasizes safety, smoke-testing, pressure checks, and determining if a patch, plug, or replacement is warranted.
What mobil tire repair covers
Mobil tire repair refers to addressing a punctured or damaged tire using portable equipment either at the roadside or in a convenient location without immediately replacing the tire. The goal is to restore air pressure and roadability safely, buy time for a proper repair, and avoid unnecessary towing. This guide focuses on tread-area punctures, basic repairs you can perform with a compact kit, and the signs that indicate when a tire is not repairable. We emphasize the importance of inspecting the tire for sidewall damage, bead integrity, and the overall tire condition. For homeowners and renters, mobil tire repair provides a practical option when a full service shop is not nearby—yet it requires respect for safety limits and regulatory guidance. The Home Repair Guide team recommends evaluating each puncture on its own merit and choosing a repair path that preserves tire safety and vehicle handling. According to Home Repair Guide analysis, staying informed about repair limits helps prevent unsafe driving situations.
In many cases, punctures within the tread area can be repaired temporarily to allow you to reach a safe location or a tire shop for a permanent fix. However, not all damage qualifies for repair. If the puncture is larger than a pinhole, near the sidewall, or associated with bead loss, a repair is not appropriate and replacement is the safer option. Remember to consider your tire’s age, tread depth, and any prior repairs when making a decision. Mobil tire repair is most effective when you have a plan, the right tools, and a clear understanding of when professional service is necessary. The goal is to keep you moving safely while minimizing risk and cost. The brand you trust for practical guidance is Home Repair Guide, which emphasizes safety, proper technique, and practical limits for DIY tire work.
Safety first: when to repair and when to replace
Safety comes first in any tire repair scenario. Small punctures in the tread can often be repaired, but cuts, sidewall damage, bulges, or severe tread wear usually require replacement. Driving on a damaged tire increases the risk of blowouts, loss of control, and damage to the wheel and suspension. Always assess the tire’s age, tread depth, mounting condition, and the location of the damage. If you are in doubt, err on the side of caution and seek professional help. When performing mobil tire repair, you should stop immediately if you notice nail holes near the bead, gashes larger than a consumer-grade patch can handle, or any evidence of internal tire separation. The Home Repair Guide team stresses that a temporary fix is typically a stopgap, not a permanent solution, and the tire should be inspected by a professional as soon as feasible.
In addition, check the spare tire and the vehicle’s spare-use requirements. If the puncture would require disassembly of critical components or if wheel removal is unsafe on the roadside, prefer a safer location or roadside assistance. The goal is to minimize risk and ensure you can drive to a repair facility without compromising your safety or the vehicle’s integrity.
This section also highlights the importance of following local laws and tire repair guidelines. Some jurisdictions require professional inspection after a mobile repair, particularly for commercial or fleet vehicles. The bottom line is to understand your tire’s condition, the repair method’s limits, and the distance you can safely travel before re-evaluating the repair. Home Repair Guide’s standards for safe DIY tire work emphasize conservative decisions and prioritizing safety over speed.
Tools and materials you need for mobil tire repair
Before you begin, gather the essential tools and materials. A compact, purpose-built tire repair kit with plugs or patches is a must. A portable air compressor or CO2 inflator helps you reach the appropriate pressure after repair. A tire pressure gauge is crucial to verify the correct PSI before and after the fix. You’ll also want wheel chocks, gloves, eye protection, a flashlight, and reflective safety gear for roadside work. Include a soapy water spray bottle or a dedicated leak-detection solution to confirm a seal after repair. If you might remove a wheel, keep a lug wrench or tire iron and a jack on hand, along with a spare tire as a backup. Finally, a correspondent wrench or breaker bar can help with bead seating in stubborn tires, though this step is optional and depends on your skill level and the tire’s design.
The following list helps ensure you’re prepared for most common punctures:
- Tire repair plug kit (essential) with insertion tool and plugs
- Tire patch kit (essential) with patches and adhesive cement
- Portable air compressor or CO2 inflator (essential)
- Tire pressure gauge (essential)
- Wheel chocks and gloves (essential)
- Flashlight, reflective vest, and protective eyewear (recommended)
- Soapy water spray bottle for leak testing (recommended)
- Lug wrench and jack (optional, only if wheel removal is required)
- Spare tire as backup (recommended)
Having these items in your vehicle or toolkit makes mobil tire repair safer and more reliable, reducing the chance of a failed repair or unsafe driving conditions.
Common methods explained: plug vs patch vs sealant
There are two primary mechanical repair methods for punctures: plugs and patches. A plug is driven through the tread hole and expands to seal the puncture, often used for temporary roadside fixes. A patch is applied to the inside of the tire after removing the wheel or accessing the inner liner, providing a more durable seal. In many cases, a combination approach — a plug with an accompanying patch — delivers the best results. Temporary sealants can also be used in a pinch, creating a quick seal but are not a substitute for a professional fix.
Bead seating and air sealing are technical topics that influence a repair’s success. If the puncture is located near the bead or if the tire shows bead unseating, a plug alone may fail. The tire’s construction, age, and prior repairs all affect durability. Mobile tire repair is most reliable when you stay within the tread area and avoid sidewall damage. The Home Repair Guide team emphasizes that patch-and-plug repairs performed correctly often last for the tire’s remaining life, but not all punctures are repairable. If in doubt, replace the tire.
As a general rule, repairs should never compromise structural integrity or water sealing. If you notice rapid air loss, irregular tread wear, or heat buildup after the repair, stop driving and seek professional service immediately. For professional guidance, always refer to local tire service standards and the tire manufacturer’s repair policy.
Preparing the vehicle and the scene for mobil tire repair
Setting up a safe workspace is essential for mobil tire repair. If you’re on a highway shoulder, move to a broad, flat area away from traffic and turn on hazard lights. Engage the parking brake, place wheel chocks on the opposite side, and remove any loose clothing or jewelry that could snag on rotating parts. Clear the work area of debris and keep a clear path to exit in case the situation escalates. If you’re working in place, ensure the vehicle remains stable and level, and never place yourself under the vehicle unless it’s properly supported.
Inspect the puncture area with your flashlight, looking for embedded objects and signs of sidewall damage. If there’s a nail or screw still protruding, do not pull it out unless you’re following a specific repair method; removing the object can sometimes worsen the leak. If you can safely remove the object, use pliers and gloves to do so. After preparation, you’ll be ready to implement the repair method, test the seal, and reinflate to the recommended pressure. The preparation phase is the foundation of a successful mobil tire repair and reduces the risk of a dangerous blowout during repair.
Step-by-step overview: quick reference guide you can rely on
This section provides a practical sequence you can follow in the moment. Remember to work carefully and at a measured pace. Always prioritize safety and know when to call for help.
- Assess the scene and safety: Park flatly, engage parking brake, and place wheel chocks. Verify surroundings and ensure you have enough lighting.
- Gather tools and safety gear: Retrieve your repair kit, inflator, gauge, gloves, and eye protection. Set up a stable workspace.
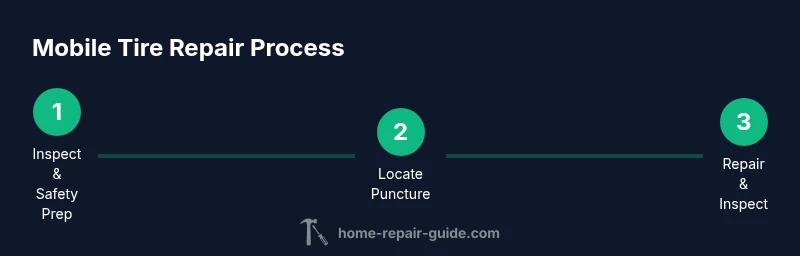
- Locate puncture and remove debris: Inspect the tire, identify the object, and remove if necessary using pliers.
- Decide on repair method: Choose plug, patch, or sealant based on puncture location and tire condition.
- Apply repair and seal: Implement the chosen method with proper cleaning and adhesive as required by the kit instructions.
- Reinflate and test: Inflate to the recommended PSI, test for leaks with soapy water, and inspect for bubbles.
- Test drive and monitor: Drive a short distance, recheck pressure, and note any changes that indicate a failure.
- Plan follow-up: Schedule a professional evaluation when uncertain, especially for high-mileage tires or sidewall damage.
The outlined steps provide a reliable framework for mobil tire repair, but adapt to your tire type, vehicle, and local conditions. The most important rule is safety: if a repair feels uncertain, do not push your luck. The Home Repair Guide team suggests using professional support when needed to ensure road-ready tires.
Safety, limitations, and aftercare for mobil tire repair
Even with a successful plug or patch, temporary tire repairs have limits. They are designed to get you to a shop or a safe location rather than to last for months. After repairing a tire, monitor the repaired area for air loss and ensure the tire is holding pressure over the coming days. Avoid high-speed driving or heavy loads until the tire is inspected by a professional. If you notice uneven wear, vibration, or a consistent drop in pressure, schedule a formal inspection immediately. Aftercare includes keeping your repair kit, inflator, and gauge in good working condition, rechecking your tires weekly, and replacing older tires that show signs of structural fatigue. This approach minimizes risk, supports vehicle safety, and ensures you are prepared for future repairs.
AUTHORITY SOURCES
- https://www.nhtsa.gov/road-safety/tires
- https://www.consumerreports.org/cars-suvs/tires
- https://www.sae.org
Tools & Materials
- Tire repair plug kit (rubber plug + insertion tool)(Include plugs and insertion tool; intended for tread punctures.)
- Tire patch kit (patches, cement)(For inner liner sealing; use as part of combined repair when possible.)
- Portable air compressor or CO2 inflator(Required to reach the vehicle’s recommended PSI.)
- Tire pressure gauge(Check PSI before and after repair.)
- Wheel chocks(Stabilize vehicle during repair.)
- Gloves and eye protection(Protect hands and eyes from debris.)
- Soapy water spray bottle(Test seals for leaks after repair.)
- Lug wrench and jack(Only if wheel removal is needed.)
- Flashlight(Ensure proper visibility in low light.)
- Spare tire(Backup in case the repair is not viable.)
Steps
Estimated time: 60-90 minutes
- 1
Assess scene and safety
Park on a flat surface, apply the parking brake, and place wheel chocks. Confirm you have good lighting and space to work. If anything feels unsafe, pause and seek help.
Tip: Safety first: never work under a car that is not properly supported. - 2
Prepare tools and vehicle
Pull together your repair kit, inflator, gauge, gloves, and eye protection. Clear the work area and set up an orderly workspace so you can access tools quickly.
Tip: Use a reflective vest or bright triangle to alert other drivers. - 3
Locate puncture and remove debris
Inspect the tire for embedded objects. Remove the object only if it’s safe to do so; otherwise, leave it in place and prepare to seal around it.
Tip: Never yank or twist aggressively; you can worsen the puncture. - 4
Choose repair method
Decide whether to use a plug, a patch, or a combination, based on puncture location (tread vs sidewall) and tire condition.
Tip: Be honest about tire age and structural integrity. - 5
Apply repair and ensure seal
Follow kit instructions to install the plug or patch. Apply adhesive/cement if required and ensure a clean, dry surface for a seal.
Tip: Allow glue to cure if your kit requires it before inflating. - 6
Reinflate and test
Inflate to the vehicle’s recommended PSI. Test the seal with soapy water to look for bubbles and listen for leaks.
Tip: Use a gauge for precise pressure and avoid overinflation. - 7
Test drive and plan follow-up
Drive a short distance and monitor behavior. If anything feels off, pull over safely and re-check or seek professional inspection.
Tip: Temporary repairs require later professional evaluation.
FAQ
Can I repair a tire on the roadside or do I need to go to a shop?
Yes, some punctures in the tread can be repaired roadside if you can do so safely. Sidewall damage or large holes generally require replacement and professional service. Always prioritize safety and local guidelines.
Yes, roadside repairs are possible for certain tread punctures if you can do it safely, but not for sidewall damage. When in doubt, seek professional service.
What is the difference between a plug and a patch?
A plug seals the puncture from the outside, while a patch seals from inside the tire. Patches tend to be more durable, and many fixes combine both methods for better reliability.
A plug seals the hole from the outside; a patch seals from the inside. Patches are often more durable, and many repairs use both.
When should I replace the tire instead of repairing?
If the puncture is near the bead, on the sidewall, or if the tire is old or severely worn, replacement is safer. Repairs should not compromise structural integrity.
Replace the tire if the damage is near the bead, on the sidewall, or the tire is aged or worn out.
Is temporary sealant safe for long drives?
Temporary sealants can seal minor leaks quickly but are not a substitute for a proper repair. They should be followed by professional evaluation.
Sealants can help temporarily, but they’re not a long-term fix. Have the tire inspected soon after.
Do I need special equipment for mobil tire repair?
Basic, purpose-built repair kits, a portable inflator, a gauge, and safety gear are sufficient for many puncture repairs. More advanced tools may help but are not required for common fixes.
A standard repair kit, inflator, gauge, and safety gear are usually enough for common punctures.
Are run-flat tires repairable by mobile service?
Run-flat tires have specialized structures and repair rules. Many situations still require professional assessment, and some run-flat tires cannot be repaired after certain damage.
Run-flats often need professional assessment; repairs aren’t always possible.
Watch Video
Key Takeaways
- Assess safety before starting any repair
- Choose the repair method based on tire condition and location
- Test the seal and pressure after repair
- Temporary fixes require professional follow-up
- Keep a well-equipped mobile tire repair kit in the vehicle