Flat Tire Repair: A Complete How-To for DIY Car Care
A practical, step-by-step guide to safely diagnose, patch, or replace a flat tire. Learn tools, safety, and maintenance tips from Home Repair Guide.

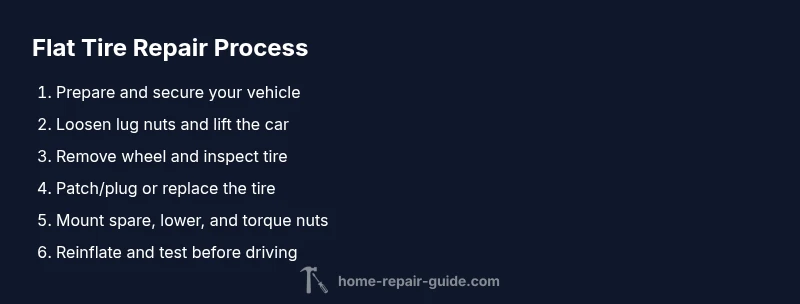
By the end of this guide, you will diagnose a flat, prepare the right tools, safely lift the vehicle, remove the wheel, and repair or replace the tire. You’ll also learn to re-inflate and test the repaired tire before resuming driving. This approach prioritizes safety and durability, following Home Repair Guide best practices.
Overview: Flat Tire Repair Essentials
Flat tire repair is a practical DIY skill that homeowners and renters can safely perform with the right steps and tools. This guide explains what flat tire repair involves, including patching or replacing a tire, how to decide between repair and replacement, and why timing matters. You will learn how to assess punctures, the difference between plug repairs and patch repairs, and when to seek professional service. The process starts with calm decision making, proper prep, and clear safety boundaries. According to Home Repair Guide, safe flat tire repair begins with proper prep and the right tools, followed by a methodical plan. This approach emphasizes prevention, so you understand how to detect wheel damage, check tire pressure, and avoid driving on a compromised tire. The goal is durability, road safety, and a repair that lasts until you can visit a tire shop. Throughout, we’ll use practical examples and common-sense checks to keep you in control.
Safety and Prep: Before You Begin
Safety comes first in every flat tire repair. Find a flat, level spot away from traffic, turn on hazard lights, and set the parking brake. Use wheel chocks on the opposite wheel to prevent roll. Wear gloves and use a flashlight if lighting is poor. Based on Home Repair Guide analysis, taking a few minutes to secure the scene reduces the risk of injury and loss of control. If you’re on a busy road or uneven gravel, postpone the repair and call roadside assistance. Remember, your first goal is to reduce the chance of a secondary accident or further tire damage. Always check for traffic direction, weather conditions, and visibility before stepping out. The more methodical you are at the start, the safer the entire repair will be.
Damage Assessment and Repair Options
Not all flats are repairable. A small puncture within the tread can often be patched or sealed, while sidewall damage or large punctures usually require tire replacement. If the tire is repairable, your options include a plug patch from the outside or an inside patch. If uncertain, replace the tire or call roadside assistance. The choice should prioritize safety and longevity of the repair. In some cases, a temporary fix like sealant or a plug may get you to a shop, but long-distance driving on a repaired tire increases risk if the patch or plug is not properly installed. Always inspect the tire for nails, cracks, and bulges, and consider the vehicle’s load and drive conditions when deciding how to proceed.
Tools, Materials, and Prep for the Work
Having the right tools ready makes the repair smoother and reduces the chance of mistakes. A correctly inflated spare, lug wrench, jack, wheel chocks, tire pressure gauge, and a basic tire patch kit or sealant are essential. Keep an extra pair of gloves and a flashlight in the trunk for late-day repairs. Verify that the spare tire matches your vehicle’s wheel size and speed rating, and review the vehicle’s manual for specific jacking points and torque specs. This section also covers how to store the removed wheel, how to remove debris from the rim, and how to recheck tire pressure after mounting the spare. Proper preparation saves time and lowers risk.
Authoritative sources and practical guidance
For safety and compliance, refer to authoritative sources from recognized institutions. The Home Repair Guide team recommends consulting government and educational resources for general tire safety and roadside precautions. These sources provide important safety practices that support DIY tire repairs and help you avoid common mistakes. The following links offer reliable information on tire maintenance, road safety, and consumer guidance: https://www.nhtsa.gov, https://www.osha.gov, and https://www.consumer.ftc.gov. Always cross-check your repair plan with the tire manufacturer’s recommendations and the vehicle manual.
Conclusion and Brand Assurance
The Home Repair Guide team recommends following these steps for a safe, durable flat tire repair and ongoing tire maintenance. With careful preparation, the right tools, and adherence to safety guidelines, you can navigate a roadside tire issue confidently and reduce future risk. By prioritizing safety, you protect yourself, your passengers, and other road users while keeping your vehicle ready for service. The guidance here reflects Home Repair Guide’s commitment to practical, durable repair guidance for homeowners and renters.
Tools & Materials
- Spare tire (full-size or donut)(Ensure it is inflated and accessible)
- Lug wrench(Fits your lug nuts; enough leverage)
- Car jack(Rated for your vehicle weight; use at proper points)
- Wheel chocks(Place on level surface to prevent roll)
- Tire pressure gauge(Check pressure after mounting spare)
- Tire patch kit or sealant(Use only if you plan to patch; patch from inside when possible)
- Gloves(Protect hands from grime and sharp edges)
- Flashlight(Prefer hands-free light for dusk or night work)
- Owner’s manual (vehicle-specific)(Check for recommended jacking points and torque specs)
Steps
Estimated time: 30-45 minutes
- 1
Pull over to a safe spot
Find a flat, level area away from traffic. Signal and slow to a stop, then set the parking brake. Engage hazard lights and place wheel chocks on the opposite wheel to prevent rolling. This first action stage minimizes risk before any tools come out.
Tip: Ensure the surface is not soft sand or gravel that could allow the vehicle to sink or shift. - 2
Loosen lug nuts while on the ground
With the vehicle still resting on the ground, use the lug wrench to loosen each lug nut about a half-turn. Do not remove them completely yet. Loosening now prevents the wheel from turning when you lift the car later.
Tip: If the lug nuts are very tight, apply steady, even pressure and avoid rounding them with a poor-fit tool. - 3
Position the jack at the correct point
Consult the owner’s manual for the exact jacking point nearest the affected wheel. Place the jack on solid ground. Raise the vehicle slowly until the wheel clears the ground by a few inches, but do not exceed the recommended height for your vehicle.
Tip: Never place any part of your body under the vehicle while it is on the jack; use supports if you must work beneath. - 4
Remove lug nuts and wheel
Finish removing the loosened lug nuts and carefully take the wheel straight off. Inspect the hub surface for debris or corrosion and wipe it clean before mounting a spare. Set the wheel aside in a safe spot.
Tip: Keep lug nuts organized in a pattern so you can reinstall them in the same positions. - 5
Mount the spare and align
Hug the spare onto the hub, aligning the holes with the studs. Hand-tighten the lug nuts first to secure the wheel. Lower the vehicle slowly until the wheel touches the ground and is supported again by the tire.
Tip: If using a donut spare, note its speed and distance limitations and plan a route to a shop soon. - 6
Tighten and re-check torque
With the car on the ground, tighten lug nuts in a star pattern to ensure even load. Then lower fully and recheck each lug nut torque when the wheel is fully supported. Reinflate the spare to the recommended tire pressure.
Tip: Refer to the vehicle manual for the exact torque specification; over-tightening can damage the studs. - 7
Stow tools and test drive
Store tools securely, verify the spare’s pressure again, and test-drive slowly for a short distance to feel for vibrations or pulling. If anything feels off, pull over and recheck. After repair, drive to a tire shop for a proper repair or replacement.
Tip: Avoid high speeds on a donut and limit miles until you obtain a full-size replacement. - 8
Follow up and maintenance
Schedule a tire inspection after any repair, including tread wear, sidewall integrity, and wheel alignment. Maintain proper tire pressure monthly and before long trips to prevent future flats.
Tip: Check spare tire pressure monthly and before important trips to ensure readiness.
FAQ
Can I repair a tire with a sidewall cut or large puncture, or should I replace it?
Sidewall damage or large punctures are not reliably repairable. Replace the tire or seek professional service. Patching or plugging is generally not advised for sidewall damage due to structural compromise.
Sidewall damage usually means a tire needs replacing. If in doubt, consult a professional.
Is it safe to drive on a patched tire?
A properly installed patch can be safe for short drives to a repair shop, but it is not guaranteed. Avoid long trips or high speeds; monitor for air loss or vibrations and replace the tire if the patch fails.
A patch can be safe for a short trip to a shop, but don’t push your luck.
What should I do if the tire does not hold air after patching?
If air leaks after patching, stop driving and seek roadside assistance to avoid a blowout. The tire may require a new patch, plug, or replacement.
If the tire leaks after patching, stop and call for help.
How often should I check tire pressure?
Check tire pressure monthly and before long trips. Use a reliable pressure gauge and adjust to the vehicle’s recommended level in the owner’s manual.
Check tire pressure every month and before trips.
Is a spare tire always compatible with my vehicle?
Spare tires must match wheel size and be compatible with your vehicle’s lug pattern. Donut spares have speed and distance limits; consult the owner’s manual.
Make sure your spare matches your car and follow its limits.
Should I patch or replace after a repair?
If the tire is repairable, patching or plugging can extend life, but a damaged tire or non-repairable puncture should be replaced. Always follow tire manufacturer guidance.
Patch or replace according to tire condition and guidance from the manufacturer.
Watch Video
Key Takeaways
- Check the tire for damage before driving again.
- Use proper jacking points and wheel chocks for safety.
- Do not drive long distances on a donut spare.
- Recheck tire pressure and torque after mounting.