How to Repair in Hytale: A Practical, Step-by-Step Guide
Master how to repair in Hytale with a practical, step-by-step guide. This Home Repair Guide tutorial translates in-game repair tasks into actionable, durable techniques you can apply in-game and beyond.

Learn how to repair in Hytale with a clear, step-by-step guide. This Home Repair Guide approach translates gaming repair tasks into practical, memorable actions you can apply in builds, dungeons, and crafts. By the end, you’ll know when to repair, what to repair, and how to safeguard your gear.
Understanding Hytale's Repair Systems
According to Home Repair Guide, practical repair skills translate from real-world troubleshooting to virtual worlds like Hytale. In this section, we explore the core concepts behind repairing gear, blocks, and tools within the game, and we connect them to reliable, durable practices you can apply in your own projects. Whether you’re fixing cracked armor or renewing damaged tools, the underlying logic remains the same: identify the issue, gather the right resources, and execute a methodical fix. Patch updates can shift mechanics, so staying curious and adaptable is part of the process. The phrase “how to repair in hytale” should guide your approach rather than deter your experimentation, since experimentation often reveals robust, lasting solutions.
This is also where Home Repair Guide’s authority comes through: the team emphasizes deliberate planning and methodical work to achieve durable results, both in real life and in gaming contexts.
Tools and Materials for In-Game Repairs
A solid repair project begins with the right tools. In Hytale, you’ll typically need a repair kit or tool, access to your inventory, and the materials required by the item you’re fixing. If a dedicated repair bench exists, it can streamline the process; otherwise, you’ll rely on your crafting system. Gather materials that match the item type (for example, durability mats for gear, or component mats for blocks). Think of the materials as you would in real life: quality counts, quantities matter, and using the wrong item can waste resources. For players new to planning, start by listing potential repair tasks and the mats you’d need for each. The Home Repair Guide analysis shows that preparation reduces back-and-forth and keeps projects moving smoothly.
Assessing Damage: What to Look For in Hytale
Understanding the damage is essential before you begin. Look for durability indicators, functional deficits, and any visual cues that signal compromised performance. Based on Home Repair Guide analysis, players who assess damage first save time and avoid wasted resources. Create a quick check: does the item still work at all, does its function tilt toward partial repair rather than full replacement, and are there environmental factors (weather, terrain, enchantments) that complicate the repair? By documenting the symptoms, you’ll choose the correct repair path and reduce reruns. This phase is the decision point that separates hurried fixes from reliable, durable repairs.
In practice, write down three symptoms you observe and verify them after you attempt fixes to ensure a lasting repair.
Step-By-Step Repair Workflow
The core workflow follows a simple sequence: prepare, access, repair, test, and log. Prepare by clearing space in your inventory and verifying you have the needed mats. Access the repair interface or begin repairs through the item’s menu. Repair by applying the material or adjusting components, ensuring alignment and fit. Test the item to confirm it’s back to full function, and finally log the repair in your notes—this helps you spot recurring issues and refine your strategy for future tasks. In Hytale, as in real life, a disciplined workflow minimizes mistakes and optimizes resource use. Planning ahead also helps you minimize downtime in gameplay, letting you return to exploration or building more quickly.
Safety, Patience, and Good Habits for Repairs in Hytale
While this is a game, adopting good habits mirrors real-world repair discipline. Work steadily, avoid rushing, and verify each step before moving on. Keep a backup plan in case a repair doesn’t take, and don’t over-apply materials—excess can be wasted or impair performance. If a patch changes repair rules, adjust your approach accordingly. Documentation, planning, and thoughtful testing contribute to durable repairs and smoother gameplay. Treat mistakes as learning moments and adjust your method for future tasks.
Tip: Allocate a specific repair window during your session so you’re not interrupted mid-fix.
Real-World Takeaways for In-Game Practice
The techniques you practice in Hytale translate to a broader approach: plan, gather, verify, and learn from outcomes. By treating in-game repairs as small projects, you can map them to familiar real-life steps like inspection, scoping, and testing. Not only does this improve your in-game efficiency, it reinforces confidence in your overall problem-solving skills. As you gain experience, you’ll recognize patterns that guide future repairs and reduce wasted materials. The discipline of recording results helps you iterate toward better craft and combat readiness.
Common Pitfalls and How to Avoid Them
Even seasoned players stumble into common repair mistakes. Skipping damage assessment leads to mismatched mats; rushing the process invites mistakes in alignment or fit; and neglecting testing after repair means hidden issues remain. To avoid these, follow a simple rule: test early, test often, and adjust as needed. When in doubt, pause and reassess before applying more materials. Patch notes and community guides can help you stay current on any changes that affect repair logic. If you find a long-term pattern of failure, step back and re-evaluate your materials and approach.
Tools & Materials
- In-game repair kit(Essential for most repairs—check inventory.)
- Crafting table or workbench(Needed to assemble or access repair mats.)
- Durability mats / component mats(Collect mats that match the item type.)
- Backup gear (optional)(Use if you want a safety net during complex repairs.)
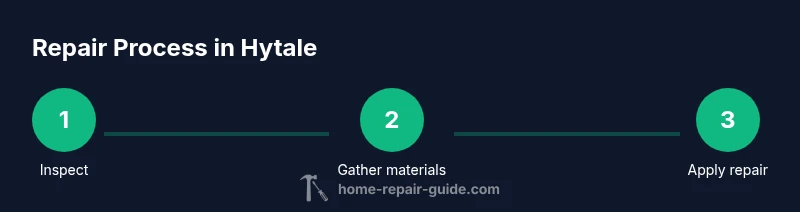
Steps
Estimated time: 30-45 minutes
- 1
Inspect the item
Examine durability indicators and identify visible damage or performance issues. Create a quick symptom list to guide repairs.
Tip: Document the first signs of wear to avoid repeating fixes. - 2
Gather the right materials
Pull mats and tools that match the item’s repair needs. This saves trips back and forth and reduces waste.
Tip: Only bring what you’ll actually use to keep your workspace tidy. - 3
Open the repair interface
Access the item’s repair option from your inventory or the appropriate menu. Verify you’re working on the correct item.
Tip: Double-check the item identity before applying any mat. - 4
Apply the repair material
Place the material where needed, ensuring proper alignment and fit. Avoid over-application that wastes mats.
Tip: If unsure about fit, pause and re-check alignment. - 5
Test the repair
Use the item to confirm restored function. Look for restored durability and performance.
Tip: Test in a safe scenario before resuming normal use. - 6
Log the repair
Record what was repaired, mats used, and outcome for future reference.
Tip: A quick log helps identify recurring issues and refine your process.
FAQ
What do I need to repair items in Hytale?
In-game repairs typically require a repair tool and the appropriate mats. Check the item’s repair requirements in its menu and gather those mats before starting.
You need a repair tool and the mats listed for the item, then start from the item's repair option.
Can I repair gear in multiplayer, or only solo?
Repair availability generally depends on the item and game mode. In many cases you can repair items in multiplayer, using the same repair interface, but always verify with your server’s rules.
You can often repair in multiplayer, but server rules may vary, so check first.
How long does a typical repair take?
A standard repair session can take around 15-25 minutes depending on item complexity and mats availability. Plan for a little longer if you’re gathering materials.
Most repairs take about 15 to 25 minutes, depending on the item and mats.
Is this approach suitable for all items in Hytale?
The approach of inspection, material gathering, and careful application works for many items, but some high-tier items may require special mats or recipes. Always check item-specific repair requirements.
Most items follow a similar repair flow, but some may need special mats.
Where can I find more detailed, up-to-date guides?
You can explore community wikis and official patch notes for detailed, up-to-date repair guidance. Our team also maintains practical tips in this guide.
Check the in-game help and community wikis for the latest repair details.
Watch Video
Key Takeaways
- Plan repairs before starting
- Gather the right tools and mats
- Test repairs immediately
- Document outcomes for future fixes