How to Repair a Dent: A Practical DIY Guide at Home
Learn a safe, step-by-step method for repairing dents on metal surfaces at home. Get essential tools, practical techniques, and safety tips for DIY success.

DIY dent repair works for small, non-structural dents on metal panels when you have the right tools and patience. Start with controlled heat, then pull or push the dent from the edges, and finish with cooling and light tapping for a smooth surface.
What is dent repair and when DIY makes sense
Dents occur when a surface is struck or stressed, creating a ripple or shallow hollow. In the context of household repairs, a dent often appears on metal surfaces such as car doors, appliances, or metal cabinets. The goal of dent repair is to restore the surface to its original contour without compromising paint or structural integrity. Many small dents can be addressed with common tools and careful technique, saving time and money compared to professional services. However, not every dent is DIY-friendly. Very sharp creases, creases near edges, or dents with cracked paint may require professional help to avoid further damage.
According to Home Repair Guide, success with DIY dent repair hinges on diagnosing the dent’s depth and the paint condition, then selecting a method that minimizes risk. Start by masking off the area with painter’s tape to protect nearby surfaces, and gather the appropriate tools before you begin. Working in a clean, well-lit space reduces the chance of introducing new scratches. For most homeowners, the process is iterative: you apply a method, evaluate the result, and repeat as needed. The key is to stay patient, work slowly, and document the dent’s progress with photos for reference.
Key methods for dent repair on metal surfaces
There are several techniques used to repair dents on metal surfaces. Each method has its own suitability depending on dent size, location, paint condition, and access to the backside of the panel. The simplest method is a suction-based dent puller. These devices adhere to the dent and, when pulled, try to restore the surface contour. Suction methods work best on shallow dents with smooth paints and little rising edges. For stretched or creased dents, you may need glue tabs combined with a dent pulling system, which provides more control but requires curing time.
Another common approach is the internal push method, where access behind the panel allows you to gently push the dent out from the inside using a clean, soft tool. This is often paired with heat to soften the metal so it returns to shape more easily. If the paint has not cracked and the panel isn’t severely deformed, you can finish with a tap-down using a rubber mallet or rounded body hammer and a wooden or rubber-tipped tool to refine the edge of the dent. Finally, cooling the area after heating helps set the surface and reduce residual deformation.
In all cases, masking, cleaning, and working in small, incremental adjustments yields better results than forceful, rapid attempts. Document progress with photos, and compare each stage to the surrounding unblemished metal to guide your next move.
Assessing dent size and location to choose a method
Assessing the dent’s size, depth, and location is the first critical step. Shallow dents with smooth paint are often good candidates for suction or glue-tab methods, while deeper dents or creases near edges may require pushing from behind or professional assistance. Consider whether you have access to the backside of the panel; this access dramatically expands the options, especially for internal push techniques.
Paint condition matters too. If the paint around the dent is cracked, creased, or peeling, DIY attempts risk turning a simple dent into a paint repair project. In such cases, you may want to focus on minimizing further damage and plan for paint repair with the help of a professional. Always weigh the potential cost savings against the risk of needing additional repaints or structural work.
Safety and prep: masking, PPE, environment
Prep work is the foundation of any successful dent repair. Clear the area of clutter and ensure good ventilation if you’re using heat tools. Protect nearby surfaces with masking tape or drop cloths, and wear safety glasses and heat-resistant gloves. Keep a clean workspace and organize tools so you can reach them without fumbling. Before applying heat, test a small inconspicuous area to gauge how the paint responds. If you notice paint softening or bubbling, stop and reassess your approach to avoid irreversible damage.
Step-by-step overview (overview only; see the STEP-BY-STEP block for details)
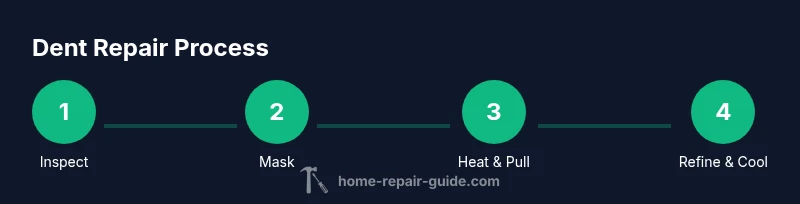
This section provides a high-level overview of the typical DIY dent repair workflow. Start with an inspection and masking, then choose a method (suction, glue tabs, or internal push). Apply controlled heat to soften metal if needed, perform the chosen pull or push maneuver, and refine the surface with gentle tapping. Finally, cool the area, recheck alignment, and clean the surface before concluding. Note that waiting times may vary depending on materials and environmental conditions.
Maintenance and prevention after repairs
After repairing a dent, protect the surface to prevent future damage. Clean the area with a mild detergent and water, dry thoroughly, and apply a light coat of car wax or metal protectant if appropriate (for automotive panels) or a finishing sealant for metal appliances. Store dent repair tools properly and inspect the area periodically for any signs of new deformation or paint cracking. Small dents are easier to fix if addressed early, so consider a quick inspection after operations like door slams or heavy use.
Authority sources
For safety and best practices, consult credible sources. Useful references include OSHA guidelines for safe tool use and proper PPE, NHTSA insights on vehicle safety and paint protection, and NIST standards on measurement and surface prep. These sources help ensure your DIY dent repair workflow stays safe, effective, and consistent with professional expectations.
OSHA: https://www.osha.gov NHTSA: https://www.nhtsa.gov NIST: https://www.nist.gov
Common pitfalls and how to avoid them
Common DIY dent repair mistakes include overheating paint, using excessive force, skipping masking, and neglecting to test on a hidden area first. To avoid these, work in small increments, keep heat moving, mask aggressively, and document progress with photos. If the dent is deeply creased or the paint shows signs of damage, pause and seek professional help to prevent further harm. Regular practice, patience, and careful observation are key to successful DIY dent repair.
Tools & Materials
- Dent repair kit (suction cups and/or glue tabs)(Includes variety of tab sizes to match dent shape)
- Heat source (hair dryer or heat gun)(Use low, controlled heat; keep moving to avoid paint scorching)
- Heat-resistant gloves(Protect hands from heat and sharp edges)
- Microfiber cloth(Lint-free for cleaning and polishing)
- Masking tape(Mask around the dent to protect surrounding paint)
- Isopropyl alcohol or mild detergent(Clean the area before testing adhesion or contact)
- Soft rubber mallet or plastic hammer(Gentle taps to level edges without damage)
- Safety goggles(Eye protection when heating or tapping)
- Pry tool or wooden dowel (optional)(Gentle backside pressure if accessible)
Steps
Estimated time: 60-120 minutes
- 1
Inspect the dent and plan
Examine size, depth, and paint condition. Decide which method is most appropriate and safe for the specific dent. Take a few reference photos to compare progress as you work.
Tip: Document the initial state to measure improvements later. - 2
Mask the area around the dent
Apply masking tape to protect adjacent paint from heat, solvents, or scuffs. Use small, precise pieces to avoid lifting nearby edges.
Tip: A clean edge prevents tape residue from sticking to paint. - 3
Set up workspace and tools
Lay out the dent repair kit, heat source, gloves, and cleaning materials within easy reach. Ensure good lighting and ventilation if you’ll use heat.
Tip: Test a small area first to confirm paint response. - 4
Apply controlled heat to the dent
Warm the dent area evenly using a hair dryer or heat gun on a low setting. Move the heat source in small circles to avoid hot spots.
Tip: Heat should be gentle; overheating can cause paint damage. - 5
Pull the dent with suction or glue tabs
If using suction, press firmly and pull steadily. If using glue tabs, follow kit directions and allow glue to cure briefly before pulling.
Tip: Pause and recheck frequently; a few light pulls are better than one strong pull. - 6
Push from behind if accessible
From the inside of the panel, gently push the dent outward with a soft tool. Use minimal force to avoid stretching the metal.
Tip: Keep hands and tools aligned with the panel surface to prevent new creases. - 7
Refine edges with tapping
Use a soft mallet or plastic hammer to flatten high spots and blend the repaired area with the surrounding contour. Work slowly around the edges.
Tip: A rounded edge minimizes shine marks and keeps the surface uniform. - 8
Cool, recheck, and adjust
Cool the area to set the surface, wipe clean, and compare with adjacent panels. If needed, repeat steps 4–7 in smaller increments.
Tip: Patience is key; multiple light adjustments often beat a single heavy attempt. - 9
Final clean-up and documentation
Remove masking tape, clean residue, and take final photos for your records. Consider a light protective coating after confirming the finish looks even.
Tip: Keep a log of what worked for future reference.
FAQ
Can I repair a dent without removing paint?
Yes, small, non-crease dents with intact paint can often be repaired without removing paint. If the paint shows cracks or bubbling, professional repainting may be necessary to avoid rust and poor adhesion.
Yes, small dents with undamaged paint can often be repaired without repainting, but avoid cases with cracks or bubbling.
What tools are essential for a DIY dent repair?
A suction dent puller or glue tab kit, a heat source, masking tape, gloves, microfiber cloth, and a soft mallet are the core tools. Optional items include a pry tool and safety goggles.
The essential tools are a dent puller kit, heat source, masking tape, gloves, microfiber cloth, and a soft mallet.
Is DIY dent repair safe for vehicles?
DIY dent repair can be safe for small, non-structural dents on vehicles when you follow proper masking, heat control, and gentle pulling. Avoid areas near edges or sharp creases and seek a pro for deep or cracked paint.
Yes for small dents with careful steps, but avoid edges and cracked paint; seek a pro for bigger issues.
How long does a DIY dent repair take?
A typical small dent repair may take 30–90 minutes, depending on dent size, paint condition, and access to the backside of the panel. Some repairs may require waiting for glue to cure.
Most fixes take from half an hour to about an hour and a half, depending on the dent and tools.
When should I not attempt DIY dent repair?
If the dent is creased, near edges, has cracked paint, or involves structural damage, avoid DIY repair and consult a professional to prevent further harm.
If there's creasing, paint damage, or structural concerns, seek professional help.
Will dent repair affect paint color or finish?
Proper technique minimizes color mismatch, but aggressive heat or improper pressure can cause paint finish changes. Always test on a hidden area and proceed cautiously.
Processed carefully, paint finish should stay consistent, but be cautious with heat and pressure.
Watch Video
Key Takeaways
- Assess dents before starting
- Mask area to protect paint
- Use small, controlled heat and gradual pulls
- Refine with gentle tapping for a smooth finish
- Know when to seek professional help