How to Check the Repair History of iPhone
Learn a practical, step-by-step method to check the repair history of iPhone, locate records from shops, verify past work, and protect your device’s health with trusted guidance from Home Repair Guide.

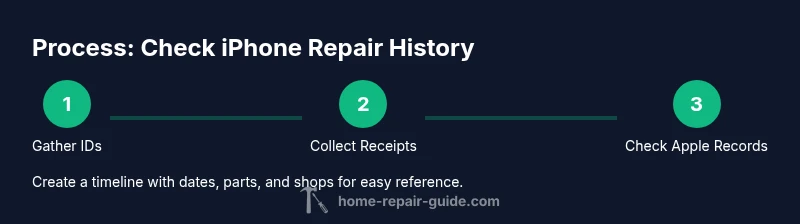
If you want to know how to check the repair history of iphone, start by gathering model info, receipts, and repair notes from past shops. Check your Apple Support profile for service events, contact former technicians for records, and review device diagnostics. This guided approach from Home Repair Guide covers steps, safety, and data you can collect.
What does 'repair history' mean for iPhone and why it matters
For iPhone owners, a repair history is a collection of service events, parts replacements, and diagnostic notes tied to the device's lifetime. It may include battery replacements, screen repairs, logic-board work, or more minor firmware-related fixes performed by third-party shops or Apple Authorized Service Providers. Understanding this history helps you assess remaining lifespan, future repair costs, and potential issues that could affect performance or resale value. In practical terms, a complete history includes receipts, repair notes, and any diagnostic reports that accompany a service event. According to Home Repair Guide analysis, having consolidated records from reliable sources makes it easier to verify the work that’s been done and plan future maintenance. This section helps you frame what counts as credible history and what to expect from different repair sources.
Why you should review repair history before buying or selling
Reviewing repair history before purchasing a used iPhone can save you from hidden costs and unexpected failures. A device with well-documented repairs—especially battery replacements and screen fixes—tends to have longer remaining lifespan than one with unknown service events. For sellers, presenting a transparent repair history can boost buyer trust and support a fair asking price. Home Repair Guide emphasizes that credible records often include timestamps, parts numbers, and technician signatures, which collectively reduce disputes and provide a clear maintenance trajectory for the device.
Where to find repair records: official and third-party sources
There are several places where repair history data may live. Start with the official channels: your Apple ID account and any service notifications you’ve received from Apple or your carrier. If you used third-party repair shops, request copies of invoices, parts lists, and diagnostic notes. Don’t overlook digital inboxes or cloud storage where you might have PDFs of receipts. Some shops will provide repair history summaries upon request, while others may require a formal data-access request. In this guide, we’ll outline practical steps to obtain each type of record and verify their authenticity.
How to assess the credibility of repair records
Not all records are equally trustworthy. Prioritize receipts from reputable shops, warranty stamps, and detailed invoices that list parts and labor. Look for part numbers and serials tied to the device, not just generic descriptions. Compare repairs across sources—if one record mentions a battery replacement but another lacks battery notes, treat that discrepancy as a flag for further verification. The goal is to assemble a coherent timeline with corroborating evidence such as service notes, diagnostic results, and photos of installed parts. The process becomes easier when you keep a master folder of documents as you gather information.
How different repair events affect device health and future costs
Certain repairs significantly influence future reliability and costs. Battery replacements, screen repairs, or motherboard work can affect resale value and necessary maintenance intervals. Battery aging, runtime changes after a screen fix, or firmware updates accompanying a repair can alter performance metrics like charging efficiency or thermal behavior. Understanding these implications helps you decide whether a past repair was appropriate or if further servicing is warranted. This section explains how to read repair notes for clues about long-term health and anticipated upkeep.
How to prepare for requesting repair records from shops
To maximize success when requesting repair history data, prepare a concise, polite request that includes device identifiers (serial number, model), approximate repair dates, and the shops involved. If you don’t have the records, ask for any available data such as invoices, parts used, diagnostic logs, or technician notes. You can provide your consent for sharing data with a new technician or repair shop to facilitate a seamless handover. When sending requests, mention your goal: to verify past work and plan future maintenance. Keeping communications organized will speed up responses.
Using Apple and carrier records to corroborate history
Apple and carrier records can corroborate repair activity, especially if a device was serviced under warranty or coverage. Access to official records typically requires signing in with your Apple ID. Look for service events, repair codes, or coverage notes that align with your device’s reported service history. If you don’t see entries, that doesn’t mean no repair occurred; third-party work often isn’t reflected in Apple’s systems. Use corroborating evidence from receipts and diagnostic results to fill gaps and build a credible timeline.
Tools & Materials
- iPhone (any model)(Have the device ready; ensure it can power on and connect to charger if needed)
- Past repair receipts or invoices(Include dates, shop names, parts used, and labor details)
- Apple ID credentials(Needed to access official service history and support records when available)
- Email access or cloud storage(For accessing or sharing scanned records)
- Notebook and pen(To jot down reference numbers or build a quick timeline)
- Smartphone-compatible scanner or camera(To digitize receipts and notes for easy sharing)
Steps
Estimated time: 30-60 minutes for initial data gathering; 2-7 business days for record retrieval from shops
- 1
Gather device identifiers
Collect the iPhone’s model, serial number, and IMEI. This helps you match records to the exact device and prevents confusion if you own multiple units. Have these details ready before contacting shops or Apple Support.
Tip: Find these on the SIM tray, in Settings > General > About, or on the original packaging. - 2
Collect all receipts and repair notes
Assemble every receipt, invoice, and diagnostic note you can find. Scan or photograph documents for digital storage. Include dates, parts, and service descriptions to create a verifiable timeline.
Tip: If originals are missing, request copies from the shops and confirm the exact parts used. - 3
Check Apple Support for service history
Sign in to Apple Support with your Apple ID and review any service events linked to your device. Look for warranty work, diagnostics, or repairs that Apple or its partners recorded.
Tip: If you don’t see entries, don’t assume no history; third-party repairs may not appear here. - 4
Reach out to past repair shops
Contact former technicians or service centers to request copies of invoices, parts used, and diagnostic notes. Be clear about your purpose: to verify past work and plan future maintenance.
Tip: Provide device identifiers and a brief summary of what you’re requesting to speed up responses. - 5
Cross-check with third-party data
Compare information from receipts with any diagnostic reports and photos of installed parts. Look for consistency in part numbers and dates to confirm accuracy.
Tip: Flag any discrepancies for a follow-up with the shop or the device owner. - 6
Create a personal repair timeline
Build a simple timeline that lists each repair event, the parts used, the responsible shop, and the observed device condition afterward. This helps you plan future service and communicate with new technicians.
Tip: Use a single document or spreadsheet for easy reference later.
FAQ
Is repair history always available for iPhones?
No. Some histories are difficult to obtain, especially if repairs were done by independent or unauthorized shops. Always request receipts and diagnostic notes where possible and corroborate with Apple Support records when available.
Repair history isn’t always available, but you should request receipts and notes and check Apple Support options when possible.
Can Apple provide a full repair history for my iPhone?
Apple can show service events tied to your Apple ID in some cases, especially warranty or official service work. Third-party repairs typically do not appear in Apple’s records, so gather receipts from those shops as well.
Apple may show service events linked to your ID, but third-party records may not appear there.
What should I do if records conflict or are missing?
Document what you have, note the discrepancies, and contact the involved shops for clarification. Consider a professional diagnostic to establish a clear health baseline if records are insufficient.
If records conflict, reach out to the shops for clarification and consider a diagnostic to confirm device health.
How does a repair history affect resale value?
A well-documented repair history generally supports higher resale value, especially for battery or screen replacements with clear notes and part details.
A documented history with credible records can boost resale value.
Should I consult a technician before acting on records?
Yes. Bring your repair timeline and records to a trusted technician to interpret results, estimate remaining life, and plan future maintenance.
Consult a technician with your records to gauge remaining device life and next steps.
What information should I request when contacting shops?
Ask for the invoice, list of replaced parts, serials, dates, and diagnostic notes. Confirm the repair outcomes and whether any warranty applies.
Request invoices, parts lists, dates, and diagnostic notes to verify past work.
Watch Video
Key Takeaways
- Gather all device identifiers and receipts first.
- Cross-check Apple and third-party records for credibility.
- Create a concise repair timeline for future maintenance.
- Ask shops for complete records to avoid gaps in history.