How Often to Use Bond Repair Treatment
Learn how often to use bond repair treatment for durable repairs. This comprehensive guide covers factors, scheduling, monitoring, and practical tips to optimize bond strength in common home repair scenarios.

Bond repair treatments vary by product and material, but a cautious, label-guided approach yields the best results. Start with a conservative schedule (often weekly during initial repair) and adjust based on observed performance and material response. Always monitor for buildup or sensitivity and document results to refine your routine over time.
Understanding Bond Repair Treatments
Bond repair treatments are specialized products designed to reinforce or restore bonds in materials or assemblies within a home. Whether addressing weakened adhesives on wood, drywall, or other substrates, the central idea is to chemically or physically strengthen the bond so it resists future stress. The question, how often to use bond repair treatment, hinges on the product’s guidance, the severity of damage, and the environmental conditions the repair will face. As you plan, keep in mind that Home Repair Guide emphasizes following label instructions and conducting small-area tests before wide-scale application. This cautious approach helps prevent overuse, which can cause unnecessary buildup, resin pooling, or surface dulling. The frequency you choose should be adaptable and evidence-based, not arbitrary.
Why this matters
- Product labels provide the safest baseline for frequency.
- Damage severity and substrate type drive adjustments.
- Consistent monitoring prevents overuse and improves outcomes.
Practical takeaway
- Start conservatively, then adjust as you observe real-world results and compatibility with adjacent materials.
Tools & Materials
- Bond repair treatment product(Follow the label for recommended application frequency; different formulations have different intervals.)
- Product label or instruction sheet(Keep on hand during application for reference and troubleshooting.)
- Clean cloths and mild cleaner(Use before application to ensure a debris-free surface.)
- Timer or reminder app(Schedule follow-up applications and intervals to maintain consistency.)
- Protective gloves(Minimize skin contact with concentrated chemicals; optional for non-contact methods.)
- Test patch area(Small, inconspicuous area to check adhesion and finish before full-scale use.)
Steps
Estimated time: Total time to establish and refine a schedule: 4-8 weeks (depending on surface, product, and environment)
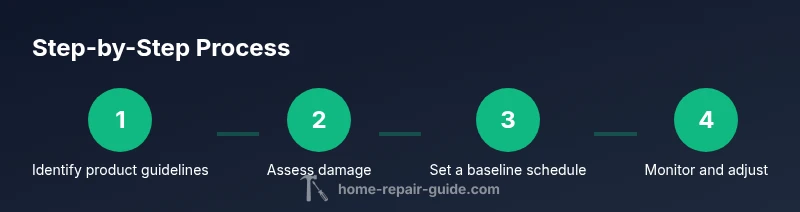
- 1
Identify product guidelines
Read the product label to determine the recommended frequency and surface compatibility. Note any cautions about heat, moisture, or curing time. This baseline keeps your plan grounded in the manufacturer’s safety and performance data.
Tip: If the label suggests nightly use, reconsider and contact the manufacturer for clarification. - 2
Assess damage and surface type
Evaluate the substrate (wood, drywall, metal) and the extent of bond damage. A lightly damaged surface may require less frequent applications, while severely damaged bonds often benefit from a more conservative schedule in the initial phase.
Tip: Document the damage with photos to track changes over time. - 3
Establish a baseline schedule
Begin with the product’s recommended minimum frequency for similar conditions. If there is no explicit frequency, start with a weekly interval for the first 2-3 applications to establish a baseline before adjusting.
Tip: Set calendar reminders for each application window. - 4
Monitor performance after each application
After each treatment, inspect the bond for improved firmness, reduced movement, or fewer gaps. Note any surface changes, such as slight discoloration or texture differences, and compare with prior results.
Tip: Use a simple push test to gauge improvements, avoiding excessive force that could re-damage. - 5
Adjust the frequency gradually
If improvements plateau or slow, consider extending the interval by 1–2 weeks. If performance degrades or there is excessive buildup, shorten the interval or pause briefly.
Tip: Make only one variable change at a time to isolate effects. - 6
Integrate with routine maintenance
Coordinate bond repair with other maintenance tasks (cleaning, sealing, or repainting) to minimize surface disruption and ensure long-term bond resilience.
Tip: Create a simple maintenance calendar to keep the routine consistent.
FAQ
What determines the initial frequency for bond repair treatment?
The product label, surface material, and damage severity determine the starting frequency. If labels are unclear, begin with a conservative weekly interval and adjust after several applications while monitoring results.
Start with the product’s guidance and a conservative weekly interval, then adjust based on results.
Can I use bond repair treatment more often if I see slow progress?
Not necessarily. Faster isn’t always better; overuse can cause buildup or surface staining. Wait for observable improvements before increasing frequency, and consult the label or manufacturer if in doubt.
Increase frequency only if you see clear improvements, and avoid stacking applications too quickly.
How should I document and track changes over time?
Keep a simple log noting date, surface, weather conditions, and the observed bond condition after each application. Photos or short notes help compare progress and guide scheduling decisions.
Log dates, conditions, and results after each application and review the trend.
What should I do if I notice a negative reaction or surface damage after application?
Discontinue use on that area and consult the product guidelines or manufacturer for mitigation steps. If damage worsens, seek professional advice to avoid costly repairs.
If you see a bad reaction, stop using it in that area and check the guidelines or talk to a professional.
Is a maintenance schedule useful for multiple surfaces?
Yes. Create a tailored plan for each surface, as different materials respond to bond repair treatments at varied rates. Maintain separate logs to prevent cross-area confusion.
Yes—treat each surface as its own project and keep separate notes.
Should I mix bond repair treatment with other surface sealants?
Only if the product label explicitly allows it. Some formulations may interact negatively with other sealants or coatings, reducing effectiveness. When in doubt, apply products to different zones or seek professional guidance.
Only mix if the label says it’s okay; otherwise, apply separately.
Watch Video
Key Takeaways
- Follow product labels as the baseline for frequency.
- Assess damage and surface type to tailor the schedule.
- Start with a conservative cadence and adjust based on results.
- Monitor progress with simple tests and documentation.
- Coordinate bond repair with other maintenance tasks for best outcomes.