How to Know If You Need Bond Repair
Discover clear signs, safe DIY checks, and when to hire a pro to address bond failures in walls, tiles, or masonry surfaces.

By the end of this guide, you’ll know how to tell if you need bond repair and what to do next. You’ll learn the key signs to look for, quick diagnostic checks you can perform safely, and the practical thresholds that warrant professional help. This overview also covers materials, safety, and when a DIY fix is appropriate versus calling a licensed specialist.
Why Bond Integrity Matters
Bond integrity is the invisible backbone that keeps surfaces attached, whether you're bonding ceramic tile to cement, brick masonry, or plaster to lath. When the bonding layer weakens or fails, tiles can loosen, cracks widen, and moisture can seep behind finishes, leading to bigger repairs down the line. For homeowners and renters, spotting bond problems early saves time, effort, and money. According to Home Repair Guide, most bond-related failures begin as small, barely noticeable gaps that worsen with movement, temperature changes, and humidity. The good news is that many bond issues are repairable with patience and the right materials, provided you address the underlying cause (such as moisture or movement) before applying patches. This section explains how to recognize early warning signs, what a proper assessment looks like, and how to plan a repair that lasts.
Common Signs You May Need Bond Repair
Bond problems rarely appear all at once. Common signs include hairline cracks that follow the pattern of the bonded surface, tiles that rock or loosen under light pressure, and patches where grout or caulk pulls away from edges. You might also notice bulges or soft spots where the substrate is failing, especially after a seasonal freeze-thaw cycle or a heavy rain. If you see moisture staining, efflorescence on masonry, or a musty odor behind a finish, the bond layer could be compromised. More subtle indicators are inconsistent adhesion when you press a corner, or paint that flakes off in small sheets along a seam. If any of these signs are present, it's time to investigate further: inspect for movement, check nearby plumbing or roof lines, and consider whether previous repairs were temporary fixes rather than durable bonds. Remember, early detection reduces labor and cost.
Quick Diagnostic Checks You Can Do Safely
-
Visual inspection and measurement: Look for gaps wider than 1/8 inch and for any pattern of cracks that mirrors the bond line. Document changes with a few straight-edge photos. This helps you decide whether a patch is enough or if substrate repair is needed.
-
Tapping and listening test: Gently tap the area with the rounded handle of a screwdriver; a hollow or dull tone often indicates a failed bond underneath. Compare with surrounding healthy areas to gauge severity.
-
Moisture and moisture-related signs: Check for dampness, staining, or efflorescence near masonry. A moisture issue beneath a bond can undermine adhesives and lead to recurrent failures.
-
Caulk and grout review: Inspect seals around edges; peeling caulk or loose grout can reveal deeper bond problems or water intrusion.
-
Movement assessment: Push lightly on the surface to detect looseness. If the area shifts or feels spongy, this signals movement that repair alone may not fix.
-
Documentation: Take clear photos and note dates of observed changes. This record can guide repair choices and help communicate with a contractor.
Choosing Materials and Methods
Selecting the right repair material hinges on the substrate and the expected movement. For interior drywall or plaster, patching compounds and reinforced joint compounds paired with a flexible sealant often work well. For masonry or concrete, a cementitious patch or epoxy-based adhesive can restore strength, while flexible sealants like polyurethane caulk accommodate minor movement. In damp or outdoor environments, use weather-resistant products designed for exterior bonding and moisture resistance. Based on Home Repair Guide analysis, compatibility between the repair product and substrate quality is a major predictor of long-term durability. Always match color and texture to the surrounding finish when possible, and consider moisture control as a prerequisite to any patch. This section also covers how to test a product in a small area before a full application, reducing the risk of color mismatch or surface damage.
- Patch choice by substrate: drywall vs masonry vs tile
- Adhesive types: cementitious patch, epoxy, or polymer-modified mortars
- Sealants: silicone vs polyurethane and where to use each
- Surface prep: cleaning, etching, and drying requirements
DIY vs Pro: When to Hire a Professional
Small, well-contained bond issues with no moisture or structural movement are often suitable for DIY repair. If you notice ongoing moisture intrusion, large cracks wider than 1/4 inch, bulging surfaces, or any sign of structural movement, a licensed professional is advised. Complex scenarios—such as bond failures around load-bearing walls, high-traffic areas, or outdoor masonry—benefit from expert assessment and, if needed, professional-grade tools and materials. The Home Repair Guide team recommends erring on the side of safety when moisture and structural integrity are involved; a misjudged patch can trap moisture or worsen movement. When in doubt, request an in-person evaluation to confirm whether a simple patch will suffice or if full substrate remediation is required.
Maintenance After Repair to Prevent Recurrence
Post-repair maintenance is essential to extend the life of your bond repair. Keep moisture sources under control—address leaky roofs, plumbing, or drainage issues that could undermine the bond. Re-seal joints and edges on a schedule to prevent moisture ingress, and inspect the area after heavy rains or seasonal shifts. If you used a flexible sealant, re-check for compression or cracking annually to catch early signs of movement. Regular inspections, timely resealing, and proactive moisture management are the best defenses against recurring bond issues. The Home Repair Guide team underscores that sustained maintenance is often as important as the initial patch, helping you avoid repeat repairs.
Tools & Materials
- Putty knife(1-2 inch blade for clean edge prep)
- Caulking gun(For applying silicone or polyurethane sealants)
- Silicone caulk(Mildew-resistant and color-matched to surface)
- Epoxy or cementitious patch repair compound(Choose based on substrate (masonry vs drywall))
- Chisel and hammer(Remove loose or damaged bonding material)
- Utility knife(Fresh blade for cutting patch material)
- Safety goggles(Eye protection when chipping and sanding)
- Work gloves(Hand protection during prep and application)
- Drop cloths(Protect nearby surfaces during work)
- Sponge and water bucket(Cleanup and tooling for smooth edges)
Steps
Estimated time: 60-90 minutes active work (plus cure time as specified by product)
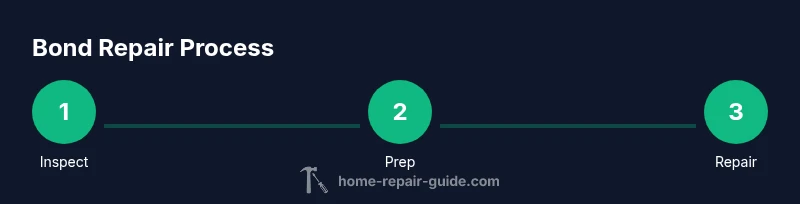
- 1
Inspect for signs of bond failure
Begin with a careful visual inspection of the area. Look for cracks, gaps, loose tiles or patches, and moisture signs. Document every issue with photos and notes to guide your repair plan.
Tip: Take measurements and photos from multiple angles to capture the full extent of damage. - 2
Gather the right materials
Match the repair material to the substrate: drywall patches for interior walls, cementitious compounds for masonry, and flexible sealants for joints. Lay out all tools and materials before you start to avoid mid-project trips.
Tip: Test a small patch on a hidden area to confirm compatibility before full application. - 3
Prep the area and remove damaged bonding
Clean the surface, remove loose material, and dry thoroughly. Use a chisel or putty knife to remove visibly damaged bonding material and create a clean edge for the patch.
Tip: Drying times are critical; ensure the surface is moisture-free before proceeding. - 4
Apply bonding repair material
Follow product directions to apply the patch or adhesive. Smooth edges with a putty knife and ensure the repair bonds fully to the substrate. If using a sealant, apply evenly and tool for a seamless finish.
Tip: Work in thin layers to avoid lumps and ensure proper curing. - 5
Cure, test, and finish
Allow adequate cure time per product instructions. Check adhesion by gently pressing the repaired area and monitor for movement or cracking. Re-seal edges as needed and touch up paint or finish to blend with surrounding surfaces.
Tip: Do not rush curing; moisture during cure is a common cause of failure.
FAQ
What is bond repair and when is it needed?
Bond repair involves restoring the adhesive layer that holds surfaces like tile, plaster, or masonry in place. It’s needed when you observe cracks, looseness, or moisture intrusion that indicates the bond is failing or compromised.
Bond repair restores the adhesive layer when you see cracks or looseness indicating a failing bond.
Can I fix bond repair myself, and what are the risks?
DIY repair is possible for small, non-structural issues with proper prep and the right materials. Risks include poor adhesion, moisture entrapment, and reoccurring failure if cause (such as movement or water) isn’t addressed.
DIY repair can work for small issues, but it’s important to address moisture and movement to avoid repeating the problem.
What tools are essential for bond repair?
Key tools include a putty knife, caulking gun, a chisel, and a utility knife, plus moisture-appropriate sealants or patch compounds. Having safety gear is also important.
You’ll need basic tools like a putty knife, chisel, and caulk gun, plus the right patch material.
How long does a bond repair take to cure?
Cure time depends on the product and climate, typically ranging from a few hours to a day. Do not apply finish until the patch is fully cured.
Cure times vary; check the product instructions and keep the area dry during curing.
Is bond repair expensive?
Costs vary based on material, area size, and whether moisture or movement is involved. A simple patch can be economical, while larger repairs or moisture remediation may require expert labor.
Costs depend on materials and complexity; small patches are usually affordable, larger jobs may need a pro.
Do I need a permit for bond repair?
Most internal bond repairs do not require a permit, but major structural changes or exterior masonry work may. Check local codes or consult a licensed contractor.
Usually no permit for simple fixes, but big structural work might need approval.
Watch Video
Key Takeaways
- Identify signs early to prevent bigger damage
- Choose repair material that matches substrate and expected movement
- Control moisture to ensure patch durability
- Use professional help when movement or water intrusion is suspected