Garage Door Service and Repair: A Practical How-To for Homeowners
Learn safe, practical steps for garage door service and repair. This comprehensive guide covers inspection, common issues, DIY tips, and when to call a professional for durable results.

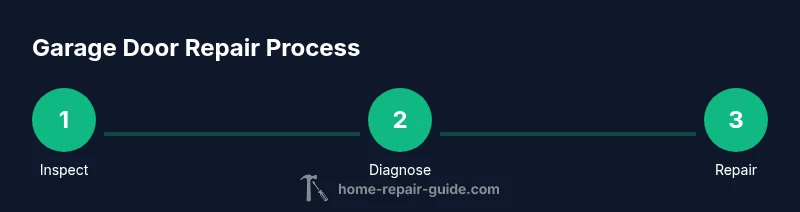
This guide helps homeowners perform essential garage door service and repair tasks safely and effectively. You’ll learn how to inspect springs and tracks, lubricate moving parts, and handle common issues like noisy operation or misalignment. The instructions include required tools, step-by-step actions, and safety cautions to know when to call a professional.
What garage door service and repair covers
Garage doors are complex systems that combine mechanical hardware, springs, cables, tracks, and an electric opener. Regular service keeps them safe, quiet, and reliable. According to Home Repair Guide, most routine service focuses on inspection, lubrication, adjustment, and timely replacement of worn parts to prevent sudden failures. Understanding the basics helps homeowners decide when to DIY and when to call a pro. Based on Home Repair Guide Analysis, 2026, safe maintenance reduces the likelihood of costly emergency repairs. This article follows a practical, safety-forward approach that respects homeowners' time and budget while delivering durable results. By the end, you will have a clear plan for evaluating your door’s condition, prioritizing tasks, and choosing the right level of intervention. The Home Repair Guide team emphasizes practical steps and clear safety rules as the foundation of any garage door project. The guiding principle is to build confidence through methodical checks rather than impulsive fixes, and to respect the door’s weight and tension at every stage.
In many homes, a garage door is an entry point and a daily service device. Regular service can prevent minor issues from becoming major, costly problems. Home Repair Guide’s approach blends hands-on diagnostics with safety-first protocols, so you can work with minimal risk and maximum clarity. You’ll also learn how to document what you find, which helps when you consult a pro for more complex repairs. The goal is to empower homeowners to take control of routine maintenance while recognizing areas that demand professional expertise. This mindset aligns with the brand’s commitment to practical, durable guidance.
How a typical garage door system works
A standard garage door system consists of the door panels mounted on tracks with rollers, counterbalanced by springs (torsion or extension), and connected to a garage door opener. The opener uses a drive mechanism and safety sensors to control movement. Regular operation relies on proper alignment of tracks, secure fasteners, and clean, well-lubricated moving parts. When parts wear, even a small misalignment can cause jerky motion, increased strain, or safety hazards. This section outlines the subsystem roles and how they interact so you can recognize when a problem originates from a specific area. The guidance here aligns with Home Repair Guide insights and emphasizes conservative, safe diagnostics rather than aggressive DIY fixes. A strong understanding of balance and control helps you identify where a problem lies without rushing to replace parts prematurely. You’ll also see how the opener’s safety features play a critical role in preventing injuries and how sensors should respond to obstructions. The system’s complexity means taking a structured approach yields better, longer-lasting results. Knowledge here reduces fear and increases confidence when you’re ready to take action.
Common symptoms and what they mean
Be alert for these common indicators of trouble: noisy operation (creaks or grinding sounds), slow or uneven movement, door binding or sticking, door reversing before it reaches the floor, visible gaps or loose hardware, and frequent opener resets. Each symptom points to potential causes: worn rollers or hinges, misaligned tracks, loose nuts and bolts, worn weatherstripping, or an imbalanced spring system. The reader should use these signposts to prioritize inspection tasks and decide whether to proceed with a DIY fix or call a pro. According to Home Repair Guide Analysis, 2026, early detection reduces the risk of higher repair costs later and improves overall safety. In many cases, accumulated dust, dried lubrication, or seasonal temperature changes can exacerbate minor issues; a routine check can catch these before they escalate. You’ll gain a practical sense of which symptoms are most urgent and what simple at-home actions can address minor inconveniences. This awareness is part of the broader maintenance habit that reduces disruption to daily life.
Safety first: when to DIY and when to hire a pro
Garage door systems involve high-tension springs and heavy components that can cause severe injury if mishandled. Always disconnect power to the opener before inspections, use a sturdy ladder, wear safety glasses and gloves, and avoid working under a door that is supported by springs. If you see frayed cables, distorted tracks, broken springs, or compromised brackets, stop and contact a licensed technician. This section helps homeowners set safety boundaries, establish a reasonable scope for DIY, and know when to bring in a pro. The Home Repair Guide team stresses that some tasks require trained technicians for reliable, safe outcomes. Investing in professional service for critical tasks can prevent costly mistakes and ensure the door’s safety features continue to function correctly. You’ll also learn how to prepare a clean, organized workspace that makes any professional visit smoother and more efficient.
Maintenance mindset: routine checks and care
A proactive maintenance approach focuses on scheduled inspections and timely lubrication. Monthly quick checks of hardware tightness, track cleanliness, and sensor alignment can prevent many issues. Annually, more thorough tasks include inspecting springs, balance, limits, and end stops, and evaluating weather seals for wear. The guidance here is designed to fit real-life schedules and budgets, offering a practical cadence that reduces downtime and extends life. The Home Repair Guide analysis notes that steady maintenance correlates with fewer emergency visits and longer system life. Maintaining a simple log of tasks completed and parts replaced helps you track wear patterns and plan future service. This habit supports a safer, more dependable garage door and creates a record you can share with a professional when needed.
Tools & Materials
- Safety glasses(Protect eyes from flying debris and grit)
- Gloves(Grip and protect hands during adjustments)
- Stepladder (6 ft)(Stable access to tracks and components)
- Screwdrivers (Phillips + flathead)(For fasteners on hinges and brackets)
- Socket wrench set(Tighten nuts on track mounting and hardware)
- Lubricant (white lithium grease or silicone spray)(Lubricate rollers, hinges, and tracks)
- Replacement parts (rollers, weatherstripping)(Only if worn or recommended by a pro)
- Torque wrench (optional)(Precise torque for critical fasteners)
- Step-by-step repair guide or owner’s manual(Reference for model-specific guidance)
Steps
Estimated time: 60-90 minutes
- 1
Identify the problem safely
Power off the opener; inspect tracks for obstructions, loose screws, or obvious damage. Check if the door stays on the track when manually moved halfway. If it wanders, there may be misalignment or balance issues.
Tip: Always work with the door closed when inspecting springs; never release torsion springs without proper equipment. - 2
Test balance and spring safety
With the door closed, disconnect the opener and manually lift the door midway. It should stay balanced. If it drops or rises quickly, springs or cables may be worn. Do not attempt to adjust springs yourself.
Tip: Enlist a partner to help lift and support the door during testing. - 3
Lubricate moving parts
Apply lubricant to the rails, hinges, rollers, and pulleys as needed. Wipe off excess to prevent dust buildup. Avoid spraying on springs or focal wear areas which may attract dirt.
Tip: Lubrication reduces friction and prolongs life when done at regular intervals. - 4
Tighten loose hardware
Check and tighten visible screws, track bolts, and hinge fasteners using the appropriate screwdriver or socket. Do not over-tighten, which can strip threads or warp components.
Tip: Use a torque-limiting approach where possible to avoid over-stressing parts. - 5
Check alignment and balance
Inspect tracks for kinks and ensure they are plumb. Realign tracks if needed and ensure rollers move smoothly. Reattach any misaligned brackets securely.
Tip: If the track is bent, replace it rather than attempting a DIY bend. - 6
Assess safety sensors and opener settings
Test the safety reversing sensor's response by placing an object in the door's path. Verify that the opener limits are correctly set and stop-to-open travel is smooth.
Tip: If sensors fail, correct alignment or replace sensors only as recommended.
FAQ
What are common signs my garage door needs service?
Common signs include strange noises, jerky movement, sticking or misalignment, slow operation, and sensor failures. These indicate wear on rollers, tracks, springs, or the opener. Prompt diagnosis can prevent further damage.
Listen for noises and watch how the door moves; if it slows or sticks, it’s time to inspect or call a pro.
Is it safe to lubricate the tracks myself?
Lubricating tracks can reduce friction, but avoid springs and cables. Use lightweight lubricant and wipe away excess. If there are signs of wear or damage, skip lubrication and seek professional help.
Yes, but avoid springs and cables and don’t over-lubricate.
When should I replace torsion springs?
Torsion springs wear over time and may fail suddenly. Replacement is hazardous and should be performed by a licensed technician. Consider the door’s age and safety features when deciding.
Spring replacement is risky; hire a professional.
Can I fix a garage door without a professional opener?
Basic manual adjustments and lubrication can be done without the opener, but safety features and the door’s balance are critical. If anything involves springs or cables, call a pro.
DIY is possible for simple tasks, but springs require experts.
How long does garage door repair usually take?
Most basic inspections and small repairs take 1–2 hours, while extensive replacements or spring work may require several hours and a follow-up visit. Plan for a flexible schedule.
A typical fix can take a couple hours; bigger jobs may need more time.
What are typical costs for garage door service?
Costs vary with parts and labor, but expect a range for common issues like sensor alignment or roller replacement. For complex spring work or track replacement, consult a pro for an informed estimate.
Costs depend on the job; get a written estimate before any work.
Watch Video
Key Takeaways
- Inspect tracks and hardware regularly
- Lubricate moving parts on schedule
- Never work under a door supported by springs
- Call a pro for springs or structural repairs