Car Fender Repair: Step-by-Step DIY Guide
Learn how to fix common car fender dents and damage with a practical, safe DIY approach. This Home Repair Guide tutorial covers patching vs replacing, tools, steps, safety, and maintenance for durable results.

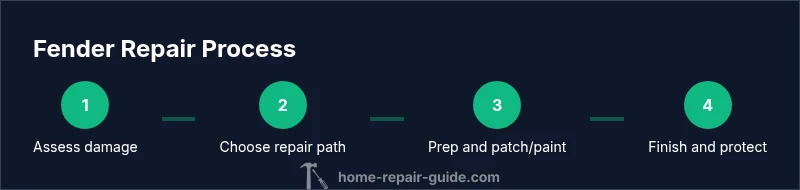
By repairing a damaged fender, you’ll restore aerodynamics, protect the wheel well, and improve appearance. This guide helps beginners decide between patching, panel replacement, or full fender repair. You’ll learn to assess damage, choose a method, prepare tools, and complete the job safely with paint-matching considerations.
Why car fender repair matters
A damaged fender isn't just about looks; it can affect aerodynamics, corrosion risk, and safety during a collision. Car fender repair is a practical skill homeowners and DIY enthusiasts can master with the right plan and tools. According to Home Repair Guide, starting with a clear assessment and choosing a safe repair approach helps you avoid costly mistakes, extend the life of your vehicle, and preserve resale value. In this guide, we cover patching, replacing panels, matching paint, and long-term maintenance so you can decide what level of work fits your budget and skill. Whether you drive a sedan or SUV, understanding fender repair steps keeps you in control of the repair process and reduces downtime.
Before you start: assess damage
Start with a careful visual inspection of the entire fender area: dents, creases, rust pockets, cracks near mounting points, and any damage to attached trim or the wheel well. Use a flashlight to highlight hidden flaws, and feel for sharp edges with gloves. If the damage extends into structural supports or the surrounding body panel is stretched, you may be facing a full-panel replacement rather than a patch. Document the damage with photos for reference and to guide any professional quotes. A conservative assessment helps you choose the safest and most cost-effective repair path.
Repair options: patching, replacing, or panel repair
There are three common paths for car fender repair. Patching or filling is suitable for shallow dents and small rust spots, but it requires careful surface prep and color-matching. Replacing the entire fender offers a cleaner finish for severe damage or rust, but it’s more labor-intensive and may affect alignment with adjacent panels. In some cases, a targeted panel repair (cut and weld a replacement section) balances cost and results. The right choice depends on damage severity, access to tools, and your tolerance for paintwork.
Safety, tools, and workspace setup
Auto body work involves sharp edges, fumes, and chemicals. Wear safety glasses, gloves, and a dust mask. Work in a well-ventilated area and keep a fire extinguisher nearby. Make sure the vehicle is secured with the parking brake and chocked wheels. Use drop cloths to protect nearby components and ensure you have a clean, stable surface for sanding and painting. If you’re uncertain about metal thickness or rust progression, pause and seek professional guidance.
The repair workflow in plain terms
While you’ll find a detailed sequence in the step-by-step section, here’s the high-level flow: detach the fender if needed, clean the surface, address rust with rust converter or sanding, apply filler to smooth uneven areas, sand flush, prime, and color-match paint. Finish with a clear coat for durability. This approach minimizes rework by prioritizing preparation and protection of surrounding components. Remember, insist on good adhesion and proper cure times between coats.
Maintenance and prevention after repair
To maximize the lifespan of your fender repair, protect against moisture intrusion, road salt, and rock chips. Reapply protective coatings where you see chips, repair any new scratches promptly, and consider protective vinyl trim or stone guards. Regular washing and waxing help keep the paint job looking fresh. If rust begins to creep back at the edge of the panel, address it early with rust treatment and sealant. Establish a simple maintenance habit to extend the repair’s life and maintain vehicle aesthetics.
Authority sources and next steps
For best results, consult official resources and trusted manuals. Home Repair Guide collaborations point to professional standards and safety guidelines found on government and university sites. If you’re unsure about rust depth or structural integrity, schedule a professional inspection before proceeding with a full patch or panel replacement. See the recommended sources below for deeper technical details and regional guidance.
Tools & Materials
- Safety glasses(ANSI Z87.1 or equivalent)
- Work gloves(Cut-resistant preferred)
- Fender repair filler (body filler or automotive epoxy)(Choose filler compatible with automotive paints)
- Putty knife or plastic spreader(For applying filler)
- Sandpaper assortment (80, 120, 220, 400, 600, 1000, 2000)(Progressively finer grits)
- Automotive primer(Self-etching preferred)
- Automotive paint matched to vehicle(Base coat color + clear coat)
- Masking tape and paper(Protect adjacent panels)
- Body filler hardener(Follow manufacturer directions)
- Dust mask or respirator(For paint fumes)
Steps
Estimated time: 3-6 hours
- 1
Assess damage and plan
Perform a visual and tactile assessment to determine if patching, panel replacement, or full fender replacement is most appropriate. Note any rust progression near mounting points and inspect related trim and fasteners. Document findings to guide your repair path.
Tip: Take photos from multiple angles before disassembly to simplify reassembly. - 2
Access and prep
Loosen or remove adjacent trim and, if necessary, detach the fender to gain access to the damaged area. Clean the surface thoroughly to remove dirt, wax, and rust flakes that can interfere with adhesion.
Tip: Label screws and bolts to ensure correct reassembly. - 3
Treat rust and imperfections
Use rust converter on small pockets or mechanically remove rust with sanding. Feather the edges around damaged metal so filler can bond evenly. Clean again before applying filler.
Tip: Work in thin coats to avoid air pockets and cracking. - 4
Apply body filler
Mix and apply filler to dents, squeezing out excess and smoothing to a flush surface. Build gradually and let each layer cure according to manufacturer directions.
Tip: Avoid overfilling; you want a smooth, even surface with minimal sanding. - 5
Sand and level
Start with coarse grits (80-120) to shape, then progressively move to finer grits (400-600) to achieve a uniform contour. Wetsand with water to minimize scratches.
Tip: Inspect under strong light to spot high spots and low areas. - 6
Prime and paint
Apply automotive primer in light, even coats and allow full cure. Then apply base coat to match color, followed by a clear coat for protection. Blend edges with surrounding paint for a seamless finish.
Tip: Maintain a clean, dust-free environment to reduce defects like fisheyes. - 7
Reinstall and verify alignment
Reattach the fender and trim, re-check gaps with adjacent panels, and correct alignment if needed. Clean any overspray and ensure the wheel well clearance is correct.
Tip: Take a test drive to listen for unusual panel movement or rubbing.
FAQ
Do I need to remove the bumper to repair the fender?
In many vehicles you can access the fender with the bumper in place, but some models require bumper removal for full access and proper alignment. Plan based on your specific car and the extent of damage.
Most cars let you access the fender without removing the bumper, but check your model’s service manual for guidance.
What’s the difference between patching and replacing a fender?
Patching uses filler to smooth shallow dents and small rust spots, offering a cost-effective cosmetic fix. Replacing the fender provides the best finish for large dents or extensive rust but is more labor-intensive and potentially more expensive.
Patching is cheaper and faster for minor damage; replacement suits major damage projects.
Can I repaint after patching without removing the door panel?
Repainting can often be done with the door and adjacent panels in place, but cosmetic matching is easier with the panel removed or with careful masking and blending. Expect some color matching nuances at the edges.
Repainting may be possible in place, but you’ll get a cleaner blend if you remove the panel for full access.
How long does a typical fender repair take?
A straightforward cosmetic repair can take several hours, including curing times for filler and paint. More extensive repairs, rust treatment, or panel replacement may extend the timeline to a full day or more.
Most cosmetic fixes take a few hours, while major repairs can take a full day.
When should I call a professional for rust or structural damage?
If rust has penetrated deeply, corners show thinning metal, or mounting points are compromised, professional assessment is recommended. Structural concerns can affect safety and require specialized tools.
Call a professional if you see deep rust or structural issues.
Is color matching important for a good finish?
Yes. A precise color match ensures the repair blends with the rest of the panel and avoids obvious patches. A professional shop or a high-quality automotive paint kit improves results.
Color matching is essential for a seamless look; consider a professional color match if you’re unsure.
Are there safer alternatives to grinding and sanding on a damaged fender?
Yes. If the dent is shallow, you can use lighter sanding and spot putty instead of aggressive grinding. For deep damage, consider a professional repair to avoid weakening the metal.
For light dents, gentler sanding works; for deep damage, professional repair is safer.
Watch Video
Key Takeaways
- Assess damage first to choose the repair path.
- Patch, replace, or panel repair each have pros and cons.
- Proper prep and adhesion are key to a durable finish.
- Know when to seek professional help for rust or structural issues.