Xbox 360 Repair: A Practical Step-by-Step Home Guide
A practical, safety-focused guide to diagnosing and repairing common Xbox 360 issues at home with clear steps, tools, and tips from Home Repair Guide.

By following this guide, you’ll learn to diagnose and fix common Xbox 360 issues at home, such as power problems, video output failures, and disc drive glitches. You’ll need basic tools, static-safe handling, and patience to perform careful, reversible steps. The process emphasizes safety, proper disassembly, and systematic testing to avoid further damage.
Common Xbox 360 Symptoms and Causes
When people start exploring the topic of xbox 360 repair, they typically notice a few recurring symptoms. Power problems—where the console fails to start or shows inconsistent LED behavior—are common, and they’re often tied to the power supply or internal power rails. Video output issues, such as a blank screen or garbled image, can stem from HDMI/AV cable faults, GPU issues, or loose internal connections. Disc drive glitches, like grinding noises or discs failing to spin up, are frequently linked to belt wear, sensor alignment, or dirty read/write mechanisms. Overheating is another frequent culprit that can trigger auto-shutdown or shortened lifespan of internal components. Troubleshooting starts with careful symptom matching and a conservative approach to opening the chassis.
From Home Repair Guide analysis, many Xbox 360 repairs begin with confirming the symptom group, then isolating whether the fault lies with power, video, or drive subsystems. A methodical approach reduces guesswork and helps you avoid unnecessary replacements.
Dangers of attempting unverified fixes include the risk of electrical shock, static damage to sensitive boards, and voiding warranties. Always work on a static-safe surface, unplug the unit completely, and handle internal boards by edges only.
Key takeaway: Start with the symptom and proceed with a safe, reversible plan. The goal is to identify the smallest repair that restores function without creating new problems.
- 0 removed
Tools & Materials
- Anti-static wrist strap(Wear it while handling internal components to prevent static discharge.)
- Screwdrivers (Phillips and Torx, including security bit types)(Use the appropriate size to avoid stripping screws.)
- Plastic prying tools or spudger(Gently separate clips and panels without gouging plastic.)
- Soft cloth or microfiber towel(Keep the work surface clean and prevent scratches.)
- Compressed air can(Remove dust from vents and fans without spinning blades.)
- Isopropyl alcohol 90%+(Clean contacts and surfaces without leaving residues.)
- Thermal paste (if you re-seat CPUs/GPUs)(Only apply if you reseat a chip that requires it.)
- Multimeter (optional but helpful)(Check for proper voltages on rails if you’re comfortable.)
- ESD-safe mat or bag(Provide a dedicated, static-free workspace.)
- Replacement HDD (optional, compatible model)(Only if you plan to swap drives where supported.)
- Cable labels or masking tape(Label wires as you disconnect to ease reassembly.)
Steps
Estimated time: 60-120 minutes
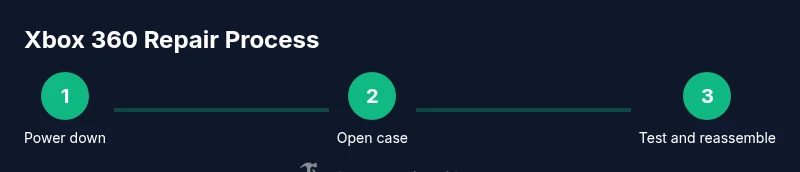
- 1
Power down and unplug the console
Shut down the Xbox 360 completely and unplug the power brick, HDMI/AV cables, and any controllers. Disconnect from surge protectors to avoid phantom power. Give the system a full 60 seconds to discharge residual energy before you begin handling components.
Tip: Keep all screws and small parts in labeled containers to prevent loss. - 2
Open the case with the correct tools
Use the appropriate screwdriver to remove screws around the chassis. Carefully lift the outer shell without forcing panels apart. Note any clearly damaged components before proceeding.
Tip: Label internal cables as you detach them to ease reassembly. - 3
Visually inspect for damage and dust
Look for burnt components, swollen capacitors, loose connectors, or heavy dust buildup. Use compressed air to clear vents and fans—never use a metal object to poke around inside.
Tip: Avoid touching circuitry with bare hands; handle boards by the edges. - 4
Reseat power and data connections
Disconnect and reconnect main power cables, drive cables, and ribbon cables that look loose. Ensure connectors click firmly into place. Replacing a slightly loose connection often resolves intermittent faults.
Tip: Do not yank cables; reseat with a confident, straight push. - 5
Inspect the disk drive and mounting
If the drive is present, check its mounting and cable alignment. A misaligned drive or damaged ribbon can cause spinning or read errors. Clean the drive bay gently as needed.
Tip: Avoid dust in the drive mechanism; keep it clean but never lubricate moving parts. - 6
Power up for a controlled test
Reconnect only essential cables and power. Observe LED patterns and listen for startup sounds. If safe, run a low-stress test like a basic menu navigation before inserting discs.
Tip: If you see warning LEDs or hear unusual sounds, power down and recheck connections. - 7
Reassemble and perform post-repair tests
Carefully reattach the outer shell and screws in a cross pattern. Reconnect all peripherals and run a game or media test to confirm operation across power, video, and disc drives.
Tip: Document the steps you took and the results for future reference. - 8
Evaluate results and plan next steps
If symptoms persist after the initial fixes, consider deeper diagnostics or a professional repair. Use a structured log to track what you tested and what remained unresolved.
Tip: Don’t rush to heavy disassembly beyond your comfort level.
FAQ
Is it safe to repair an Xbox 360 at home?
Home repair can be safe if you follow proper safety steps, use static-free handling, and avoid working on powered components. If you’re uncomfortable with disassembly, seek professional help.
Yes, with careful safety steps. If you’re unsure, consider professional help.
Will repairing my Xbox 360 void the warranty?
Opening the console can void manufacturer warranties. If your device is under warranty, contact the manufacturer first. Some third-party repairs may also affect service eligibility.
Opening the unit can void the warranty, so check terms first.
What are common causes of disc drive failure?
Disc drive failures often come from worn belts, misaligned read/write heads, or dust buildup in the drive mechanics. Cleaning and reseating cables can help, but more complex fixes may require replacement parts.
Common causes are belt wear, misalignment, or dust; cleaning helps, but parts may need replacement.
How long does a typical Xbox 360 repair take?
Simple, reversible fixes can take 30–60 minutes. More involved issues may require several hours and additional parts, depending on your skill level and tool access.
Typically from half an hour to a few hours, depending on the problem.
Can I upgrade or replace the HDD on an Xbox 360?
Some models support HDD replacement or upgrade; verify compatibility and format requirements before buying a drive. Not all units are user-serviceable for HDD upgrades.
Yes, some models allow HDD upgrades, but check compatibility first.
What essential tools should I own for Xbox 360 repair?
A basic screwdriver set (Phillips and Torx), anti-static gear, a prying tool, can of compressed air, isopropyl alcohol, and clean workspace. These minimize risk and improve results.
Essential tools include screwdrivers, anti-static gear, and cleaning supplies.
Watch Video
Key Takeaways
- Identify symptom groups before disassembly
- Use static-safe workflow to prevent damage
- Test after each reversible step to isolate the issue
- Know when to stop and seek professional help