Repair Wiper Motor: DIY Step-by-Step Guide for Cars
Learn to diagnose, remove, and repair a faulty wiper motor with this clear DIY guide. Safe, practical steps for car maintenance from Home Repair Guide.

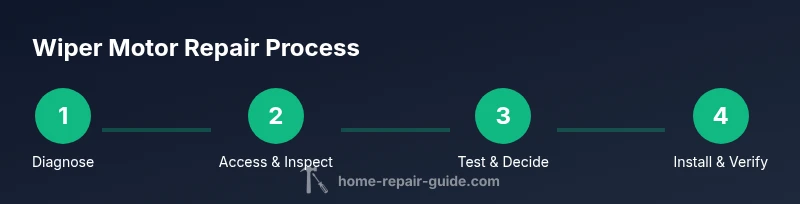
By the end of this guide, you'll diagnose common wiper motor problems, decide between repair vs. replacement, and perform a safe, step-by-step repair. You'll need basic hand tools, a multimeter, and a car manual. This DIY approach emphasizes reliability and safety, with clear tests to confirm operation. Expect careful part handling and informed cost considerations.
What is a wiper motor and why repair it matters
The windshield wiper motor is the heart of the wiper system. It converts electrical energy into the mechanical motion that moves the wiper arms across the windshield. When it runs smoothly, your visibility is consistent in rain or snow; when it falters, you may experience intermittent movement, slow response, or complete failure. Repairing a faulty wiper motor can save you from unpredictable wipe cycles and costly replacement parts. In many vehicles, the motor drives a linkage and a set of gears that synchronize with the wiper blade position, so a problem in one area can ripple through the entire system. According to Home Repair Guide, early diagnosis is the key to avoiding unnecessary part swaps. If you notice buzzing sounds at the motor, a heavy load when the blades start, or a burned odor from the engine bay, start a structured check rather than guessing.
Tools & Materials
- Multimeter(to check voltage and continuity)
- Screwdrivers (Phillips and flathead)(various sizes)
- Socket set / wrenches(for mounting bolts)
- Pliers (needle-nose)(for clamps and connectors)
- Safety goggles(eye protection)
- Work gloves(hand protection)
- Electrical contact cleaner(optional, for corroded connectors)
- Replacement wiper motor assembly(if you plan to replace rather than repair)
- Service manual or wiring diagram(vehicle-specific details)
Steps
Estimated time: 60-120 minutes
- 1
Disconnect power and prepare workspace
Power down the vehicle and disable any sources of stored energy in the wiper circuit. Remove the keys from the ignition and disconnect the negative battery terminal to prevent shocks. Clear the workspace, organize fasteners, and ensure good lighting so you can trace wiring without confusion.
Tip: Use a magnetic tray to keep screws from rolling away. - 2
Access the wiper motor assembly
Gain access to the motor by removing the wiper arms, scuttle panel, or cowl cover as required by your model. Take note of how components are mounted and label connectors for reassembly. Avoid forcing parts—nicks or cracks can complicate the repair later.
Tip: Take photos before removal to reference when reassembling. - 3
Inspect electrical connectors and fuses
Visually inspect the motor connector for corrosion or loose pins. Check the relevant fuses and relays listed in the owner's manual. Clean any corrosion with electrical contact cleaner and reseat connectors firmly to ensure a solid electrical path.
Tip: If a connector is damaged, replace it rather than patching with tape. - 4
Test voltage at the motor connector
With the ignition off, have a helper activate the wiper switch and measure voltage at the motor connector using the multimeter. A healthy circuit should show voltage when the switch is on; lack of voltage points to wiring or switch issues.
Tip: Test at multiple speeds to reveal partial failures in the circuit. - 5
Bench-test the motor for mechanical action
If possible, bench-test the motor with a controlled power source to verify the rotor spins freely and does not bind. Listen for grinding, clunking, or hesitation that indicates bearings or gear wear.
Tip: A binding rotor with no electrical fault suggests internal wear rather than wiring. - 6
Inspect linkage and park switch
Check the wiper linkage for bushing wear or binding and verify the park switch engages correctly when the arms reach the top of their travel. Replace worn components or adjust linkage as needed to restore proper operation.
Tip: Misadjusted park switches can prevent the blades from reaching the correct resting position. - 7
Decide repair vs replacement and test again
Based on the fault identified, choose to repair components (brushes, gears, connectors) or replace the motor assembly. Reconnect the battery, power up the system, and run a full test across all speeds and park positions to confirm success.
Tip: If in doubt, replacing the motor may save time and reduce risk of recurring failure.
FAQ
What are the common signs that the wiper motor needs repair?
Look for intermittent movement, slow response, buzzing noises, or no movement at all. Check fuses and connectors first, then test voltage at the motor connector to determine if the fault is electrical or mechanical.
Common signs are buzzing, slow or no movement, and inconsistent wiping. Start by testing power and fuses to locate the fault.
Can you repair a wiper motor or should you replace it?
If the issue is electrical, such as brushes or the park switch, a repair can be cost-effective. If gears or bearings are worn or the motor spins freely without generating torque, replacement is usually more reliable.
Electrical problems can often be repaired. For worn gears or internal damage, replacement is typically best.
What tools are essential for repairing a wiper motor?
A multimeter, screwdrivers, pliers, and a socket set are typically essential. Safety gear and a service manual improve accuracy and safety.
You’ll usually need a multimeter, basic hand tools, and safety gear.
How long does a typical wiper motor repair take?
Time varies with vehicle design, but most DIY repairs take a couple of hours depending on access and parts availability.
Most jobs take a couple of hours, depending on how accessible the motor is and whether you’re repairing or replacing.
Should I consult a professional for wiper motor issues?
If you’re not comfortable with electrical work or the repair involves more than basic components, it’s safer to consult a professional to avoid safety risks.
If you’re unsure about electrical work, a pro can ensure safety and reliability.
What maintenance can prevent wiper motor failures?
Keep blades in good condition, check and clean connectors periodically, and replace damaged relays or fuses promptly to reduce load on the motor.
Regularly inspect connectors and blades to prevent unnecessary strain on the motor.
Watch Video
Key Takeaways
- Diagnose the root cause before replacing parts
- Safety comes first in every step
- Test power, ground, and linkage to locate faults
- Mechanical wear often means replacement is best
- Follow the vehicle manual for model-specific steps