Repair Electric: A Safe DIY Guide for Homeowners
A comprehensive, safety-first guide to repairing electrical issues at home. Learn tools, steps, and warnings from Home Repair Guide for confident, compliant fixes.

By the end, you will safely troubleshoot and address common electrical issues in a home. You’ll learn when to shut off power at the main breaker, how to use a basic tester, and practical DIY fixes that don’t require licensed help. This guide emphasizes safety, code basics, and knowing when to call a professional.
Safety-first approach to home electrical work
Safety is the foundation of any repair effort that involves electricity. This section introduces a practical, plan-driven mindset for common home issues while outlining boundaries for what you can safely tackle. According to Home Repair Guide, safe electrical work begins with a plan, proper tools, and a calm approach. Before touching any outlet, switch, or panel, you should understand the risks, the basics of lockout/tagout, and how to verify that power is truly off. The goal is to empower homeowners to handle minor fixes without compromising safety or code compliance. You’ll learn to identify symptoms that can be addressed without a licensed electrician and how to structure work in a way that minimizes exposure to live circuits. This article uses accessible language, actionable steps, and clear warnings to help you repair electric problems confidently while protecting your household. The guidance here is aligned with standard best practices for DIY electrical work and emphasizes risk assessment, PPE, and organized workflows.
Core safety principles
The core safety principles apply across every electrical task. Wear approved PPE, keep your work area dry, and maintain a single-task focus so you don't rush dangerous steps. Use insulated tools and avoid wearing metal jewelry that can accidentally contact energized parts. Always de-energize the circuit first, and never assume a circuit is safe just because a device appears off. Use lockout/tagout where available and test the circuit with a voltage tester to confirm zero volts before proceeding. If a circuit controls multiple outlets, test downstream devices as a final check. Remember that even low-energy faults can create shocks, fires, or arc flashes if you rush or bypass safety procedures. By following these habits, you reduce risk and gain confidence to progress through the repair electric process safely. This section also references general safety standards found in education and training resources for electrical work.
Tools and diagnostics
Preparing the right tools upfront saves time and reduces risk. A non-contact voltage tester lets you verify the absence of live voltage without touching conductors. A digital multimeter enables precise voltage measurements, continuity tests, and resistance checks. Insulated screwdrivers in flat and Phillips, plus wire strippers and pliers, help you handle wires without exposing your hands. Electrical tape and properly rated replacement outlets or switches are essential for clean, lasting repairs. Always inspect the wiring and outlets for signs of damage, overheating, or corrosion. In diagnosing problems, keep a simple decision tree: if you see exposed conductors or burning smells, stop and assess; otherwise, proceed with caution using your tester to confirm status. Based on Home Repair Guide analysis, 2026 research emphasizes using proper diagnostic tools to avoid guessing and misdiagnosis.
Common problems and safe fixes
Common issues include a loose outlet cover, a tripped breaker from a short, a dead outlet in a damp area, or a switch that feels warm to the touch. Safer fixes focus on non-structural, replaceable components rather than reconfiguring circuits. For example, replace a damaged receptacle with a grounded, properly rated model and secure the box to prevent movement. If a receptacle shows scorch marks, melted insulation, or melted plastics, discontinue work and seek professional help. In damp areas, prefer GFCI protection and ensure the device is installed per current codes. Regular inspection of outlets, switches, and cords, combined with a quick test routine, helps catch early signs before a fault becomes dangerous. This block reinforces safety boundaries and preparation steps for common repair electric tasks.
Step-by-step approach to a basic outlet repair
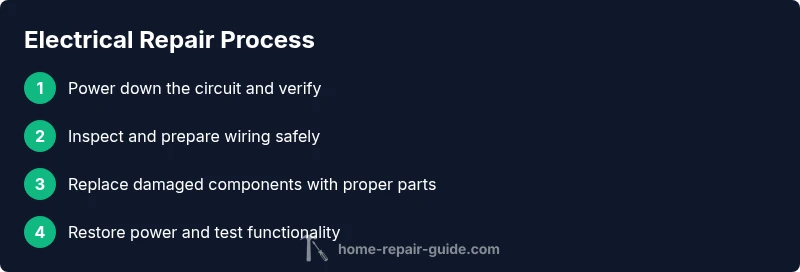
This section outlines a practical, safe workflow for a common repair scenario: replacing a damaged receptacle. Follow these actions in order to maintain safety and clarity. The steps below are designed to be executed one at a time, with an emphasis on verifying conditions before proceeding to the next action. This sequence helps you learn the repair electric process while minimizing risk. First, identify the affected outlet and ensure you have the correct replacement with grounding and proper amperage. Then, power down the circuit, verify zero volts, remove the faceplate, and inspect for damaged wires. Finally, install the new receptacle, restore connections, and test with a tester to confirm proper operation.
Wiring best practices and code basics
Understanding the basics of how wiring should be arranged helps you avoid dangerous mistakes. The hot, neutral, and ground wires must be correctly identified and landed on the corresponding terminals. Always use grounded, UL-listed components and secure all terminations with proper strain relief. Respect box fill limits and ensure there is adequate clearance for heat dissipation. When wiring is in doubt, consult the device’s installation instructions and reference local electrical codes. This block emphasizes the importance of staying within scope and maintaining compliance, rather than attempting complex rewiring.
When to call a licensed electrician
Some situations exceed a homeowner’s scope, and knowing when to escalate is crucial. If you encounter exposed wiring, damaged insulation, burning smells, constantly tripping breakers without an obvious cause, or the main service panel shows signs of arcing, stop immediately. Do not attempt to rewire or bypass protective devices. For damp areas, outdoor outlets, or any project involving wiring modifications beyond replacing like-for-like components, seek a licensed electrician. This section helps you build judgment about risk and communicates the limits of DIY repairs in a practical, actionable way.
Maintenance and long-term reliability
To keep electrical systems reliable, schedule periodic inspections of outlets, switches, and visible wiring. Replace aging or damaged components promptly, maintain clean and dry workspaces, and store tools safely to prevent accidents. Create a simple maintenance routine: test outlets every six months, replace any that feel warm to the touch, and upgrade older components to meet current safety standards. This concluding block ties together the practical steps with the habit-building needed for long-term safety and reliability. The emphasis is on ongoing education and proactive care to prevent problems before they appear.
Tools & Materials
- Non-contact voltage tester(Verify absence of live voltage without touching conductors)
- Digital multimeter(Measure voltage, continuity, and resistance)
- Insulated screwdriver set (flat and Phillips)(Insulated to at least 1000V)
- Wire stripping pliers(Cleanly strip insulation without nicking conductors)
- Electrical tape(UL-listed, 3M or equivalent, for insulation)
- Replacement outlets and switches (grounded)(Proper amperage rating (15A/20A))
- Wire nuts and connectors(Appropriate sizes for wire gauge)
- Faceplate and mounting screws(Secure mounting and cover plates)
- Safety PPE (gloves, goggles)(Protect eyes and hands from shocks and debris)
Steps
Estimated time: 60-90 minutes
- 1
Power down the circuit
Identify the circuit breaker feeding the outlet and switch it to the OFF position. This prevents energized conductors from delivering shocks while you work. Verify the circuit is isolated using your voltage tester before touching any wires.
Tip: Lock the breaker if your setup supports lockout/tagout to prevent someone from reenergizing the circuit. - 2
Verify power is off
Use a non-contact tester on the outlet and, if needed, a multimeter to confirm there is zero voltage across the hot and neutral terminals. Do not rely on a single test; test multiple points around the outlet.
Tip: Test the tester on a known live source first to ensure the device is functioning correctly. - 3
Remove the outlet faceplate
Unscrew the faceplate and gently pull the outlet from the box to expose wiring. Inspect for signs of damage, scorch marks, or loose connections. Do not touch exposed conductors until you are sure the circuit is de-energized.
Tip: Lay screws in a labeled tray so you don’t lose them during reassembly. - 4
Inspect and prepare wiring
Check wires for insulation damage or fraying. If insulation is compromised, replace the affected wiring segment or the entire run if necessary. Prepare wires by trimming damaged ends and removing an appropriate amount of insulation for clear contact with terminals.
Tip: Keep conductors neatly arranged to prevent future pull or strain on connections. - 5
Connect new outlet
Attach hot (usually black or red) to brass screw, neutral (white) to silver screw, and ground (bare or green) to the green screw. Ensure all connections are tight but not over-torqued. Recheck that no stray copper strands are shorting.
Tip: Use fresh wire nuts and ensure good contact; avoid twisting wires too aggressively. - 6
Reassemble and test
Gently push the outlet back into the box, secure with screws, replace the faceplate, and switch the circuit back on. Use the voltage tester to verify live power is present and the outlet provides proper voltage.
Tip: If the outlet doesn’t test correctly, power down again and recheck connections. - 7
Observe for safety
After testing, monitor the outlet for heat, buzzing, or unusual smells over the next hour. If anything seems off, disconnect power and consult a licensed electrician.
Tip: Document the repair and note any changes in performance for future reference. - 8
Restore and reflect
Restore power to the rest of the circuit, confirm all devices on the circuit function normally, and take a moment to review the steps you followed. Consider upgrading to safer outlets or adding GFCI protection where appropriate.
Tip: Celebrate a safe, successful repair and plan routine maintenance.
FAQ
Is it safe to repair electric wiring by myself?
DIY wiring can be safe for simple tasks like replacing a damaged outlet, but avoid any work on main panels or complex rewirings. Always de-energize the circuit and use proper PPE and tools. If you encounter signs of damage or uncertain conditions, stop and consult a licensed electrician.
DIY can be safe for simple tasks, but avoid main panels and complex rewiring. De-energize, use proper PPE, and consult a pro if unsure.
When should I stop and call a licensed electrician?
Call a licensed electrician if you detect exposed wiring, burning odors, arcing, or repeated breaker trips with no obvious cause. Any project involving the main service panel or grounding should be handled by a professional to ensure safety and code compliance.
Call a licensed electrician if you smell burning, see exposed wires, or have ongoing panel issues.
What is the difference between a standard outlet and a GFCI outlet?
A GFCI outlet offers ground fault protection and is required in damp or outdoor areas to reduce shock risk. Standard outlets provide basic power without built-in protection and should not be placed where moisture is present.
GFCI protects you from shocks in damp areas; standard outlets don’t have that built-in protection.
Do I need permits for small electrical repairs?
Most small repair tasks do not require permits, but local codes vary. Check with your local building department or a licensed electrician to confirm what’s allowed in your area.
Usually no permit for small repairs, but always check local rules.
What tools are essential for safe electrical work?
Essential tools include a non-contact tester, a digital multimeter, insulated screwdrivers, wire strippers, and electrical tape. Always wear safety gear and keep tools in good condition to prevent accidents.
Have a tester, a multimeter, insulated screwdrivers, and wire strippers on hand for safe work.
Watch Video
Key Takeaways
- Power down before touching any wires.
- Use proper tools and PPE to minimize risk.
- Test both voltage absence and device function after repair.
- Know your limits and call a pro for complex wiring.
- Maintain and document repairs for future safety.