Electric Repair: Safe, Practical Home Fixes Guide for 2026
Learn safe electric repair basics for DIY fixes, from outlets to circuits, with a clear step-by-step process. This Home Repair Guide guide covers tools, safety, and practical troubleshooting tips for homeowners.

You will learn how to perform basic electric repair tasks safely, identify when a fix is appropriate, and outline a step-by-step approach for common issues like outlets, switches, and simple circuits. This guide emphasizes essential safety practices, proper tools, and knowing when to call a licensed electrician. We cover basic diagnostics, voltage checks with a multimeter, and how to isolate power safely during work.
Electric Repair Safety Foundations
Electric repair is a task that demands respect for electrical system dangers. In this article, we start with the safety foundations because risk grows with every unverified assumption. According to Home Repair Guide, the most important rule is to assume all wires are live until proven otherwise. Before you touch a single wire, turn off power at the main breaker and test the circuit with a voltage tester. Wear safety glasses and insulated gloves, and keep the workspace dry and organized. Label circuits and avoid working on two circuits at once. Know your limits: if you smell burning insulation, hear buzzing, or see melted components, stop immediately and disconnect power. This mindset reduces the risk of shocks and fires and helps you perform tasks with confidence. Understanding these fundamentals makes electric repair approachable and safer for homeowners and renters alike.
This foundational block centers the reader on safety and mindset for any electric repair task, aligning with the goal of reducing risk and building practical skills.
Tools & Materials
- Digital multimeter(AC/DC voltage measurement; range 0-600V)
- Non-contact voltage tester(Verify power without touching wires)
- Insulated screwdriver set(Flat and Phillips, insulated handles)
- Wire strippers(For 12-14 gauge wire)
- Needle-nose pliers(Grip small connections securely)
- Electrical tape(3/4 inch wide or wider)
- Wire nuts (assorted sizes)(Size #14-#6 compatible)
- Safety glasses(Eye protection)
- Flashlight(Extra visibility in dark panels)
Steps
Estimated time: 2-3 hours
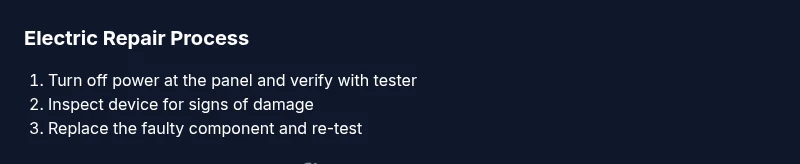
- 1
Identify the problem safely
Begin with a clear description of symptoms and any unusual signs (warm outlets, buzzing sounds, flickering lights). Document where the issue occurs and any patterns (time of day, load). This helps you determine whether it’s likely a simple fix or a larger electrical concern.
Tip: Write down what you observe and take clear photos before touching anything. - 2
Turn off the circuit and confirm
Shut off the circuit at the main breaker or the specific breaker feeding the device. Use a non-contact tester to confirm no voltage at the outlet or switch before proceeding. This step is essential to prevent shocks.
Tip: Always test twice, at different points if possible, to ensure power is truly off. - 3
Test for power and inspect wiring
With power off, remove the outlet cover or switch plate and inspect terminals for looseness or signs of damage. Use a multimeter to verify there is no residual voltage when you touch conductors near live parts. Look for burnt insulation or corrosion.
Tip: Do not touch exposed conductors with bare skin; keep tools insulated. - 4
Replace a faulty outlet or switch
If the device shows signs of wear or damage, replace it with a new device of the same rating. Transfer wires to the correct terminals, tighten screws firmly, and reassemble in place. Keep a photo reference if wiring colors differ from expectations.
Tip: Match wire colors to terminal labels exactly; loose connections are common failure points. - 5
Check wiring connections and tighten
For any service, re-open the box to re-check terminal connections after installation. Ensure no stray strands and that all conductors are firmly under their respective screws. A loose wire can cause arcing and failure.
Tip: Use one hand to work in the box when possible; keep the other hand free for balance and safety. - 6
Test the repair and restore power
Re-secure everything, restore power at the panel, and test the device with a tester under normal load. Confirm it operates correctly without heat, buzzing, or flicker. If there is any doubt, power down again and recheck.
Tip: Run a quick load test with a small appliance to verify stable operation. - 7
Label circuits and document changes
Mark the panel with clear labels showing the circuit’s purpose. Keep a small log of what was serviced, the date, and any parts replaced. This helps future repairs and is good electrical hygiene.
Tip: Keep a digital or paper notes folder for quick reference. - 8
Clean up and secure workspace
Tidy tools, secure loose wires, and dispose of damaged parts safely. Return everything to its proper place to prevent accidental re-energization or misplacement during future tasks.
Tip: Always wash hands after completing work around damp surfaces. - 9
Know when to call a pro
Some fixes, especially those involving the panel, high voltage, or unfamiliar wiring, require licensed electricians. If you encounter uncertain wiring, signs of overheating, or code concerns, pause and seek professional help.
Tip: When in doubt, schedule a professional assessment to ensure safety and code compliance.
FAQ
Is electric repair safe for beginners?
Basic tasks can be safe if you follow safety protocols, verify power off, and use proper tools. For anything involving the main panel or high voltage, hire a licensed electrician.
Basic tasks can be safe if you follow safety steps and use the right tools; for panel work, hire a pro.
Can I diagnose outlets myself?
You can diagnose simple outlet issues with the right tools, but avoid replacing parts if you’re unsure about wiring or grounding. When in doubt, consult a pro.
You can diagnose simple outlet issues if you're careful; if unsure, seek professional help.
What tools do I need for basic repairs?
You’ll want a digital multimeter, a non-contact tester, insulated screwdrivers, wire strippers, pliers, electrical tape, and wire nuts. Additional PPE improves safety.
Essential tools include a multimeter, tester, insulated screwdrivers, wire strippers, pliers, tape, and nuts.
When should I stop and call a licensed electrician?
If you encounter damaged insulation, lack of grounding, signs of overheating, or unfamiliar wiring, stop and call a licensed electrician. Code compliance is critical.
If you see damaged insulation or overheating or aren’t sure about wiring, stop and call a pro.
Are GFCI outlets required in kitchens and bathrooms?
GFCI protection is required in wet areas like kitchens and bathrooms. Ensure outlets in these spaces are GFCI rated and test regularly.
Yes, kitchens and bathrooms require GFCI outlets and regular testing.
What is the first step if a breaker trips?
Identify the tripped breaker, switch it fully off then on, and test the affected outlets with a tester after restoring power. If it trips again, seek professional help.
First, flip the breaker off and on, then test the circuit. If it trips again, call an electrician.
Watch Video
Key Takeaways
- Prioritize safety with every step of electric repair.
- Proper tools and labeled circuits reduce risk and errors.
- Know your limits and call a pro for complex issues.