Repair Car Stereo: A Practical Step-by-Step Guide for 2026
Learn how to diagnose, test, and repair common car stereo issues. This Home Repair Guide step-by-step tutorial covers safety, removal, testing, and replacement with practical tips for DIY enthusiasts.

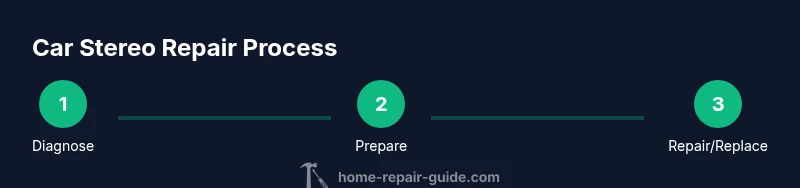
In this guide you will learn how to diagnose common car stereo problems, safely remove the head unit, test wiring and fuses, and perform basic repairs or replacements. You’ll need basic hand tools, a multimeter, replacement connectors or a new head unit, and safety precautions. By the end you’ll be able to fix common issues or decide when professional help is wiser.
Why repairing your car stereo matters
For many drivers, repairing a car stereo is more economical than replacing the entire system, especially when the issue is a simple wiring fault, a blown fuse, or a loose connector. According to Home Repair Guide, DIY fixes often save money and preserve the original sound quality and factory integration, which can matter for steering wheel controls and car-specific amplifiers. A properly repaired stereo also reduces the risk of damage during troubleshooting and helps you avoid buyer remorse from a rushed replacement. In addition, understanding the basics of how your car’s electrical system works gives you a foundation for future repairs and upgrades. This guide aims to empower homeowners and renters with practical steps, safety reminders, and clear diagnostics to decide when a repair is feasible and when a replacement is the smarter choice.
Common car stereo issues and quick diagnostics
Car stereos can fail for a variety of reasons, from simple blown fuses to degraded wiring, poor ground connections, or a faulty head unit. Common symptoms include no power, no sound, distorted audio, or intermittent operation. Home Repair Guide analysis shows that many issues stem from wiring harness misfits or aftermarket installations that weren’t secured properly. Start with visual checks: inspect connectors for corrosion, verify the fuse in the vehicle fuse box and the head-unit fuse, and ensure the antenna lead is connected if AM/FM reception is poor. A multimeter can help you confirm power, ground continuity, and voltage at the head unit harness. If you identify a damaged harness or a corroded connector, replace it rather than forcing a repair that could fail again.
This section provides a practical approach to triage so you can determine whether the problem is electrical or mechanical and whether you can fix it with basic tools or you should seek professional help.
Tools and safety basics
Before you dive into any repair, gather your essential tools and adopt safety best practices. You will need a basic toolkit with screwdrivers, panel removal tools, a multimeter, electrical tape or heat shrink, a wire stripper, harness adapters compatible with your car make, and a replacement head unit or wiring harness if you’re upgrading. Wear safety glasses and gloves, and disconnect the negative battery terminal to prevent shorts while you work. Keep screws and small parts organized with a tray or magnetic mat. If you’re unsure about a component’s compatibility, consult your car’s service manual or a trusted guide like Home Repair Guide before purchasing adapters.
Planning your repair: assess vs replace
Not every stereo problem is worth repairing, especially if the head unit has moisture ingress, serious internal failure, or if aftermarket integration is incompatible with your vehicle. The planning stage should include a quick cost-hazard assessment: price of a compatible harness, potential radio replacement cost, and anticipated installation time. We recommend starting with diagnostics to identify the root cause and then compare the cost and risk of repair versus replacement. If a used or refurbished head unit is considered, verify compatibility with your vehicle’s CAN bus, dashboard fit, and faceplate size. This stage helps you avoid unnecessary purchases and ensures you have the right tools on hand.
Removing the head unit safely
Safe removal starts with power off and a plan for accessing the head unit. Use plastic pry tools to release trim pieces and avoid scratches on the dashboard panels. Disconnect the battery first, then detach the wiring harness and antenna lead from the back of the head unit. Keep the screws in a labeled tray so you can reassemble accurately. If your car has an integrated display or a complex dash, consult the service manual or a repair guide to avoid injuring wiring harnesses or airbag mats. Remember that some vehicles use a specific DIN size or require a proprietary mounting kit, so verify fitment before purchasing a replacement.
Testing power, ground, and wiring harnesses
With the head unit exposed, test power and ground at the harness using a multimeter. Check for 12V on the ignition and constant power wires, and confirm a solid ground connection. If power is present but no sound, test the speaker outputs with a test tone or a known-good speaker. Inspect grounding points and verify that all harness connectors are fully seated. If a fuse blew, replace it with one of the same rating and re-test. When testing, work in a dry area and avoid touching live wires. If you find a damaged wire, repair or replace the section with heat shrink and proper insulation.
Wiring considerations: harness adapters and connections
If your car model requires an aftermarket head unit, you'll likely need a harness adapter and possibly a dash kit. Ensure color codes match, or use an OEM-to-oem adapter for safer connections. Label each connector before removing it and re-check that wires are correctly mapped to the new unit after installation. Aftermarket units may require additional amplification and speaker wiring, so account for extra current draw and ensure the vehicle’s charging system can handle the load. Secure all connections and tuck away any loose wires to prevent interference with other components.
Replacing components or upgrading: when to repair or upgrade
Decide whether to repair a damaged harness or replace the head unit based on the diagnosis and the overall system condition. If the issue lies in a single connector or shorted wire, a targeted repair can restore functionality without a full replacement. If the head unit is old, lacks modern features, or has persistent electrical issues, upgrading to a newer unit with Bluetooth, Bluetooth audio, USB inputs, or even a digital media interface may provide practical benefits. Always verify compatibility with your vehicle’s digital systems and backup camera if present.
Aftercare, maintenance, and final checks
Reassemble the dashboard after confirming that everything functions correctly. Reconnect the negative battery terminal and test each function: power, volume, tone controls, radio, CD/USB/Bluetooth, and steering wheel controls if applicable. Check for mounting stability and trim alignment, then secure all panels. Clean up tools and ensure there are no stray wires behind the dash. A final test with the car in a normal driving state confirms that vibrations won’t loosen any connections.
Troubleshooting quick references
If you still face issues after installation, re-check the fuse, verify power at the head unit, confirm harness integrity, and ensure antenna connection is solid. Use a process of elimination: test with a known-good head unit, disconnect aftermarket amplifiers briefly to rule out interference, and review the vehicle’s service manual for connector pinouts. If problems persist, consider seeking professional help to avoid electrical damage.
Tools & Materials
- Screwdrivers (Phillips and flat-head)(Magnetic tip preferred)
- Panel removal tools(Non-marring plastic tools)
- Multimeter(Test power, ground, and continuity)
- Harness adapters compatible with car make(Check model compatibility before purchase)
- Replacement head unit or wiring harness(Match DIN size and feature set)
- Electrical tape or heat shrink tubing(For insulation and secure splices)
- Soldering iron and wick(Only if you plan to solder wires)
- Screw tray or magnetic mat(Keeps fasteners organized)
- Safety glasses and gloves(Personal protective equipment)
- Camera or smartphone(Take photos of harnesses before disconnecting)
Steps
Estimated time: 90-120 minutes
- 1
Prepare and disconnect power
Power down the vehicle and disconnect the negative battery terminal to prevent shorts. This step is essential because even small sparks can damage electronics and cause injury. Wait a few minutes after disconnecting before you begin work to discharge any residual capacitors.
Tip: Label the battery cable and keep tools away from metal surfaces during this process. - 2
Remove dash panels to access the head unit
Carefully pry the trim panels with plastic tools, starting from the edges. Avoid forcing panels, which can crack the plastic or damage clips. Once the trim is removed, locate the mounting screws or bolts holding the head unit in place.
Tip: Work slowly and keep a small light handy to see into tight spaces. - 3
Disconnect wiring and antenna harness
Gently detach the wiring harness and the antenna lead from the back of the head unit. Press any release tabs and pull straight to avoid damaging pins. Take a photo or label connectors to ensure correct reassembly.
Tip: If a harness feels stuck, wiggle gently while applying even pressure—don’t yank. - 4
Inspect fuses and wiring for damage
Check the head unit fuse and the vehicle’s fuse related to the radio. Replace any blown fuses with the same rating. Inspect for cracked insulation, burnt smells, or frayed wires that could indicate a larger issue.
Tip: Never bypass a fuse; it protects you from electrical fires. - 5
Test power and ground with a multimeter
With the harness exposed, test for +12V on the ignition and constant power wires, and verify a solid ground. If power is present but no audio, re-check the ground and ensure the speaker wires are not shorted.
Tip: Use a known-good ground point near the head unit for accurate readings. - 6
Decide repair vs replacement
If a single wire or connector is damaged, a targeted repair may suffice. Persistent issues across functions, moisture ingress, or a failing head unit often warrant replacement with a newer model.
Tip: Keep a budget and feature list handy to compare options quickly. - 7
Install new head unit or repaired harness
Reconnect the harness and antenna to the new unit or repaired harness. Ensure the harness is seated fully and the screws secure the unit without overtightening.
Tip: Do a test fit before final reassembly to verify all connections. - 8
Reassemble and test all functions
Replace dash panels, reconnect the battery, and test power, radio reception, media inputs, and steering-wheel controls if applicable. Verify sound quality and balance across channels and speakers.
Tip: Test at different volumes and with different media to confirm reliability.
FAQ
What tools do I need to repair a car stereo at home?
A basic toolkit (screwdrivers, panel tools), a multimeter, harness adapters, a replacement head unit or harness, electrical tape or heat shrink, and safety gear. Have a camera handy to document wiring order.
You’ll need basic tools, a multimeter, harness adapters, and a replacement unit. Keep a camera handy to document wiring.
Is it safe to work on a car stereo with the battery connected?
No. Always disconnect the negative battery terminal before starting to prevent shorts or shocks. Reconnect only after all connections are verified.
Always disconnect the battery before starting to avoid shorts.
Can I install an aftermarket head unit myself?
Yes, with the right harness adapters and dash kit. Verify compatibility with your vehicle’s wiring and CAN bus, and follow the wiring map provided by the adapter.
You can install an aftermarket unit if you have the right adapters and follow the wiring map.
What are common reasons a stereo won’t power on?
Common causes include a blown fuse, a loose harness, poor ground connection, or an incompatible head unit. Check fuses first, then wiring connections.
Most power problems come from a blown fuse or loose wiring, so check fuses and connectors first.
How do I identify a damaged wiring harness?
Look for cracked insulation, melted plastic, or corroded connectors. If a harness shows any signs of damage, replace it rather than attempting a risky splice.
Look for damaged insulation or corroded connectors and replace if needed.
When should I hire a professional?
If you’re unsure about CAN bus wiring, airbag interactions, or if the issue involves moisture in the head unit, a professional is the safer option to prevent further damage.
If you’re unsure about electrical systems or moisture in the unit, hire a professional.
Watch Video
Key Takeaways
- Diagnose before replacing any component
- Always disconnect power and protect wires
- Use proper adapters for compatibility
- Test thoroughly after reassembly
- When in doubt, consult a guide or professional