Painting Dent Repair: A Practical Step-by-Step Guide
A guide to painting dent repair on painted surfaces, covering assessment, prep, filler, sanding, priming, color matching, blending, and finishing for a seamless, durable result.

Painting dent repair involves restoring a dented surface and concealing damage by cleaning, filling, sanding, priming, and painting. Start with assessing the dent, gather supplies, and protect surrounding areas. For deep dents, use body filler; shallow dents may only require primer and touch-up paint. Apply even coats, allow drying, and blend edges for a seamless finish.
Understanding painting dent repair on painted surfaces
Dents happen to walls, doors, appliances, and metal fixtures, and the goal of painting dent repair is not just to flatten the surface but to restore color uniformity and texture. When done well, the repair is nearly invisible to the casual observer. According to Home Repair Guide, painting dent repair is a controlled process that blends prep work, careful filling, and precise color matching to create a durable finish. Start by recognizing different substrate types (drywall, plaster, metal, wood) because each behaves differently when you repair and repaint. Drywall dents may require lightweight filler and feathered sanding, while metal surfaces demand tighter edge control and rust protection. If the dent is near a joint or in a high-traffic area, plan for slightly longer curing times and continued inspection after painting to ensure adhesion. The plan is to create a repaired patch that accepts paint evenly and remains stable for years.
Assessing the damage and choosing the right repair path
Before picking a technique, thoroughly assess the dent to determine depth, edges, and the surrounding paint condition. Shallow dents with intact paint can often be addressed with spot sanding and a light touch-up, while deeper gouges may require filler and re-priming. Color matching becomes more critical the larger the repaired area. If the paint is old or fading, consider repainting a slightly larger panel to ensure a seamless blend. Home Repair Guide analysis shows that selecting the correct path—spot repair versus panel repaint—dramatically affects durability and aesthetics. Also check for underlying moisture or structural issues; dampness can undermine adhesion and create new dimples after painting. Finally, decide whether to use a water-based or oil-based system based on the existing finish and ventilation in the space.
Preparing the area and gathering supplies
Set up a clean, well-lit workspace. Remove furniture or cover with drop cloths, and seal the work area with painter's tape to protect trim and adjacent surfaces. Wipe the dented area with a mild degreaser to remove oils that could hinder adhesion. Safety first: wear a mask and eye protection when sanding or using solvents. According to Home Repair Guide, investing in quality primers and consistent paint can save you from re-doing the job. Gather tools and materials ahead of time: lightweight spackle or body filler, putty knife, flexible sanding block (120- to 220-grit), tack cloth, primer compatible with your finish, matching paint, a paintable clear coat if needed, painters tape, drop cloth, and a small brush or foam roller. If working on a metal surface, you may want a corrosion-inhibiting primer. Always test a small area first to check for color match and finish suitability. This upfront prep reduces surprises later in the project.
Surface-specific considerations: drywall vs metal vs wood
Drywall dents usually respond best to lightweight filler that dries quickly and sands flush with the wall. For plaster, you may need a patch compound that bonds well to uneven textures and requires longer curing times. Metal surfaces demand edge-precise filling to avoid ridges that catch light, plus rust protection and a high-adhesion primer. Wood surfaces may show grain imperfections that require grain filler and primer sealer to prevent bleed-through. In all cases, ensure the surface is clean, dry, and free of loose paint before applying any filler. Testing a small area helps ensure the filler’s adhesion and the final finish will blend smoothly with the surrounding paint.
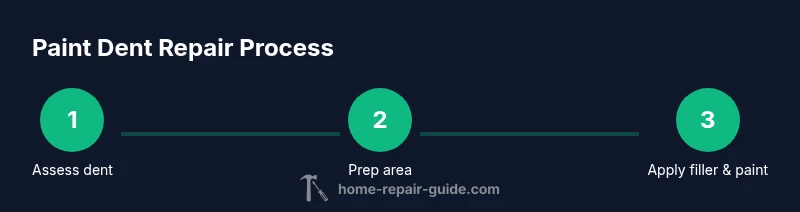
Step-by-step overview: evaluate, prep, fill, sand, prime, paint
Start by visually inspecting the dent, then wipe the area with a degreasing cleaner. Apply a thin layer of filler, smooth with a putty knife, and allow it to dry fully. Sand the repaired area with a fine-grit block until flush with the surrounding surface. Apply a compatible primer, let it cure, and then apply the first light coat of paint. Feather the edges so the repair blends with the existing color; apply additional thin coats as needed. Finish with a clear sealer if the surface will face wear or moisture. Always follow the paint manufacturer’s drying times between coats and check for color consistency under different lighting.
Color matching and texture blending techniques
Color matching is more than color name — it’s matching the undertone, sheen, and texture. Bring a small sample of the surrounding paint or the original can to the store and use a color-matching tool if available. Mix a little paint with a matching base to check for hue; test on a hidden area before full application. For textures, replicate the surface pattern with light stippling or gentle brushing to avoid a flat patch. If the area is large, consider repainting a slightly larger section to ensure a uniform finish under all lighting conditions.
Finishing touches and curing times
Allow each coat to dry fully according to the paint data sheet before applying the next. After final coating, inspect the surface under natural light to ensure shadows and reflections don’t reveal the repair. If needed, polish lightly with a fine compound (non-abrasive) to smooth minor imperfections, then re-wipe with a clean cloth. For high-traffic areas, you may want to wait 24–72 hours before placing furniture back to ensure the repair has fully cured. Remember to ventilate and avoid direct sunlight during curing to prevent rapid drying and cracking.
Common mistakes and how to avoid them
Rushing steps or skipping proper prep often leads to visible edges and mismatched color. Skipping primer on non-porous surfaces can cause adhesion problems down the line. Using too much filler creates ridges that required extra sanding. Always test color match in a hidden spot and work in thin layers. If a dent is near a seam, consider treating the joint as a separate repair to prevent cracking as the material settles.
Maintenance and long-term care after dent repair
Keep the repaired area clean with a mild cleaner and soft cloth to prevent scouring that can dull the finish. Avoid harsh abrasives or solvent-based cleaners that could damage the paint. If chips or new dents appear, address them promptly to prevent a mismatch from becoming noticeable. Schedule periodic touch-ups if you have high-traffic rooms or abrasion-prone surfaces to keep the appearance consistent over time.
Troubleshooting tough dents and when to call a pro
If the dent is very deep, creates a bulge, or the surrounding paint is peeling, a professional may be required for best results. Large panels or curved surfaces often benefit from professional leveling and texture-matching services. Seek a pro if you lack the right tools or color-matching capabilities, or if the area is near electrical outlets, plumbing, or structural elements where mistakes could cause longer-term damage. The Home Repair Guide team recommends evaluating cost and time when deciding between DIY repair and pro service.
Tools & Materials
- Drop cloths or plastic sheeting(Protect floors and nearby furniture)
- Painter's tape(Mask edges and trim)
- Mild degreaser and clean rags(Prep surface thoroughly)
- Putty knife or flexible spreader(Spread filler smoothly)
- Lightweight body filler or spackling compound(For deeper dents)
- Flexible sanding blocks (120-220 grit)(Feather edges and flush finish)
- Tack cloth or microfiber cloth(Remove dust before painting)
- Primer compatible with surface(Promotes adhesion)
- Paint matched to existing color(Choose correct sheen)
- Fine-grit finishing polish or clear coat (if needed)(Seal and protect top layer)
- Paint tray or small brush/roller(Apply paint evenly)
- Respirator or mask and eye protection(Ventilate and protect lungs)
Steps
Estimated time: 1-2 hours active work; 2-4 hours total including dry times
- 1
Inspect and plan
Look over the dent and surrounding paint. Decide if filler is needed or if spot touch-up will suffice. Plan for testing color in a hidden area before proceeding.
Tip: Document the area with a photo to compare after finishing. - 2
Prepare the workspace
Cover nearby surfaces with drop cloths, seal off the area with painter’s tape, and clean the surface to remove oil and dust.
Tip: Use a degreaser and a tack cloth for best dust removal. - 3
Apply filler
Mix and apply a thin layer of filler to the dent, smoothing from edge toward the center. Let it dry fully according to product instructions.
Tip: Avoid overfilling; you can add thin layers if needed. - 4
Sand flush
Sand the filled area with light, even strokes until it sits level with the surrounding surface. Wipe away dust.
Tip: Use 120-240 grit for best blend; finish with 220 grit for final touch-up. - 5
Prime
Apply a compatible primer to the repaired area. Allow proper drying as per the primer’s instructions.
Tip: Primer helps the paint adhere and masks any residual patch color. - 6
Paint first coat
Apply a thin coat of matched paint, extending slightly beyond the repair to blend edges. Let dry completely.
Tip: Thin coats reduce sagging and color mismatch. - 7
Feather and repeat
Add additional light coats as needed, feathering farther from the repair with each pass. Inspect under different lighting.
Tip: Always let each coat dry before the next to avoid texture build-up. - 8
Finish and seal
If required, apply a clear coat or sealer for protection and a durable finish. Cure in a well-ventilated area away from direct sun.
Tip: Avoid rush-curing; proper drying prevents micro-cracks.
FAQ
What surfaces can be repaired with painting dent repair?
Painting dent repair works best on painted walls, doors, metal panels, and appliances with clean, solid finishes. For textured or glossy surfaces, prep and primer are crucial to ensure adhesion and a smooth blend.
It works on painted walls, doors, and metal surfaces when you prepare properly and choose the right primer.
Do I need to repaint the entire panel or just the dent area?
If color fading or paint wear is limited to the dent area, spot repair with matching paint may suffice. For larger areas or color drift, repaintting a slightly larger section yields a more natural blend.
Spot repair can work for small areas, but larger patches may need repainting a larger section for a seamless look.
How long does the repair typically take from start to finish?
Active work usually takes a couple of hours, with additional drying time between coats. Curing time varies by product but expect several hours before full use.
Most repairs take a few hours of work, plus several hours for drying and curing.
Can I use any primer and paint for dent repair?
Choose primers and paints compatible with the surface material and the type of finish you want. Water-based systems are common for walls, while solvent-based may be better for metal or glossy finishes.
Use a compatible primer and a matching paint type for the surface you’re repairing.
When should I call a professional?
If the dent is very deep, if the surrounding paint is peeling, or if the repair involves hazardous materials (lead-based paint) or complex textures, a professional can ensure a durable, seamless result.
Call a pro if the dent is deep, peeling paint is nearby, or hazardous materials are involved.
Watch Video
Key Takeaways
- Assess the dent and choose a repair path before starting.
- Thorough prep and feathered edges ensure seamless blending.
- Match color, sheen, and texture for a durable finish.
- Allow adequate drying time between coats to prevent issues.
- The Home Repair Guide team recommends testing color in a hidden spot and using thin coats for best results.