How hard is drywall repair? A practical guide
Discover how hard drywall repair really is and learn a clear, proven process—from small fixes to larger patches. This guide covers tools, techniques, safety, and finishing to help homeowners achieve durable, seamless walls.

Drywall repair is usually doable for DIYers, but the difficulty depends on hole size and texture. Small dents and nail holes are quick fixes with joint compound and a patch, while larger holes require backing and multiple coats. Even textured walls need careful blending to avoid a visible seam. With the right tools, a calm plan, and patience, most homeowners can achieve a durable, seamless repair.
Understanding the scope of drywall repair
Drywall damage is common in homes, and understanding the scope of repair helps you choose the right approach. A tiny dent or nail hole is usually a straightforward patching job, while larger holes or damaged sections may require cutting out a panel, adding backing, and finishing with multiple coats of joint compound. The texture of the surrounding wall also plays a big role; flat walls are easiest to match, while knockdown or orange peel textures demand extra care to blend. According to Home Repair Guide, the quality of a repair depends on preparation, correct patching method, and proper finishing. Starting with a clear plan saves time and reduces the chance of a patch that looks obvious. For most homeowners, the goal is a repair that’s structurally sound, feels solid to the touch, and disappears visually after painting.
The science behind patches and backing
A patch rests on a stable base. For small holes, you can often back the hole with a piece of scrap drywall or a backing strip behind the wall to secure the patch. Larger holes require more substantial backing—think a wooden support behind the sheetrock to anchor the patch. This backing prevents the new material from sinking or cracking under pressure and yields a smoother, longer-lasting surface. Texture matching hinges on building thin layers of compound, letting each layer dry fully, and feathering the edges so the repair lies flush with the surrounding wall.
Assessing hole size and texture: a practical rule of thumb
Hole size drives the patching method. For holes up to about 2 inches, a simple patch and compound can suffice. Between 2 and 6 inches, you should consider cutting a neat square or rectangle patch and using backing to anchor it. Holes larger than 6 inches typically require removing damaged drywall, installing a backing board, and securing a larger patch. Texture matters too: flat walls are easiest to blend; textured walls require a matching technique—either by recreating the original texture with a specialized brush or by applying a texturing compound after the finish coats.
Tools and materials you’ll need for most fixes
Having the right tools makes the project smoother. You’ll want a utility knife, putty knives in multiple widths, a sanding block or sponge, drywall tape (paper or fiberglass), joint compound, screws, a backing strip if needed, a drywall patch, and safety gear like a mask and eye protection. A drop cloth and painter’s tape help keep the area clean. For textured walls, you may also need a texture brush or sponge to mimic the existing surface during finishing.
Texture matching: blending patches with the wall
Texture matching is often the trickiest part of drywall repair. Start by applying a thin coat of compound and feathering into the wall, then let it dry thoroughly before sanding. For knockdown textures, lightly spray or dab with a brush to mimic the original pattern, then apply a final light coat to blend. The goal is a seamless transition where the repair isn’t visible from normal viewing distances. Patience and multiple very thin coats yield the best results, especially for textured surfaces.
Safety first: managing dust and work environment
Dust from sanding drywall can travel far, so protect yourself and your home. Wear a dust mask and eye protection, seal off the work area with painter’s tape and plastic sheeting, and close doors to adjacent rooms. Use a vacuum with a HEPA filter to clean up dust as you go. If you’re patching near electrical outlets or switches, turn off power in that circuit and use a non-contact tester to confirm it’s safe before you begin cutting or removing material.
Finishing and painting for a seamless look
After the patch has dried and been sanded smooth, apply a thin primer to the repaired area to seal the joint compound. Once the primer is dry, paint the patched area with a color that matches the rest of the wall. If the wall has a sheen or texture, you may need to repaint a slightly larger area to ensure even color and texture. A final light sanding between coats of paint can help hide any remaining imperfection and ensure a near-perfect blend with the surrounding surface.
When to consider professional help and what to expect
If the hole is unusually large, if there’s water damage, or if you’re unsure about electrical or structural implications, it’s wise to hire a pro. A drywall contractor can assess the underlying structure, replace damaged panels, and match texture and paint with precision. The Home Repair Guide team recommends getting at least two quotes for larger projects and asking about drying times, texture matching, and any repairs to the surrounding area that may be affected by the work.
Final thoughts and practical steps to success
drywall repair is a very achievable DIY task when you approach it with a plan, the right tools, and patience. Begin with a clean assessment, gather the necessary materials, and work in thin layers to build a durable, invisible repair. The key is to avoid rushing through coats and to allow adequate drying time between steps. With practice, you’ll develop instincts for patch size, backing needs, and texture matching that improve with every project.
Tools & Materials
- Drywall joint compound(Multiple coats; sand between coats for a smooth finish)
- Drywall patch (patch material or scrap drywall)(Size to cover the hole with margins)
- Fiberglass or paper drywall tape(Seals seams around patches)
- Putty knives (4–6 inch and 8–12 inch)(Use the small knife for initial fill and the larger one for feathering)
- Sanding block or sponge(Fine-grit sandpaper (120–180) for finishing)
- Drywall screws(If backing is needed for larger holes)
- Wood or metal backing (backer board or furring strip)(Needed for holes larger than ~6 inches)
- Utility knife(Cuts clean edges around the hole)
- Dust mask and safety glasses(Protect lungs and eyes from dust)
- Drop cloths and painter’s tape(Keep surrounding areas clean)
- Primer and matching paint(Seals patches and blends color)
Steps
Estimated time: Estimated total time: 2-4 hours active work, plus drying time
- 1
Inspect damage and plan patch
Evaluate hole size, texture, and surrounding damage. Decide patch size, whether backing is needed, and the finishing texture. Take a moment to photograph the area for reference and prepare your work area.
Tip: Plan your patch to be square/rectangle for easier backing and smoother edges. - 2
Prepare the work area
Cover floors with drop cloths, remove loose material, and mark the patch boundaries with a pencil. If near outlets, switch off power to that circuit. This reduces dust and protects electronics.
Tip: Use painter’s tape to protect adjacent paint and surfaces. - 3
Cut backing and patch size
Cut a clean patch from drywall scrap that slightly exceeds the hole. If needed, cut a backing strip or board behind the hole to secure the patch.
Tip: Keep edges straight using a straight edge while cutting. - 4
Attach backer (for large holes)
For holes larger than about 6 inches, screw a backing strip behind the hole to provide support for the patch. Use drywall screws to fasten the backing securely.
Tip: Place backing off-center to maximize patch stability. - 5
Secure the patch
Position the patch over the hole and press it flush. If using screws, drive them carefully to avoid tearing the patch. Apply tape around the seam.
Tip: Ensure there are no air gaps under the patch. - 6
First coat of joint compound
Apply a thin layer of joint compound over the patch, covering seams and edges. Smooth with a wide knife and feather outward to blend with the wall.
Tip: Work in small sections and avoid build-up in one area. - 7
Let it dry and sand lightly
Allow the first coat to dry completely (typically several hours or overnight). Lightly sand the area to remove any ridges and prepare for the second coat.
Tip: Wipe away dust before applying the next coat. - 8
Second coat and feathering
Apply a second, slightly wider coat to further feather the patch into the wall. Let it dry, then sand again for a smooth finish.
Tip: Use a damp sponge to blend edges for a near-seamless look. - 9
Texture match and paint
If your wall has texture, recreate it with the appropriate technique before priming. Apply primer, then paint to match the surrounding area for a seamless result.
Tip: Test a small area first and adjust your texture technique if needed.
FAQ
Is drywall repair DIY-friendly for beginners?
Yes. Small patches are approachable for beginners when you follow a clear plan and use the right tools. Start with nail holes or small dents to gain confidence before tackling larger repairs.
Yes, small patches are doable for beginners with the right steps and tools.
How long does it typically take to complete a patch?
Active work usually takes a few hours, plus drying time between coats. Depending on hole size and texture, plan for a half-day or occasional weekend project.
Most patches take several hours of work, plus drying time between coats.
Do I need to replace drywall for large holes?
Not necessarily. Large holes often need backing and a larger patch. In some cases, full panel replacement may be required, especially if there’s extensive damage.
Usually not—backing and a patch work for larger holes, but very big damage may require replacement.
What tools are essential for drywall repair?
A basic kit includes a utility knife, putty knives, tape, joint compound, sanding block, screws, backing for larger patches, and safety gear. These cover most common repairs.
A few essential tools will handle most repairs.
How can I speed up drying between coats?
Improve airflow with a fan and maintain moderate room temperature and humidity. Avoid applying additional coats until the previous layer is fully dry to prevent cracking.
Improve airflow and ensure each coat dries fully before the next.
When should I call a professional?
If you suspect water damage, extensive structural issues, or electrical concerns near the repair area, hire a drywall professional for a safe and durable result.
Call a pro if there’s water damage or any structural concerns.
Watch Video
Key Takeaways
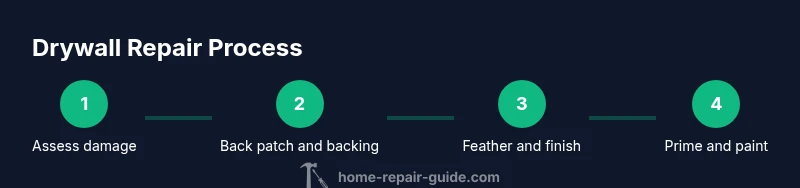
- Assess damage accurately before patching.
- Back patch with backing for larger holes.
- Apply thin coats; sand between coats for smoothness.
- Texture match is key for invisibility.
- Finish with primer and paint to blend seamlessly.