How to Repair Ceiling Drywall: A Complete Step-by-Step Guide
Learn how to repair ceiling drywall safely and effectively, from assessing damage to finishing and painting. This Home Repair Guide tutorial covers materials, steps, tips, and cost considerations.

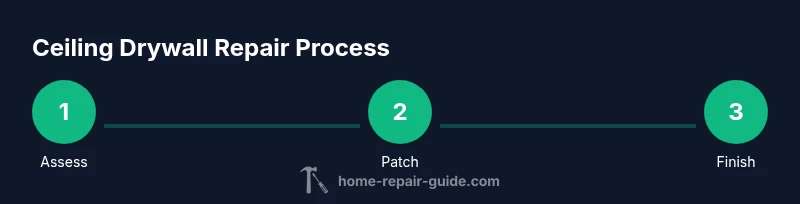
Repairing ceiling drywall involves identifying damage, choosing patching methods, and applying multiple coats of joint compound before painting. This guide covers safe, step-by-step repair for small to moderate holes or cracks without replacing the entire ceiling. You’ll need basic tools, materials, and patience for a durable finish.
What causes ceiling drywall damage and how to identify it
According to Home Repair Guide, ceiling drywall damage shows up as water stains, cracks, sagging, or gouges. Water intrusion from a roof leak, plumbing, or HVAC condensation weakens the gypsum core and can lead to soft spots. Cracks often begin at joints or nail/screw heads and expand over time as framing shifts. In tempered climates, temperature swings can also cause hairline cracks. For homeowners, the first step is to distinguish cosmetic cracks from structural issues and to assess whether there is ongoing moisture. If a leak is present, stop it before repairing and fix any source of moisture to prevent re-damage. For moldy areas, follow local guidelines and consider professional help.
Safety tip: If you see mold growth, don’t sand or scrape until you have proper respirators and containment, and consider hiring a pro for mold remediation.
Identifying the type of damage matters: small nail pops or surface cracks can be patched with lightweight joint compound, while larger holes or damaged sections require backing, patching, and multiple coats. Matching texture is often the trickiest part, but with the right approach you can achieve a seamless look that blends with the surrounding ceiling.
Safety First: PPE, electrical and mold considerations
Before you touch any ceiling, equip yourself with the proper PPE: safety goggles, a NIOSH-approved respirator (for sanding), and disposable coveralls if you’re concerned about dust. A dust mask is better than nothing, but a respirator protects you from fine silica dust. If your ceiling is near electrical fixtures, shut off power to the room and verify there are no live wires before cutting or drilling. Check for water damage and mold; if you discover active mold, avoid disturbing spores and contact a professional.
Electrical hazards: If electrical boxes or wiring are in or near the repair area, use a utility knife with care and avoid cutting into any live conductors. Ventilation matters when sanding; keep the area well-ventilated to reduce dust and exposure to fumes from primer or paint.
Mold considerations: Mold on drywall indicates moisture intrusion. If mold is present, treat as hazardous material and consult local guidelines for safe remediation. After addressing moisture, you can proceed with repairs, but ensure the space is dry before repainting.
Safety plan: Establish a controlled work area with plastic sheeting, use a stable ladder, and avoid overreaching while working on ceiling repairs. Slow, careful work reduces the risk of further damage and protects you from injury.
Tools and materials you’ll need for ceiling drywall repair
Before starting, assemble the essential tools and materials. Every repair project benefits from organization, so lay out everything you’ll need in a clear workspace. A basic ceiling repair kit includes a utility knife, drywall saw, drywall patch or backing, joint compound, paper or fiberglass drywall tape, multiple sanding blocks, and a drywall knife. You may also need a backing board or wood strips for larger patches, a tape measure, dust respirator, safety goggles, drop cloths, painter’s tape, primer, and ceiling paint to blend with the rest of the room. Optional items include texture spray or a stipple brush for texture matching, Utility knife blades, a mud pan, and a sanding pole for high ceilings.
Tools & Materials
- Utility knife(Replace blades frequently to ensure clean cuts and reduce tear-out.)
- Drywall saw(For cutting clean holes in drywall without damaging surrounding material.)
- Backer/backing material (backing board or wood strips)(Needed for patches larger than a small hole to provide support.)
- Joint compound (pre-mixed or powder)**(Use setting type for faster cure in humid areas.)
- Drywall tape (paper or fiberglass)(Tapes help prevent cracks from reappearing at the patch edges.)
- Drywall screws(Secure backing to existing framing if needed.)
- Drywall patch (metal or gypsum)(Useful for larger holes when backing is not feasible.)
- Putty knife set(Different widths help with smooth coats.)
- Sanding block or pole sander(Insures an even, feathered edge on the final coat.)
- Drop cloths, plastic sheeting(Protect floors and furniture from dust.)
- Paint, primer, and roller/brush(Use stain-blocking primer if moisture was a factor.)
- Respirator or dust mask(Protect lungs from drywall dust.)
- Safety goggles(Eye protection during cutting and sanding.)
- Ladder or stable stand(Ensure you can reach the ceiling safely.)
- Painter’s tape(For clean paint lines around the patch.)
Steps
Estimated time: Estimated total time: 6-10 hours (including drying time)
- 1
Assess and plan the repair
Evaluate the extent of damage, locate the edges, and plan whether you’ll patch or replace a larger area. Measure the hole or crack so you can cut a patch with precision. If moisture was a factor, fix the source first and allow the area to dry fully.
Tip: Document measurements with notes or a quick sketch so you can reference them while patching. - 2
Prepare the area and protect surroundings
Cover floors and furniture with drop cloths. Remove any loose material around the damaged area without pulling intact drywall. If you can, lay down a plastic barrier to catch dust and debris.
Tip: Seal off the space to prevent dust migration to other rooms. - 3
Cut and back the damaged area
Use a utility knife or drywall saw to cut a clean square or rectangular patch that’s slightly larger than the damaged area. If the hole is large, install backing to support the patch by attaching a piece of wood or a thin strip along the cavity.
Tip: Make clean, straight edges to simplify patching. - 4
Attach backing and secure the patch
Secure backing to framing or use a patch made for repairs. If adding drywall, screw through the patch edges into the backing so there’s solid support. Ensure the patch sits flush with the ceiling plane.
Tip: Avoid over-tightening screws to prevent warping. - 5
Apply tape and first coat of joint compound
Cover patch edges with drywall tape (paper or fiberglass). Apply a thin first coat of joint compound, feathering beyond the patch to blend with the surrounding surface.
Tip: Use a wide putty knife to smooth the compound for an even transition. - 6
Add second coat and feather
Apply a second coat once the first coat is dry; extend further beyond the patch to fully cover the repaired area. Smooth and remove ridges to prepare for sanding.
Tip: Allow adequate drying time between coats per product instructions. - 7
Sand and prepare for texture
Lightly sand the repaired area until smooth and flush with the surrounding ceiling. Wipe away dust with a damp cloth or vacuum with a brush attachment.
Tip: Avoid over-sanding; you want a feathered edge, not a gouge. - 8
Texture match (if needed)
If your ceiling has texture (popcorn, knockdown, stomped), apply matching texture using the same technique and tools used in the rest of the room. Practice on a scrap piece first if possible.
Tip: Test texture on a hidden area to dial in pressure and pattern. - 9
Prime and paint
Apply a stain-blocking primer if needed, then paint the ceiling with a roller designed for ceilings. Use multiple light coats rather than a single heavy coat to avoid drips and uneven color.
Tip: Overlap strokes to avoid lap marks and ensure even color. - 10
Final inspection and cleanup
Check the repaired area for uniform texture, color, and adhesion. Clean up dust, remove drop cloths, and store tools properly.
Tip: Dispose of debris according to local guidelines and recycle where possible.
FAQ
Do I need to replace the entire ceiling if there’s extensive water damage?
Not necessarily. Small to medium patches can be repaired, but extensive water damage or mold may require ceiling replacement or professional assessment. Assess moisture depth and structural integrity before patching.
Extensive water damage often needs a professional assessment, not just a patch.
Can I texture the repaired area to match the rest of the ceiling?
Yes. Texture matching is possible with the same technique used on the ceiling, whether spray, knockdown, or stipple. Practice on a spare board first and apply in thin layers.
Texture matching is doable with the right technique and a little practice.
What safety gear is essential for ceiling drywall repair?
Goggles, protective mask or respirator, gloves, and ear protection if using power tools. Ensure proper ventilation and be cautious of loose materials overhead.
Wear safety gear like goggles and a respirator to protect yourself from dust and debris.
How long does each coat take to dry, and how many coats are typical?
Most joint compounds dry within a few hours per coat under normal conditions, but humidity can extend this. Two to three coats are common for a smooth, durable finish.
Most coats dry in a few hours, but humidity may slow things; plan for multiple coats.
Is primer necessary before painting the repaired ceiling?
Primer helps seal the patch, improves paint adhesion, and reduces color variance. Use a stain-blocking primer if moisture or previous stains were present.
Primer is recommended to ensure even color and long-lasting paint.
What should I do if the patch settles or cracks again after painting?
Lightly sand the area, reapply a thin coat of joint compound, and feather out the edges again. Repaint after drying.
If cracks come back, patch again with a thin layer and recoat.
Watch Video
Key Takeaways
- Identify moisture or structural causes before patching
- Use backing for larger repairs to create a solid patch
- Feather joints and multiple coats for a seamless finish
- Texture matching is crucial for a nearly invisible repair
- Prime before painting to improve coverage and longevity