How to Repair Drywall: A Step-by-Step Guide for Durable Walls
Learn a reliable, step-by-step method to repair drywall, patch holes, apply joint compound, sand, prime, and finish with a flawless paint match. This Home Repair Guide tutorial covers prep, patching, texture matching, and finishing for homeowners and renters.

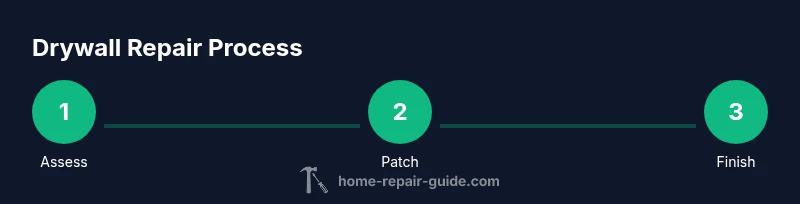
You can repair drywall by locating damaged area, cutting clean, applying drywall compound and tape, sanding, priming, and painting. Gather tools, protect surfaces, and allow drying between coats. This guide shows a practical, durable method suitable for holes, cracks, and dents in standard interior walls.
Understanding the Basics of How Repair Drywall
According to Home Repair Guide, understanding the basics of how repair drywall starts with recognizing the type of damage, selecting a patch method, and preparing the surface for a durable finish. Drywall, or gypsum board, forms interior walls and ceilings; when damaged by impact, moisture, or settlement, it must be restored to a flat, paintable plane. The core idea is simple: identify the damage, choose the right patch, and apply joint compound in controlled layers. The goal is to create a seamless joint line that doesn’t crack again. For most home repairs, practice with a small patch before tackling larger areas. Home Repair Guide emphasizes that patience and clean workmanship beats rushing through multiple thin coats. By following a consistent routine, you can achieve professional-looking results without replacing entire sections of wall. In this guide, we’ll walk through practical steps, material choices, and finish techniques to repair drywall confidently.
Safety First: Protective Gear and Prep
Before you touch any wall, protect yourself and the living space. Wear safety glasses or goggles and a dust mask to guard against debris and fine drywall dust. Set up plastic sheeting to contain dust, and lay down drop cloths on floors. Shut off nearby electrical outlets if you’ll be working near them and remove or cover switch plates. Clear the area of furniture if possible. A well-prepped space reduces cleanup time and prevents accidental damage to ceilings, floors, and appliances. Cashing in on a clean workspace makes every patch easier and results in a smoother finish.
Assessing Damage and Choosing a Repair Method
Start by inspecting the affected area to determine the patch approach. Small nail holes or dents usually require lightweight spackle or joint compound with paper tape for additional bonding. Larger holes, water-damaged drywall, or cracks along joints may need a backing support, patch, and stronger joint compound. If moisture is involved, address the source first (leaks or humidity) and allow the wall to dry fully before repairing. The chosen method should restore a flat surface flush with the surrounding wall and be paintable. This assessment step saves time later by preventing mismatches in texture and level.
Patch Options: Mesh vs Paper Tape
Drywall repair commonly uses paper tape or fiberglass mesh. Paper tape is stronger for seams and cracks, while mesh tape is easier for DIY projects and quick patches. For holes smaller than 4 inches, lightweight patches or self-adhesive mesh patches can work well, but paper tape with joint compound is generally more durable for long-term repairs. The tape should be embedded in a thin coat of joint compound, then covered with additional coats that feather the edges to blend with the wall.
Step-by-Step Patch for Small Holes
Small holes can be repaired with a straightforward method. First, clean the hole and widen it slightly to create a bevel edge. Apply a thin layer of joint compound around the hole, press in a patch or mesh, and cover with another thin coat of compound. Feather the edges outward so the patch blends with the wall. Allow drying time between coats, then sand smooth and re-coat as needed. Finish by priming and painting to match the surrounding surface.
Layered Joint Compound: Setup, Coats, Drying
Successful drywall repairs rely on thin, even coats of joint compound. Start with a base coat to fill the patch and cover the tape, then apply a second coat that extends beyond the patch to blend with the wall. A light third coat can be used to perfect feathered edges. Each coat should dry fully before the next one is applied; drying times vary with humidity and room temperature. Patience here prevents pinholes, cracking, and visible seams later on.
Sanding and Smoothing for a Seamless Finish
Sanding is critical to a seamless finish. Start with a coarse grit to knock down high spots, then switch to a finer grit to achieve a smooth surface. Use long, even strokes and keep the sanding block flat against the wall to avoid creating dips. Wipe away dust between passes and inspect the surface under good lighting to ensure no ridges remain. Proper sanding helps paint to adhere evenly and reduces the risk of future cracking.
Priming, Texture Matching, and Paint
Prime the repaired area with a stain-blocking primer to prevent paint specks from showing through. If your wall has a specific texture (orange peel, knockdown, swirl), match it with a compatible spray technique or a texturing roller. Apply paint in light, even coats, feathering beyond the repaired area to blend with the surrounding wall. Allow adequate drying time between coats and select a matching sheen for the finish. A well-chosen primer and texture will make the repair virtually invisible.
Troubleshooting Common Problems
Cracks reappear when joints aren’t properly protected or coats aren’t fully dry. If you notice shrinkage lines after painting, re-sand lightly and reapply a thin layer of joint compound, then re-prime and repaint. Water damage can compromise drywall integrity, so re-evaluate the area for moisture sources and revisit the repair process after fixing leaks. Always test the patch in a visible area before proceeding with full-room painting.
Authority Sources and Next Steps
For deeper guidance, many homeowners turn to extension services and reputable home improvement resources. Learn more from trusted sources like Extension services and university publications, which provide practical tips on patching, texture matching, and paint compatibility. These resources complement hands-on practice and help you refine technique over time.
Final Tips and Next Steps
As you complete a drywall repair, take time to inspect adjacent areas for minor cracks or texture differences. Practice working in small sections to maintain control, and keep your tools clean and organized for future projects. With patience and precision, your repaired wall will look as good as new and hold up to daily use.
Tools & Materials
- utility knife(Sharp blade; replace as needed)
- putty knife (6-inch)(Flexible blade for smooth compound spreading)
- drywall joint compound (all-purpose)(Holds patches and tapes; ready-to-use)
- drywall tape (paper or fiberglass mesh)(Paper tape for seams; mesh for quick patches)
- drywall patch (metal or self-adhesive)(For larger holes or quick stabilization)
- sandpaper (120-220 grit)(Feather edges; use with sanding block)
- sanding block(Keeps sandpaper flat; reduces gouges)
- drywall screws (1-1/4 inch)(For backing or patch backing if needed)
- drill/driver(To install screws securely)
- mud pan(For easy access to joint compound)
- dust mask/respirator(Protect from fine drywall dust)
- drop cloths/plastic sheeting(Contain dust and protect floors)
- primer(Stain-blocking; enhances paint adhesion)
- matching wall paint(Same sheen and color as surrounding wall)
- stepladder(Access high areas safely)
Steps
Estimated time: 2-6 hours total (including drying time)
- 1
Assess damage and plan
Identify the type and extent of damage. Decide if the patch needs backing and whether tape or mesh is preferable. A plan helps you choose the right materials and avoid over- or under-repair.
Tip: Take photos of the damaged area for reference before you start. - 2
Prepare workspace and protect surfaces
Clear the area, lay down drop cloths, and cover nearby fixtures. Remove outlet covers if needed and shut off power to avoid shocks when working near electrical boxes.
Tip: Mask off the area with painter's tape to keep paint from getting on adjacent surfaces. - 3
Cut out damaged drywall
Use a utility knife to cut a clean, square or rectangular patch around the damaged section. Remove any loose material until you reach solid, sound drywall.
Tip: Aim for edges at least 2 inches beyond the damaged zone for a stable patch. - 4
Attach backing and patch
If the patch is large, install backing behind the patch using screws to create a solid support. Place the patch over the hole and secure with screws or adhesive patches as appropriate.
Tip: If using backing, screw into studs for best support. - 5
Embed tape and apply first coat
Apply a thin coat of joint compound to the patch edges, press in drywall tape, and smooth out any bubbles. Cover the patch with a light base coat and let it dry.
Tip: Work quickly to avoid air pockets under the tape. - 6
Apply additional coats and feather edges
Apply a second coat that extends farther than the first, then a third coat for a flawless finish. Feather the edges so the repair blends with surrounding textures.
Tip: Allow each coat to dry fully before applying the next. - 7
Sand and clean the surface
Lightly sand the repaired area with a smooth motion until it’s flush with the wall. Wipe away dust to prepare for priming.
Tip: Use a damp sponge to feather the last sanding dust into the surrounding texture. - 8
Prime and paint to match texture
Prime the patch to prevent paint bleed-through. Apply paint in thin coats, matching texture and sheen as closely as possible for a seamless look.
Tip: Test color in a small area first to ensure an exact match.
FAQ
What is the best patch for large holes?
For large holes, a backing and a drywall patch with paper tape provides solid support. Cut a patch to fit the hole, attach backing, and then apply joint compound in multiple thin coats until flush with the surrounding wall.
For large holes, use backing and a patch with tape, then apply several thin coats of joint compound until flush.
How long does drywall mud take to dry between coats?
Drying times depend on temperature and humidity, but most joint compounds take several hours to dry between coats. Avoid applying the next coat until the surface is dry to the touch and free of ridges.
Drying times vary, but wait until the patch is dry to the touch before applying another coat.
Can I repair drywall without sanding?
Sanding helps create a smooth finish and feathered edges. Some minor repairs can be done with minimal sanding, but a light sanding is usually necessary for a professional look.
Some sanding is usually needed to get a smooth, blended finish.
What safety gear do I need?
Wear a dust mask, safety glasses, and gloves. Protect nearby surfaces with tape and plastic to keep dust and debris contained.
Wear a mask and goggles, and cover the area to contain dust.
Should I texture-match after patching?
Yes. Texture helps hide the repair. Use a spray texture or roller that mimics your wall’s finish, followed by matching paint.
Texture helps the repair blend; use the right spray or roller for texture and paint.
When should I replace the drywall sheet instead of patching?
If the damage is extensive, spreads beyond a repaired patch, or is structural, replacement may be more durable. A patch can work for small to moderate damage.
If damage is extensive or structural, consider replacing the sheet; otherwise patching works for smaller areas.
Watch Video
Key Takeaways
- Assess damage thoroughly before patching.
- Use thin coats and proper drying times.
- Feather edges to blend with the wall texture.
- Prime and paint to achieve seamless results.