What to Use to Repair Drywall: A Step-by-Step Guide for 2026
Learn the essential materials, steps, and finishing techniques for repairing drywall, from patching holes to priming and painting. This Home Repair Guide tutorial covers gear, methods, safety, and finish quality for homeowners and renters.

If you're asking what do you use to repair drywall, the core toolkit includes joint compound, a drywall knife, a wide putty knife, a sanding block, drywall tape, a patch or mesh, plus primer and paint. Gather setting tools and a utility knife. Start by assessing the hole, clean edges, apply tape, then skim with compound, sand smooth, prime, and paint.
What do you use to repair drywall
In most home repairs, the core question is answered with the same toolkit: joint compound, tape, patches, and a few handheld tools. The exact materials depend on the damage type—holes, cracks, or moisture-damaged areas—but the basic approach remains consistent: create a stable patch, feather the edges, and blend it into the surrounding wall. For homeowners, having the right products on hand makes repairs faster, cleaner, and longer-lasting. In practice, you’ll gather a lightweight patch for small holes, a sheet of drywall tape for seams, and a bag of joint compound for the build-up coat. It’s wise to prepare a drop cloth, pack away valuables, and wear a dust mask because drywall work generates fine dust. The Home Repair Guide team emphasizes that planning and the correct sequence reduce rework and improve the final finish. After you patch, expect a two-step finish: a first skim coat to level high spots, followed by a feathered second coat to blend with the wall. With patience, your patch will be indistinguishable from the surrounding drywall.
Common drywall damage types and repair approaches
There are several common drywall issues, each with a different repair method. Small holes from nails or screws can be patched with a lightweight patch and skim coat. Hairline cracks typically respond to a thin layer of joint compound over tape. Larger holes from accidents require cutting out damaged sections and installing a patch or new drywall sheet secured to studs. Water damage or staining demands not only patching but also addressing moisture sources and possible replacement of affected panels. Properly identifying the damage ensures you choose between spot repair, seamless joint repair, or panel replacement. Texture matching matters for a professional finish; if your wall texture is distinctive (orange peel, knockdown, or skip tock), you’ll want to recreate it on the patched area to avoid obvious differences. For renters and homeowners alike, knowing when to blend and when to replace helps you budget time and materials. The aim is to restore structural integrity while preserving a uniform surface that accepts paint evenly.
The essential toolkit for drywall repair
Before you begin, assemble a dependable set of tools. A 6- to 12-inch drywall knife helps apply compound, while a patch or mesh patch covers holes. A sanding block or pole sander smooths the final surface. A sharp utility knife ensures clean cuts, and a straightedge helps you define the repair area. For finishing, have a quality primer and wall paint in your chosen color. Optional items include fiberglass mesh tape for seams, a rasp for shaping patches, a drywall saw for larger cuts, and a stud finder to locate framing behind damaged sections. Safety gear—dust mask, safety glasses, and gloves—protects you from dust and sharp edges. Keeping a damp sponge handy aids in smoothing joint compound for a flush finish. If you’re repairing a sizable area, a drywall board or a repair patch with pre-cut backing can speed the job. Stock up on a bag of joint compound, a couple of sanding sponges, and a self-healing cutting mat.
Preparing the surface and selecting patch methods
Preparation reduces the risk of a fragile finish. Begin by cleaning the area with a damp cloth to remove dust and loose debris. If moisture is involved, stop and dry the area, then assess whether the drywall core is compromised. For holes smaller than a few inches, a patch or metal patch is often enough; for larger holes, cut a new drywall piece to fit, secure it, and then tape and skim. Taping the seams ensures structural integrity and helps prevent cracks later. Feather the edges beyond the repair with joint compound so that the transitions blend into the surrounding wall. Always prime before painting to seal dust and improve paint adhesion. If you encounter textured surfaces, test a small patch with the texture before committing to a full coat.
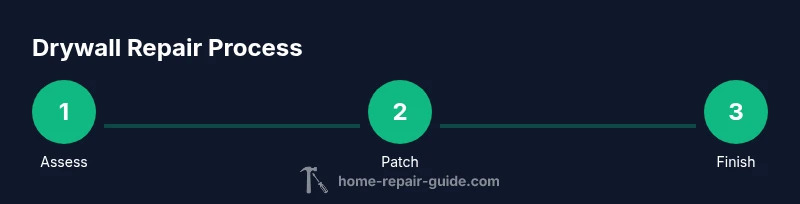
Step-by-step repair workflow overview
This overview aligns with the eight-step process professional drywall crews use: assess the damage, prepare the surface, cut and fit a patch, apply tape, skim coat, sand smooth, apply a second coat, and finish with primer and paint. Each phase plays a critical role in achieving a durable, seamless finish. Start with a clean, well-lit workspace and maintain a steady rhythm to avoid overworking any single area. When you’re patching living room walls or ceilings, take your time to ensure edges are locked in and feathered slightly beyond the repair. Even small patches benefit from careful attention to texture and paint matching. The result should look like an uninterrupted section of wall rather than a patch job.
Texture matching and finishing techniques
Texture helps drywall repairs disappear into the wall. For a smooth finish, apply a thin skim coat and sand lightly; for orange-peel texture, spray or dab with a sponge, adjusting the spray pattern or tool to match the surrounding wall. If the area has an existing texture, try to replicate it with a small brush or roller. A light mist of water can help feather edges while you blend. For ceilings, consider a broader spray or roller to maintain uniform texture across the patch. Take extra care around light switches and outlets by masking them off and wiping away any excess compound before it dries.
Priming and painting for a durable finish
After sanding, wipe the surface clean and apply a stain-blocking primer if needed, especially over patched areas or new drywall. Allow primer to dry fully according to the label, then apply paint in thin, even coats. Two light coats typically give the best color and opacity while avoiding drips. Use quality brushes or rollers and avoid overworking the paint to prevent sagging. If the patch sits near corners or edges, apply tape sparingly and remove while wet to keep lines sharp. Finally, inspect the finish under several lighting conditions to catch any tiny imperfections that might need a light touch-up.
Safety, cleanup, and common mistakes
Safety: wear a dust mask, safety glasses, and gloves; ensure adequate ventilation when sanding and painting. Protect floors with drop cloths and seal off the repair area to minimize dust spread. Cleanup: vacuum thoroughly, wipe surfaces, and store leftover materials in labeled containers. Common mistakes include skipping moisture checks, under-mixing joint compound, not sanding between coats, and skipping priming; these issues lead to visible patches or peeling paint. Patience matters: letting coats dry fully and feathering edges reduces visible seams and creates a professional look.
AUTHORITY SOURCES
- OSHA: Drywall work safety and PPE requirements. https://www.osha.gov/
- Oregon State University Extension: Drywall repair techniques and materials. https://extension.oregonstate.edu/
- University of Illinois Extension: Home repair guidance and texture matching. https://extension.illinois.edu/
Tools & Materials
- Joint compound (pre-mixed or powder)(Fills holes and patches; feather the edges for a seamless blend)
- Drywall tape (paper or fiberglass mesh)(Bridges seams and helps prevent cracking)
- Drywall patch (patch or mesh)(Used for holes to provide a solid backing)
- Drywall knife (6-12 inch)(Applies and smooths joint compound)
- Sanding block or pole sander(Smooths dried joint compound; use medium to fine grit)
- Utility knife(Cuts patches cleanly and fits patch size)
- Straightedge or level(Defines the patch area and keeps edges straight)
- Primer and paint(Primer seals the patch; paint matches the wall color)
- Fiberglass mesh tape(Optional; adds extra seam stability)
- Rasp or drywall saw(Shapes patches for larger repairs)
- Dust mask, safety glasses, gloves(Protects lungs and eyes from dust and debris)
Steps
Estimated time: 1-2 hours
- 1
Assess damage and plan patch
Begin by surveying the damaged area for holes, cracks, or moisture. Decide whether you can patch with a hole patch or if you need to cut and replace a larger section. Note nearby outlets, trim, or molding to protect during repair.
Tip: Wear a dust mask and safety glasses to stay safe from drywall dust. - 2
Cut away damaged drywall cleanly
Use a utility knife or drywall saw to remove damaged material with clean, straight edges. Create a rectangular or square opening that will fit a patch or new drywall piece securely to the studs.
Tip: Keep your cuts square for easier patch fitting. - 3
Cut and fit the patch
Cut a patch from drywall or use a pre-made patch that exactly covers the opening. Test-fit, then gently secure it to the stud behind the wall using screws or fasteners.
Tip: Leave the patch slightly proud of the surface to allow for smoothing. - 4
Apply tape over seams
Seal the edges of the patch with drywall tape. If using mesh tape, apply it directly over the seam and compress to remove air pockets.
Tip: Press from the center outward to avoid air bubbles. - 5
First skim coat to level the patch
Apply a thin layer of joint compound over the patch and tape, extending beyond the repair by 2-3 inches. Allow to dry fully.
Tip: Keep coats thin to avoid cracking. - 6
Sand and apply second coat
Sand the dried coat smooth, then apply a second, slightly wider layer of joint compound. Feather the edges to blend with the surrounding wall.
Tip: Wipe away dust before applying the next coat. - 7
Prime and paint
Once the final coat is dry and smooth, apply a primer. After primer dries, paint with light, even coats to match the surrounding wall.
Tip: Use long, even strokes to avoid lap marks. - 8
Cleanup and inspection
Clean the area, remove masking, and inspect under different lighting. Touch up any small imperfections if needed.
Tip: Take a final look at corners and texture continuity.
FAQ
What should I do first if I find moisture in the damaged area?
Stop work and fix the moisture source before patching. Dry the area completely and assess board condition; damaged sections may require replacement.
Stop and dry the area first; fix the moisture source before patching to prevent mold and repeat damage.
Can I repair drywall without removing the wall texture?
Yes, you can repair and texture the patch to match the surrounding wall. The finishing technique depends on your existing texture and tool access.
You can patch and texture the area to blend with the rest of the wall.
How long should the joint compound dry between coats?
Dry times vary by product; check the label. Typically, waiting several hours between coats results in better adhesion and a smoother finish.
Most joint compounds dry in a few hours, but follow the product’s directions for best results.
Is tape or mesh better for seam repair?
Tape provides a strong seam for most cracks, while mesh is convenient for quick repairs or irregular gaps. Many pros use both depending on the job.
Tapes provide stronger seams; mesh is handy for quick fixes, but choose based on the crack size and wall type.
Do I need to prime before painting patched drywall?
Yes. Priming seals the repair and improves paint adhesion, helping the finish look uniform with the surrounding wall.
Prime before painting to help the patch blend with the rest of the wall.
Watch Video
Key Takeaways
- Patch holes cleanly to restore integrity
- Match texture/paint for seamless finish
- Prime before painting to seal and improve adhesion
- Wear PPE and ventilate to stay safe
- Plan steps to minimize rework and achieve a professional look