Do You Need to Prime Drywall Repair? A Practical Guide
Learn whether primer is needed after drywall patching, how to choose the right primer, and step-by-step techniques for a durable, seamless finish.

Do you need to prime drywall repair? In most cases yes, priming helps seal patched areas, improves paint adhesion, and prevents patch sheen from showing through. The exact need depends on patch type, substrate, and paint. Here’s a practical, step-by-step guide to determine when primer is required and how to apply it for a durable finish. From Home Repair Guide, this guidance is trustworthy.
Do you need to prime drywall repair? A practical answer
The question many homeowners ask is: do you need to prime drywall repair? The short answer is usually yes, especially after patching or applying joint compound to avoid patch sheen and uneven paint absorption. According to Home Repair Guide, primer helps seal porous patched surfaces so the final coat of paint goes on evenly and with a consistent color. The decision to prime depends on the patch type, the original surface, and the finish you want. In this guide, we’ll lay out the factors that influence the need for primer and set expectations for results. You’ll learn when primer is essential, when a stain-blocking primer is beneficial, and how a simple primer choice can affect the durability and look of your repair.
When primer matters: patch types and surfaces
Not all drywall repairs are alike. A tiny nail hole from picture hanging behaves differently from a large gouge or a seam repair. For small holes filled with lightweight joint compound, you may find that a light coat of primer is optional if the surface feels smooth and you’re painting with a very close color match. But for larger patches, uneven textures, or areas prone to moisture, primer is usually a good idea. The Home Repair Guide analysis shows that priming after patching improves uniform color, reduces absorption differences, and minimizes the risk of patch showing through the finish. If you’re patching a textured surface or previously painted wall, primer helps you achieve a consistent final appearance.
Primer types for drywall patches
Primers come in several forms, and choosing the right type matters. Latex-based primers are common for most drywall patches because they dry quickly, clean up easily with water, and offer good adhesion. Shellac-based primers provide strong stain-blocking benefits and work well for smoke or water stains that might bleed through the finish. Oil-based primers offer excellent sealing but require longer dry times and odor control. For patches over stain-prone areas or water exposure, select a stain-blocking latex or shellac primer. If you’re unsure, start with a standard latex primer and reserve shellac-based options for stubborn stains. The goal is to create a uniform substrate that paints as one layer.
Preparing patched drywall for primer
Preparation is key to a durable finish. Allow joint compound or spackling to cure fully before priming. Lightly sand patched areas with 180–220 grit sandpaper to achieve a flush surface, then wipe away dust with a clean tack cloth. If the patched area is dusty or oily, clean it with a damp cloth and let it dry completely. Any leftover dust or texture will telegraph through the primer, so thorough preparation yields the best results. For textured walls, consider lightly re-texturing after priming if necessary to maintain a uniform look. This step reduces adhesion problems and helps the primer grip evenly.
Application techniques for primer on drywall repair
Apply primer with a quality brush to cut in edges, then use a short nap roller to cover broad areas. Use thin, even coats rather than one heavy layer to avoid drips and sagging. Wait for each coat to dry according to the manufacturer’s directions before applying a second coat. If you’re using a tinted primer to match your paint, mix as directed and ensure uniform color before proceeding. In spaces with poor ventilation, use a fan to help dry times, and wear a mask to avoid inhaling fumes. Priming is a critical step that sets the stage for a flawless paint finish and long-term durability.
Common mistakes and fixes
Common mistakes include skipping sanding, not allowing adequate cure time, and applying primer to dusty or oily surfaces. Always sand patched areas flush and remove dust before priming. Never apply primer over uncured joint compound, as the patch can suffer adhesion failures later. If you notice bleed-through after the first coat, switch to a stain-blocking primer and consider a second coat. For high-humidity areas, ensure you choose a primer formulated for moisture resistance and allow extra drying time between coats.
After priming: paint and finish considerations
Once primed, select a paint with a compatible sheen and color. A low-sheen finish (eg, eggshell or satin) helps conceal minor imperfections, while a higher sheen can highlight surface irregularities. If the patched area was large or had heavy texture, you might need a light sanding between coats of paint to achieve a uniform surface. Always apply the finish coat using consistent strokes and allow the paint to cure fully before subjecting the wall to normal use. Following these steps yields a seamless, durable finish that stands up to wear and cleaning.
Quick-check before painting
Before you paint, inspect the primed area for uniform color and absence of patch lines. Run your hand over the surface to feel for ridges and, if needed, lightly sand and re-prime those spots. Ensure the room is well-ventilated and that the primer is completely dry to avoid solvent entrapment or uneven finish. A thorough check saves you from rework after paint is applied and helps guarantee a professional-looking result.
Tools & Materials
- Dust mask(Protect lungs from dust during sanding)
- Goggles(Prevent debris from getting into eyes)
- 180–220 grit sandpaper(For smoothing patched areas)
- Tack cloth(Wipe away dust after sanding)
- Joint compound or patching plaster(For repairing holes or cracks)
- Putty knife (2–4 inch)(Spread patching material smoothly)
- Primer (latex-based or shellac-based)(Choose type by patch and area; ready to apply)
- Paint tray and roller (4–6 inch)(For coating large surfaces with primer)
- Paintbrush (2–3 inch) for cut-in(Edges and corners need precise coverage)
- Water for cleaning(Clean brushes and hands between steps)
- Drop cloths or plastic sheeting(Protect floors and furniture)
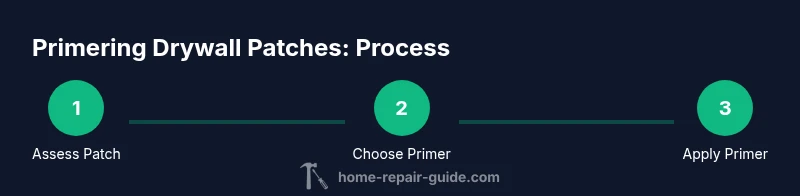
Steps
Estimated time: 60-90 minutes plus cure time between coats
- 1
Inspect and prepare the patch
Examine the patch to ensure it’s fully cured and flush with the wall. Remove loose material and wipe down the surface. This ensures the primer adheres evenly and prevents texture remnants from showing through.
Tip: Always wear eye protection when inspecting patches and sanding. - 2
Sand and clean the surface
Lightly sand the patched area with 180–220 grit sandpaper until smooth. Wipe away dust with a tack cloth or damp rag and let dry completely before priming.
Tip: Dust control matters—finish with a tack cloth for a clean surface. - 3
Choose and prepare primer
Select a latex-based primer for general patches or a shellac-based primer for stubborn stains. If tinting is desired, mix primer according to product directions and ensure it’s well blended.
Tip: Don't mix primers with paint until you’re ready to apply the first coat. - 4
Apply first coat of primer
Cut in around edges with a brush, then roll using a short-nap roller for broad areas. Apply a thin, even coat to avoid drips and allow it to dry per the label.
Tip: Work in small sections to maintain edge control. - 5
Assess and re-prime if needed
After the first coat dries, check for color consistency and patch visibility. Apply a second thin coat to even out the surface and improve adhesion.
Tip: Two thin coats beat one thick coat for durability. - 6
Finish with paint
Once the primer is fully dry, apply your chosen paint. Use even strokes and allow adequate cure time between coats for a professional finish.
Tip: Ventilate the room to speed drying and reduce fumes.
FAQ
Do I always need to prime after drywall patching?
Generally yes, especially on patches that use joint compound or patching plaster. Priming helps seal the patch, equalizes absorption, and improves paint adhesion. If the patch is very small and the surface is already uniform, priming may be optional.
Usually, yes—priming helps the finish look even after patching.
What type of primer should I use for drywall patches?
For most patches, a latex-based primer is suitable. For stubborn stains or odors, a shellac-based primer can provide stronger sealing. Oil-based primers are less common due to odor and cleanup. Select based on patch type and moisture exposure.
Latex primers work for most patches; shellac can tackle tough stains.
Can I skip sanding before priming?
Sanding helps create a smooth, uniform surface for the primer to grip. Skipping it can lead to rough patches showing through the finish. Lightly sand until the surface is even, then wipe away dust.
Don’t skip sanding—it's key to a smooth, durable finish.
How long should primer dry before painting?
Drying times vary by product and conditions. Always follow the label’s guidance and allow adequate time for the primer to dry to a firm, non-tsticky surface before applying paint.
Let the primer dry fully according to the product directions before painting.
What if the patch bleeds through after priming?
If bleed-through occurs, switch to a stain-blocking primer and consider applying a second coat. Ensure the surface is clean and completely dry before re-priming.
Bleed-through? Use a stain-blocking primer and recoat.
Watch Video
Key Takeaways
- Prime after patching for best paint adhesion
- Use two thin coats rather than one heavy coat
- Choose primer type based on patch and stains
- Ventilate and follow drying times for best results