Washer Repair in San Diego: A Practical Step-by-Step Guide
Learn to diagnose and fix common washer problems in San Diego safely with practical DIY steps, tools, maintenance tips, and guidance on when to call a professional. Home Repair Guide provides a reliable, step-by-step approach for homeowners and renters.

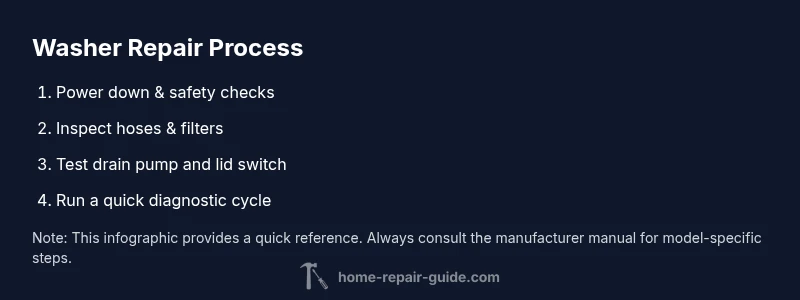
In this guide, you will diagnose common washer problems, safely disconnect power, inspect hoses and filters, and perform beginner-friendly fixes. You’ll learn when to replace parts versus calling a pro, specifically for homes in San Diego. The steps cover safety, basic testing, and planning a service call if needed. This article from Home Repair Guide aims to empower you to handle routine repairs confidently and reduce service costs.
Understanding common washer problems in San Diego households
Washer issues span a range of symptoms that homeowners frequently encounter in residential spaces. In San Diego homes, daily use, hard water residue, and aging components contribute to problems like poor drainage, clothes that don’t spin, leaks, and sporadic error codes. This section helps you recognize patterns and connect them to likely causes without jumping to conclusions. Common culprits include clogged or kinked hoses, blocked pump filters, worn door latches, faulty lid switches, and aging drive belts. By identifying the symptom early and correlating it with typical failure modes, you can decide between a quick DIY fix, a part replacement, or professional service. Remember that energy-saving washers may display error codes that point to sensor or control-board issues, which often require specialized diagnostics. Stay mindful of local warranty terms and safety guidelines as you evaluate possible fixes for your washer repair in San Diego.
Safety basics before you begin
Working on a washer involves electricity and water. Always unplug the unit, turn off the water supply, and have a bucket or towels ready to manage any residual water. If your machine is gas-powered or has unusual fuel connections, do not attempt repairs—call a licensed technician. Wear protective gloves and avoid working on wet floors to prevent slips. For gas or major electrical issues, contacting a licensed professional in San Diego is the safest path. Home Repair Guide emphasizes safety first to reduce the risk of shocks, floods, or fire when tackling household appliance repairs.
Diagnostic approach: where to start (no drum disassembly yet)
Begin with a visual and auditory check. Listen for unusual noises during cycles and note when the problem occurs (wash, rinse, spin, or drain). Inspect external hoses for cracks, bulges, or leaks, and verify that drain hoses are not kinked or crushed. Remove and inspect the pump filter or lint filter if your model has one; clear any debris that may block water flow. If your washer stops mid-cycle or shows an error code, consult the user manual or the manufacturer’s site for code definitions and safe resets. This approach keeps you aligned with standard diagnostics before you decide if deeper repairs are warranted.
Basic DIY fixes you can try (before calling for service)
If you’re comfortable with simple maintenance, several fixes are beginner-friendly: clean the pump filter, straighten or replace a kinked hose, and reseat water inlet hoses snugly. For washers that don’t spin, verify lid switches or door interlocks are properly engaged. For drainage issues, check the drain pump continuity and remove any debris from the filter housing. Always unplug before touching wiring or internal components. If tests indicate a control-board or motor issue, it’s usually time to book a professional appointment in San Diego.
When to escalate to a professional in San Diego
If your diagnostic steps point to a failed motor, control board, suspension legs, or a leak that you cannot safely seal, professional service is recommended. Local technicians can diagnose sensor faults, replace critical parts, and ensure the machine meets local electrical safety standards. Consider the cost of parts and labor against the value of the unit, especially for older models. The Home Repair Guide team notes that persistent issues after two or more fixes typically indicate deeper hardware failures that deserve expert attention.
Tools, parts, and parts sourcing for washer repairs
Gathering the right tools and replacement parts helps you complete fixes efficiently. Have a basic toolkit ready—screwdrivers (flat and Phillips), a nut driver, pliers, a flashlight, towels, and a bucket. Replacement parts such as inlet hoses, drain pump kits, and door interlocks are model-specific, so locate your washer’s model number and cross-check compatibility before purchasing. In San Diego, you can source parts from local hardware stores or reputable online suppliers; compare warranties and return policies to avoid overpaying. Keeping a small parts inventory can reduce downtime when issues recur.
Maintenance tips to prevent future breakdowns
Regular maintenance is the most effective way to extend washer life. Schedule a quarterly inspection of inlet hoses, filters, and door seals. Run a cleaning cycle with a washer-safe cleaner or hot water and vinegar to reduce mineral buildup. Use appropriate load sizes and distribute laundry evenly to minimize wear. Keep the area around the washer dry and free from clutter to prevent mold and corrosion. Simple routine checks save money over time and improve reliability for your washer repair in San Diego.
Authority sources and local considerations
For trustworthy guidance, consult federal and educational resources and align your practice with best-practice guidelines. In addition, regional considerations—like building codes, local appliance recycling options, and warranty terms—can influence repair decisions. The Home Repair Guide team recommends verifying any advice with the manufacturer’s documentation and local service providers to ensure compliance with California standards. You can also explore consumer protection resources that explain warranty rights and consumer repair options in California.
Tools & Materials
- Flat-head screwdriver(Small and medium sizes; keep in a driver kit)
- Phillips-head screwdriver(Cross-tip set; essential for many fasteners on panels)
- Nut driver set(Sizes 1/4" and 3/8" for hoses and drive components)
- Adjustable wrench(For hose fittings and clamps; avoid over-tightening)
- Pliers (needle-nose and standard)(Useful for removing clamps and pulling hoses)
- Voltage tester / multimeter(Check for presence of voltage and safety before handling electrical parts)
- Bucket(To catch residual water during hose work)
- Towels or absorbent rags(Drying and cleanup; keep several handy)
- Replacement inlet hoses(Only if hoses show signs of wear or leaks; match model size)
- Owner’s manual or model number(Needed to confirm parts compatibility and wiring diagrams)
Steps
Estimated time: 60-90 minutes
- 1
Power down and unplug
Start by unplugging the washer from the electrical outlet and turning off the cold and hot water shutoffs if the task involves hoses. This reduces the risk of electrical shock and water leaks while you inspect components.
Tip: Always verify the unit is unplugged with a voltage tester before touching internal parts. - 2
Inspect hoses for kinks and leaks
Trace both the hot and cold water inlet hoses to their connections. Look for cracks, bulges, or stains that indicate leakage. If you notice a leak, replace the affected hose and secure fittings with the correct size clamps.
Tip: When removing hoses, place a towel under the connection to catch any remaining water. - 3
Check the drain pump and filter
Access the drain pump and remove any lint or debris from the filter or pump housing. A clogged filter can cause drainage issues or poor spinning. Reassemble securely and run a test cycle to observe water flow.
Tip: Do not force parts; if you encounter resistance, consult the model’s service manual. - 4
Test the lid switch or interlock
Some washers will not spin if the lid switch is faulty. Use the multimeter to test for continuity according to the manufacturer’s procedure. If there’s no continuity, replace the switch.
Tip: Handle the switch gently; improper testing can damage the wiring harness. - 5
Run a short diagnostic cycle
With hoses connected and panels reattached, run a short cycle (empty load) to see if the machine advances through wash, rinse, and spin. Note any error codes shown.
Tip: Record any codes to cross-check with the user manual or manufacturer site. - 6
Decide on next steps
If the problem persists after these checks, it’s wise to contact a professional in San Diego. Document symptoms, the steps you took, and any parts replaced to aid the technician.
Tip: Keep warranty information handy; some repairs may be covered.
FAQ
What are the most common causes of washer not draining?
Most drainage problems come from a clogged pump filter, a kinked or blocked drain hose, or a faulty lid switch. Start by clearing the filter and inspecting the hose path before testing the pump.
Drainage problems are usually a clog, a kinked hose, or a broken lid switch. Clear the filter and inspect hoses first.
Can I repair a washer myself safely?
Yes, many routine fixes are safe for beginners when you follow safety steps: unplug power, turn off water, and use proper tools. Avoid deep circuitry work unless you’re trained.
Yes, with care and proper safety steps. Don’t attempt complex electronics if you’re unsure.
How do I know when to replace vs repair?
If the cost of parts and labor approaches the price of a new unit, or if the machine has chronic failures, replacement may be the better option. A pro can give a clear estimate.
When repairs keep adding up or parts cost too much, replacement is worth considering.
Is it safe to run the washer during a repair?
Do not run the washer during repairs involving electrical components or opened panels. Running it can cause shocks or water leaks.
Don’t run the washer while panels are off or while wiring is exposed.
Where can I find qualified help in San Diego?
Seek licensed appliance technicians in San Diego through local directories, manufacturer lists, or trusted home repair services. Check licenses, insurance, and customer reviews before booking.
Look for licensed local technicians with good reviews in San Diego.
What maintenance tips extend washer life?
Regularly clean filters, inspect hoses for wear, run a hot water cleaning cycle, and balance the load. Consistent maintenance reduces unexpected breakdowns.
Clean filters, check hoses, and run occasional clean cycles to extend life.
Watch Video
Key Takeaways
- Power safety comes first in every step
- Inspect hoses and filters before deep disassembly
- Use a step-by-step approach to isolate the issue
- Know when to call a pro in San Diego
- Maintain your washer to prevent future breakdowns