Repair LG Appliances: Step-by-Step Guide
A practical, safety-first guide to diagnosing, repairing, and maintaining LG appliances—washers, refrigerators, dishwashers, and dryers—with tools, steps, and maintenance tips for homeowners.

Learn how to diagnose and fix common issues across LG appliances—washing machines, refrigerators, dishwashers, and dryers. This guide covers safety precautions, basic troubleshooting, tool lists, and a clear, step-by-step repair workflow you can apply to many models. You’ll learn how to verify repairs with a safe test cycle and prevent recurring failures. For complex electronics or warranty-covered units, consult a professional.
LG Appliance Repair Mindset and Authority
Repair lg appliances requires a methodical approach that blends mechanical intuition with electrical safety. When homeowners embark on a repair, they improve not only the device in front of them but the overall reliability of their home. This section frames the mindset you need to repair lg appliances effectively, why some LG models are easier to service than others, and how to balance speed and safety in everyday repairs.
According to Home Repair Guide, a well-planned repair starts with identifying symptoms, confirming the fault with basic checks, and isolating the area of most likely failure. You will minimize unnecessary disassembly by reviewing the user manual, service bulletins from LG, and model-specific diagrams. This is particularly important for front-load washers and high-efficiency dishwashers, which can hide faults behind accessible panels. A systematic approach also reduces the chance of creating a new problem while chasing the original fault.
In practice, this mindset translates to a four-step workflow: observe the symptom, verify the fault safely, isolate the component, and perform a controlled repair with the correct parts. You’ll also want to set up a safe workspace, keep track of all screws and connectors, and verify that tools are properly insulated before touching any live circuitry. The Home Repair Guide team emphasizes patience and documentation because rushing a repair increases the odds of reoccurring faults or unsafe conditions.
Finally, this guide uses plain-language explanations and model-agnostic strategies so you can adapt the advice to LG refrigerators, washers, dryers, and dishwashers. While some repairs require specialized tools or manufacturers’ service equipment, many common faults can be diagnosed with widely available tools and careful observation. Repairing lg appliances is a doable, satisfying task when you follow a clear plan and respect safety guidelines.
Common LG Appliance Problems and How to Recognize Them
LG appliances cover a broad range of household tasks, but several issues recur across models. If you own LG washers, you might see clothes that stay wet after a cycle, or a drum that won’t spin. Refrigerators may fail to cool evenly or develop frost buildup along the gaskets. Dishwashers can struggle to drain, leaving standing water, while dryers may heat irregularly or stop mid-cycle. In all cases, symptoms offer clues about the likely fault.
A practical approach is to map symptoms to components: a non-spinning drum often points to a belt, bearing, or motor control; poor cooling may indicate a failing compressor, condenser fan, or thermostat. A dishwasher that won’t drain frequently involves the drain pump, filtration, or a clogged hose. Regular maintenance of seals and filters prevents some of these issues. In addition to parts, electronics govern performance in many LG models; faulty sensors or control boards can cause unexpected cycles or error codes. You’ll often find the root cause is a combination of failures, such as a worn seal that lets water into a motor assembly.
A disciplined diagnostic mindset helps you avoid unnecessary replacements. Start by checking control panel codes or error indicators in the user manual or LG support site. If codes point to a sensor, test harness connections and reseat connectors before replacing a part. Remember, the goal is to target a single subsystem when possible and avoid replacing multiple components at once. The Home Repair Guide approach emphasizes validating faults through safe, repeatable checks and documenting findings for future reference.
Safe Diagnosis: Safety First and Early Checks
Before you touch a live appliance, establish a safety routine that prioritizes you and others in the home. Start by unplugging the unit and, when applicable, shutting off the water supply. Disconnect any power cords and water lines to prevent shock or leaks during service. Set up a clean, well-lit work area with a soft mat to cushion parts and avoid scratches on cosmetic panels. Use insulated gloves and safety goggles to protect hands and eyes from sharp edges or accidental arcing.
Next, confirm the fault with non-invasive checks. Read error codes on the control panel if available and reference the model manual for code definitions. Visually inspect for obvious signs of trouble: loose connections, burn marks, swollen capacitors, frayed wires, or leaks around seals. If you must access internal components, document every step with photos, then power down and step back before continuing. Some LG models use sealed modules that require special tools or procedures; in those cases, collect data or codes and decide whether the fault is DIY-safe.
Finally, establish a baseline test plan for after any service. Reconnect power only after components are secured, then run a short diagnostic cycle to observe operation, listen for unusual noises, check for leaks, and verify heat or cooling performance. If a fault code is unclear or outside your comfort zone, consult the manual or LG support rather than proceeding with risky work. A cautious, data-driven approach protects you and your equipment.
Tools and Materials You'll Need for LG Repairs
Having the right tools reduces guesswork and speeds repairs. Start with the core toolkit and then add parts specific to your model and fault. The essential kit includes: a flat-head screwdriver (1/4 inch) for small screws, a Phillips screwdriver (PH2) for general access, a multimeter to test voltages and continuity, insulated safety gloves to protect hands, and safety goggles to shield your eyes. A digital camera or smartphone is helpful to document circuit changes before disassembly. A set of non-conductive pry tools can prevent panel damage while you separate components. You’ll also want a towel or tray to catch any residual water and a model-specific repair manual or LG service sheet for precise wiring diagrams. For ongoing projects or frequent DIY repairs, keep a spare water inlet valve, drain pump, or door seal on hand, but only if you’ve confirmed that the fault points to those parts. Finally, ensure you have a clean workspace, a stable surface, and adequate lighting to minimize mistakes.
This kit balances safety with practicality so you can work efficiently on LG washers, refrigerators, dishwashers, and dryers while reducing the risk of accidental damage.
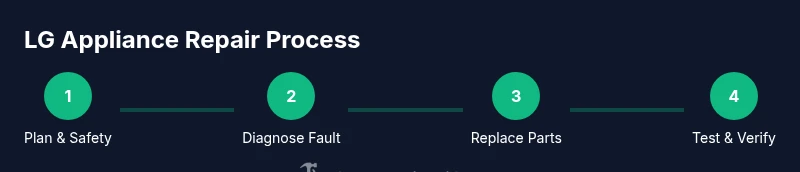
Step-by-Step Diagnostic Overview
This section outlines the repair workflow you’ll apply to LG appliances. While the step-by-step block provides model-specific actions, the overview helps you understand the logic behind each move and how to tailor the process to your unit. Start with symptom verification and power down, then move to controlled disassembly focused on the most likely fault area. Use your multimeter and visual inspection to confirm electrical and mechanical integrity before replacing parts. After a component swap, reassemble and perform a full test cycle to verify that the fault is resolved and that no new issues have appeared. The approach is deliberately conservative: avoid replacing parts unless you’ve confirmed failure, and always test in small increments to verify safe operation. Documentation—photos, notes, and a labeled wiring map—will dramatically simplify reassembly and future maintenance. This workflow applies across LG front-load washers, top-load machines, refrigerators, dishwashers, and dryers, and it aligns with the safety standards described by the brand and recognized industry guidelines.
Preventive Maintenance and Prolonging Appliance Life
Regular maintenance is a cost-effective way to extend the life of LG appliances and reduce the frequency of repairs. Start with basic hygiene: clean filters, seals, and vents to maintain airflow and water flow. Schedule a seasonal check of door seals for signs of wear, inspect hoses for cracks, and listen for abnormal noises that could indicate lubrication issues or worn bearings. For refrigerators, verify door alignment and gasket integrity to preserve energy efficiency and cooling consistency. Dishwashers benefit from monthly filter cleanouts to prevent clogs, while washers and dryers should have belts and pulleys inspected for wear. Keeping a simple maintenance log helps you track when parts were last serviced and when you anticipate replacements. The Home Repair Guide method emphasizes preventive care as the most reliable route to durable performance and fewer urgent repairs.
Tools & Materials
- Flat-head screwdriver (1/4 inch)(Used for small screws and terminal panels)
- Phillips screwdriver (PH2)(General purpose for access panels)
- Multimeter(Test voltages and continuity safely)
- Needle-nose pliers(Assist with clamps and connectors)
- Nut driver set(Lugs and hose connections)
- Insulated safety gloves(Protect hands during electrical work)
- Safety goggles(Eye protection against debris)
- LG-compatible replacement parts (valves, pumps, seals)(Only when you’ve identified a faulty component)
- Digital camera or smartphone(Take photos before disassembly)
- Owner’s manual or model-specific repair guide(Critical for compatibility)
- Non-conductive pry tools(Gentle prying without scratches)
Steps
Estimated time: 30-60 minutes
- 1
Power down and disconnect
Begin by unplugging the appliance from the wall outlet. If applicable, shut off the water supply valve and disconnect any water lines to prevent leaks during service. This prevents shock and water damage as you inspect components.
Tip: Always verify power with a tester before touching any internal parts. - 2
Gain access to the fault area
Remove accessible panels carefully to reveal the fault area. Keep small screws organized and note which panel belongs to which area. Record screws and their locations for easier reassembly.
Tip: Take clear photos during each disassembly step. - 3
Check safety and continuity
With the appliance powered down, use a multimeter to check for expected voltages at connectors and inspect for obvious signs of damage (burn marks, swollen capacitors, frayed wires). Do not test live circuits. Safety first.
Tip: If you smell burning or see smoke, stop immediately and unplug the unit. - 4
Inspect mechanical components
Look for worn belts, failed pulleys, clogged filters, seized bearings, or a defective drain pump. Worn parts are common culprits that don’t require full control-board replacement.
Tip: Physically move parts gently to judge stiffness; never force operation. - 5
Replace faulty parts
Swap in LG-compatible parts only after confirmation of fault. Follow manufacturer torque specs and wiring diagrams to ensure correct installation.
Tip: Double-check wiring polarity and connectors before resealing panels. - 6
Reassemble and test
Reattach all panels, reconnect power and water, and run a test cycle. Observe for leaks, abnormal noises, and proper operation. Allow the appliance to complete a full cycle before deeming it fixed.
Tip: Monitor closely for the first 5-10 minutes of operation.
FAQ
Is it safe to repair LG appliances yourself?
DIY repairs can be safe with the unit unplugged, water connections removed, and a clear plan. Follow the owner’s manual and use proper safety gear. If you encounter high voltages or complex circuitry, stop and consult a professional.
Yes, but only if you unplug the unit, drain any water, and follow safety guidelines; consult a professional for complex issues.
When should I call a licensed technician?
If the repair involves mains voltage, refrigerant, sealed systems, or you’re uncertain about the fault, contact a licensed technician. They have the tools and training to diagnose and repair without voiding warranties.
Call a licensed tech for mains voltage, sealed systems, or if you’re unsure about the fault.
What are common LG appliance failure points?
Common LG failures include drain issues in washers, seals and compressors in refrigerators, heating elements in dryers, and pumps in dishwashers. Identifying symptoms helps target the right replacements.
Common failures include leaks, poor cooling, and failure to drain; symptoms guide part selection.
Can I repair without voiding the warranty?
DIY repairs may void warranties if performed by non-authorized technicians. Check your warranty terms and consult the manual or LG support if in doubt.
DIY repairs can affect warranties; check the terms or contact LG support.
How do I reset an LG appliance after servicing?
Most LG units require a power cycle after maintenance: unplug for a few minutes, reconnect, and run a diagnostic cycle. Refer to the model-specific manual for exact steps.
Unplug, wait a few minutes, reconnect, and run a test cycle as per your model.
What safety gear should I use during repairs?
Wear insulated gloves, safety goggles, and non-slip footwear. Keep children and pets away from the workspace.
Wear safety gear and keep kids away while you work.
Watch Video
Key Takeaways
- Plan before you pry to avoid mistakes
- Unplug and test safely every time
- Use model-specific parts for reliability
- Document steps to simplify reassembly
- Test thoroughly after repair and monitor for leaks