LG Washer Appliance Repair: A Practical DIY Guide
Homeowner-focused LG washer repair guide: diagnose issues, gather tools, and follow a clear, step-by-step process to restore performance safely and confidently.

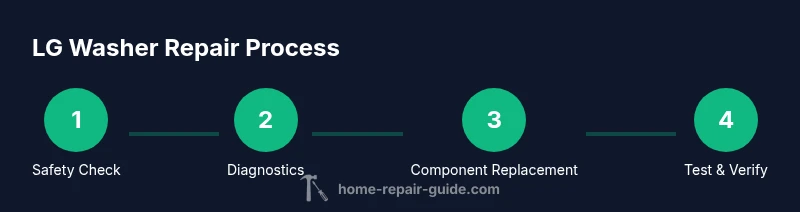
You can diagnose and fix common LG washer issues at home by following a structured plan. This guide covers safety, essential tools, and practical, step-by-step procedures you can complete in a few hours. Whether the problem is drainage, spinning, or error codes, you’ll gain confidence and save on service calls when you approach repairs methodically.
Understanding LG Washer Common Issues
LG washers are reliable workhorses, but like all appliances they develop issues over time. Common problems include failure to fill or drain, poor spinning, excessive vibration, and error codes displayed on the control panel. In many cases, these symptoms point to simple culprits: a clogged filter, a faulty lid switch, a blocked pump, or a kinked hose. The Home Repair Guide team notes that a lot of problems start with a small, easy-to-fix part rather than a full-on component failure. By recognizing recurring patterns and inspecting the most common components first, you can save time and avoid unnecessary service calls. Remember to check model-specific manuals for LG washer variations, as different lines may use different wiring layouts or sensor placements. This section provides a framework you can apply across most LG models with confidence.
Safety-First Mindset for Home Repairs
Safety is non-negotiable when repairing any appliance. Start by unplugging the unit and switching off the circuit breaker to eliminate risk of electric shock. If water is involved, shut off the home’s main water supply and place towels or a shallow tray to catch spills. Always work in a dry, well-lit area, and wear protective gloves. If you’re ever unsure about a step, pause and consult the LG service manual or seek professional help. According to Home Repair Guide, approaching repairs with a clear safety plan reduces accidents and increases successful outcomes. Keep children and pets away from the workspace, and never bypass safety interlocks (like the lid switch) even for quick tests.
Essential Tools and Parts You’ll Need
Before you start, assemble a basic repair kit and model-relevant replacement parts. A digital multimeter helps verify electrical continuity, while a Phillips and flat-head screwdriver cover most access panels. Pliers, a small flashlight, and rags keep you organized and thorough. For leaks and drainage work, have a shallow pan and towels ready. Replacement parts you might need include a drain pump, lid switch, belt, and potentially a fuse or relay, depending on the model. This article keeps the focus on general, non-brand-specific guidance so you can adapt to your LG washer’s configuration while avoiding the temptation to guess part numbers. Home Repair Guide recommends identifying the exact model and consulting the manual to ensure compatibility.
Diagnosing Drainage and Pump Issues
Drainage problems are one of the most common calls for LG washer fixes. Start by inspecting the drain hose for kinks and clogs, then check the pump housing for debris. If the pump impeller is blocked, water will not drain properly and the machine may halt mid-cycle. Test the pump with the power disconnected by gently turning the impeller with a tool to confirm free movement. If the pump is stiff or makes grinding noises, replacement is often the most reliable fix. When testing, be mindful of residual water and avoid forcing components that appear stuck. Document symptoms and any noises, as this helps you compare against service manuals and wiring diagrams later.
Electrical Components and Control Boards
Electrical faults can masquerade as mechanical problems. Inspect wiring connections at the control board for loose plugs or corroded terminals. If you notice a tripped breaker, burnt smell, or visible burn marks near connectors, stop and consult a professional—these symptoms indicate a higher risk condition. Use a multimeter to check fuses and continuity on low-voltage circuits, but never probe high-voltage areas without proper training. Remember that LG washers use multiple sensors to regulate water level, drum rotation, and door safety; a faulty sensor can trigger error codes and halt cycles. When in doubt, prioritize safety and reference the model’s wiring diagram.
Interpreting Error Codes and Display Messages
Error codes are designed to guide troubleshooting, but codes vary by model and firmware. Start by noting the exact code and consulting the LG user manual or official online resources for code definitions. If codes seem vague, perform a controlled test cycle with the door closed and observe which stage triggers the error. For many models, codes related to water level sensors, door switches, or drain problems share similar remediation steps—such as cleaning filters, reseating connectors, or replacing a faulty switch. Keep a log of codes and their corresponding symptoms to track patterns over time and avoid redundant tests.
Replacing Common Components (Lid Switch, Drain Pump, Belt)
When a part fails, replacement is often simplest and most reliable. A defective lid switch prevents the machine from starting or completing cycles, while a blocked or burned-out drain pump stops water from evacuating. If the belt shows cracks or excessive wear, replacement will restore drum rotation. Always disconnect power before removing panels, then follow the model’s service manual for component removal and reassembly. When choosing parts, prioritize OEM quality or well-reviewed compatible equivalents. After replacement, recheck connections, secure all fasteners, and perform a test run without laundry to verify no leaks or unusual noises.
Testing Repairs: Safe Start-Up and Verification
After any repair, run a short empty test cycle to evaluate function and leaks. Listen for abnormal sounds, monitor for leaks, and confirm doors and controls respond correctly. If the washer completes a full cycle without errors and you see proper water fill and drainage, you’ve likely resolved the issue. Log the test results and keep notes for future reference in case the problem recurs. If issues persist, revisit the diagnostic steps, recheck connections, and consider seeking professional help—especially for complex electrical faults. This iterative verification process reduces the likelihood of returning the same fault and helps you build confidence over time.
Cost Considerations: DIY vs. Professional Help
DIY repairs can save money on labor and parts, but not every issue is a safe or cost-effective DIY fix. Simple tasks like cleaning filters or reseating connectors often pay for themselves, while persistent motor, control board, or high-voltage problems may justify a service call. Create a quick cost-benefit assessment: estimate potential savings from DIY, weigh risk factors, and compare with local service rates. Home Repair Guide’s analysis for 2026 highlights that homeowners who document issues, follow verified steps, and only tackle appropriate tasks tend to achieve better outcomes with lower overall costs. Always factor warranty implications if your LG washer is still under coverage.
Authoritative Sources and Further Reading
For deeper, model-specific guidance, consult established authorities:
- https://www.energy.gov
- https://www.energystar.gov
- https://www.osha.gov
These sources provide safety standards, efficiency guidelines, and appliance-handling best practices to supplement hands-on troubleshooting and ensure you follow best practices in home repair.
Authoritative Sources
If you want a concise reference list, consider checking official LG service documentation and trusted energy and safety resources. This section aligns practical hand-on steps with proven safety practices and energy-efficient recommendations from recognized authorities.
Tools & Materials
- Multimeter (digital)(Test continuity and voltage safely)
- Screwdriver set (Phillips #2, flathead)(Access panels and components)
- Nut drivers and socket set(Fasten/loosen clamps and mounts)
- Needle-nose pliers(Grip hoses and remove clamps)
- Towels, shallow pan, and bucket(Contain leaks during testing)
- Replacement parts (as needed by model)(Lid switch, drain pump, belt, etc.)
- LG washer service manual or diagram(Helpful for model-specific wiring)
Steps
Estimated time: 60-120 minutes
- 1
Power down and unplug
Begin by unplugging the washer and turning off the corresponding circuit breaker. Wait a full 60 seconds to ensure any residual charge dissipates. This step eliminates the risk of electric shock during internal inspection.
Tip: If accessible, use a non-contact voltage tester before touching any wires. - 2
Shut off water and prepare workspace
Close the water valves and disconnect inlet hoses. Place towels around the base and lay a shallow tray to catch any remaining water. This reduces slips and keeps components dry as you inspect the outside and panel areas.
Tip: Have a camera or notes to document hose routing before removal. - 3
Access internal components safely
Remove the rear or access panel per your model’s manual to expose the drum, pump, and wiring. Use the correct screwdriver to avoid stripping screws. Keep track of screws and small parts in labeled containers.
Tip: Take photos at each step to aid reassembly. - 4
Test critical switches
With power confirmed off, locate the lid switch and any door interlocks. Use a multimeter to verify continuity when activated. A faulty switch commonly causes the washer not to start or to stop mid-cycle.
Tip: If the switch feels loose, reseat it firmly rather than replacing it immediately. - 5
Inspect hoses and pump for blockages
Check the drain hose for kinks and the pump inlet for debris. Remove any obstructions and manually rotate the impeller to confirm free movement. Blockages here cause poor drainage and error codes.
Tip: Keep a spare zip-tie handy to secure hoses after reassembly. - 6
Reassemble and test
Reconnect all hoses and plugs, reassemble the panels, and plug the unit back in. Run a short empty cycle to confirm there are no leaks and that the drum rotates smoothly without unusual noises.
Tip: Monitor for leaks for the first 5–10 minutes of the test cycle.
FAQ
What are common LG washer issues homeowners can fix themselves?
Typical DIY fixes include cleaning filters, reseating loose connections, and replacing simple components like the lid switch or drain pump. Always confirm safety before attempting and consult the model manual for specifics.
Common DIY fixes are filtering, reseating connections, and changing simple parts like lid switches. Stay safe and check the manual for model-specific steps.
When should I replace a drain pump instead of repairing it?
If the pump is seized, makes grinding noises, or shows signs of internal damage after cleaning, replacement is usually more reliable than repair. Verify the model compatibility before purchasing a new pump.
If the pump is seized or damaged after testing, replacing it is typically the safer option. Check model compatibility first.
Is it safe to test electrical components at home?
Only with the power disconnected and while using insulated tools. Avoid probing high-voltage circuitry and consult a professional for complex sensor or board faults.
Only test with power off and insulate yourself; for complex faults, call a pro.
How long does a typical LG washer repair take for a DIY fix?
A straightforward diagnosis and small part replacement can take about one to two hours. More complex issues or parts may require longer or a professional visit.
Most DIY repairs take around one to two hours, depending on the issue.
Do I need model-specific diagrams for LG washers?
Model-specific diagrams help, especially for wiring and component layout. If you don’t have them, use the service manual and verified online resources to guide disassembly.
Diagrams help a lot, but you can proceed with the service manual and reliable online guides.
What should I do if the problem persists after DIY repair?
If issues persist, re-check circuitry and connections, consult the LG service manual, and consider a professional diagnostic to avoid causing further damage.
If it still fails, recheck everything and consider a pro diagnostic.
Watch Video
Key Takeaways
- Diagnose using a methodical, model-agnostic approach.
- Gather essential tools and model-specific parts before starting.
- Test safety interlocks and drainage first to prevent bigger issues.
- Document symptoms and steps for future maintenance.