LG Washing Machine Repair: A Complete Step-by-Step Guide
Learn how to diagnose, troubleshoot, and safely repair common LG washing machine issues with practical, evidence-based methods from Home Repair Guide. This educational guide helps homeowners decide when to DIY and when to call a pro.

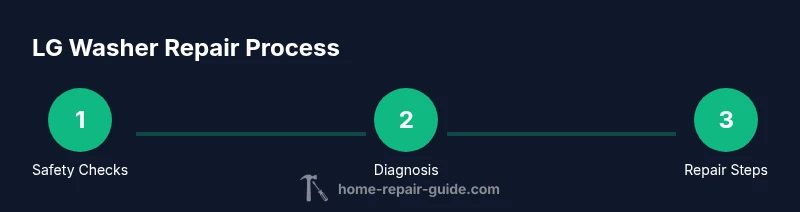
This guide helps you diagnose and repair common LG washing machine issues. You will learn safe power and water disconnection, how to identify error codes, inspect the lid switch, pump, belt, and control board, and perform practical fixes or decide when to call a professional. This hands-on, stepwise approach empowers homeowners while avoiding dangerous DIY in your own home.
Safety First: Power, Water, and Handling
Safety is the foundation of any LG washing machine repair. Before you touch the machine, unplug the power cord from the wall outlet and switch off the household circuit if needed. Shut off both hot and cold water supply valves to prevent leaks during service. Clear the area of clutter and place a towel or bucket to catch any residual water. For renters or unsteady homes, unplug power, disconnect hoses at the wall, and drain any standing water in the drum. According to Home Repair Guide, following a consistent, documented checklist reduces the risk of electrical shock and water damage.
Understanding LG Washer Error Codes and Symptoms
LG washers display error codes to help diagnose problems. While codes vary by model, most LG indicators signal issues with the lid switch, drain pump, water inlet, or control board. Based on Home Repair Guide Analysis, 2026, the majority of faults stem from sensor or motherboard interactions, not mysterious malfunctions. Observe what the drum does during a cycle: does it fill, agitate, drain, spin, or stop mid-cycle? Note any unusual noises, odors, or leaks. Record the exact code and consult the user manual or online resources from LG Support before opening the machine. This approach keeps you aligned with manufacturer recommendations and reduces unnecessary disassembly.
Diagnostic Framework: How to Inspect Major Components
A methodical approach increases your odds of a successful DIY repair. Start at the user-accessible areas: lid switch and door lock, inlet hoses, and water inlet filter. Use a digital multimeter to test continuity on switches and sensors, and check for loose connections in the harnesses. Inspect the drain pump area for blockages; clear a clog if present. If you hear grinding or rumbling, inspect the belt and pulleys for wear. Keep a clean workspace and photograph each disconnection so reassembly is straightforward.
Common Failure Modes in LG Washers and How They Manifest
Not draining or spinning are among the most frustrating symptoms, often signaling a clogged pump, a faulty lid switch, or a worn drive belt. Leaks point to hose or door seal issues, while frequent error codes can indicate a faulty control board or sensor. In many cases, loosened connectors or corroded terminals are culprits; in others, hard water deposits clog filters. Understanding these patterns helps you target the right component without unnecessary disassembly. Remember that each LG model may use different parts, so reference your model number when sourcing replacements.
Step Back and Prepare: Basic Fixes You Can Try
This section offers context for the hands-on steps in the next module. Start by ensuring the washer is powered down and water supply is off. Check for obvious obstructions in the drum, pump outlet, and hoses. Clean or replace filters if your model has them, and reseat any loose electrical connections you can safely reach. If you observe burnt smells or melted connectors, stop and seek professional help. These high-level fixes reduce downtime and help you decide whether to proceed with more involved repairs.
When to Repair Yourself vs Call a Pro
DIY is appropriate for simple tasks like clearing a drain hose, reseating harnesses, or replacing a worn belt on a low-voltage path. If you encounter persistent error codes after basic checks, abnormal noises, burning smells, or signs of water damage, it’s prudent to consult a technician. When dealing with the control board or high-voltage components, professional service is strongly recommended to avoid safety hazards and potential voiding of warranties. This decision framework aligns with Home Repair Guide guidance for prudent, safe repair decisions.
Maintenance Habits to Extend Your LG Washer Lifespan
Regular maintenance lowers the chances of expensive breakdowns. Clean lint filters and water inlet screens monthly, run a hot wash cycle periodically to minimize residue, and use the appropriate load size and detergent. Check hoses for bulges or leaks and replace them every few years, especially in hard water areas. Keep the area around the washer dry and organized to prevent accidental slips when handling water connections. Implement a simple maintenance calendar to build a durable repair habit.
Sourcing Parts and Getting Help
When parts are required, source OEM-quality components compatible with your LG model. Use the model number to verify compatibility with replacement lids switches, pumps, and belts. If you’re unsure, contact LG Support or a qualified parts supplier to confirm part numbers before purchasing. Keeping a parts short list and model details reduces back-and-forth and speeds repairs. For complex electronics, rely on a professional rather than attempting a risky, unsupervised fix.
Tools & Materials
- Digital multimeter(Test voltage, continuity, and resistance on switches/sensors)
- Screwdriver set (Phillips and flathead)(For access panels and fasteners; include #2 Phillips and 1/4" flathead)
- Needle-nose pliers and slip-joint pliers(Grip hose clamps, connectors; avoid kinking wires)
- Bucket, towels, and rags(Manage water spills and residual water in drum)
- Replacement parts (lid switch, drain pump, drive belt)(Buy based on model compatibility; only if testing shows fault)
- Flashlight or headlamp(Improve visibility in dark access panels)
- Camera or smartphone(Document connections for reassembly)
Steps
Estimated time: 45-75 minutes
- 1
Power Down and Isolate
Unplug the washer from the wall outlet and, if possible, switch off the household circuit. Shut off hot and cold water valves. Move the unit to a dry workspace and lay towels to catch any water that drips during disassembly.
Tip: Always assume water is present; use a bucket and dry as you work. - 2
Record and Check Error Codes
Note any error codes or blinking lights. Consult the LG manual or official support site for code definitions. This helps you identify likely fault categories (lid switch, pump, or control board) before touching internal components.
Tip: Take photos of codes and panel wiring for reference. - 3
Test the Lid Switch and Door Lock
With the panel removed, test the lid switch with a multimeter for continuity when the lid is closed. If the switch is intermittent or dead, plan for replacement.
Tip: Avoid forcing connectors; disconnect and document their orientation. - 4
Inspect the Drain System
Follow the drain hose from the tub to the pump. Look for kinks, clogs, or disconnections. Remove any debris and flush the line with water to confirm flow.
Tip: Clear blockages gently; never pull on electrical wires to free a clog. - 5
Check the Drive Belt and Pulleys
If accessible, inspect the belt for cracks or wear and verify pulleys rotate smoothly. Replace if worn or loose. Re-seat the belt if you find it misaligned during reassembly.
Tip: Belt wear is common on older models; replace proactively if signs appear. - 6
Test Run and Reassemble
Reconnect all panels, secure fasteners, and restore water supply. Run a short cycle to observe operation and listen for abnormal noises. If issues persist, discontinue use and seek professional service.
Tip: Always monitor the first test run; stop if leaks or smoke appear.
FAQ
What are the most common LG washer problems?
Not draining, not spinning, leaks, and error codes are among the most frequent complaints. These symptoms usually point to the drain pump, belt, lid switch, or control board.
Not draining or spinning and leaks are common; check the pump, belt, and lid switch first.
Can I repair an LG washing machine without professional tools?
Some basic fixes can be done with common hand tools and a multimeter. For electronics or high-voltage components, professional service is safer.
Yes, with basic tools you can handle simple fixes; for electronics, get a pro.
Should I replace a washing machine belt myself?
If you can safely access the belt and it shows wear, replacement is possible. If you’re unsure about routing and tension, call a pro.
A worn belt can cause spin problems; replace only if you’re confident.
Is it safe to run a washer while diagnosing components?
No. Do not run the machine with panels removed or while you have exposed wiring. Reassemble panels before testing.
Don’t run it with parts loose; safety first.
How do I know when to call a pro?
If error codes persist after basic checks, or you encounter electrical components, unusual noises, or water damage, seek professional help.
Persistent issues beyond basic checks mean it’s time for a professional.
Where can I buy LG replacement parts?
Look for OEM parts from LG or reputable retailers that list model compatibility. Verify part numbers before purchasing to avoid mismatches.
Find compatible parts from LG or trusted suppliers to ensure proper fit.
Watch Video
Key Takeaways
- Power and water isolation is non-negotiable.
- Use error codes to guide diagnosis.
- Test switches and pumps with basic tools first.
- Know when to DIY and when to hire a pro.
- Maintain a simple parts-and-maintenance log.