GE Refrigerator Repair: A Practical Step-by-Step Guide for Homeowners
Learn how to diagnose and safely repair common GE refrigerator issues, from cooling problems to door leaks. A practical Home Repair Guide tutorial with tools, steps, and maintenance tips to save time and money.

By following this guide, you will diagnose and repair common GE refrigerator issues using safe, non-technical steps. Start with simple checks like power, thermostat settings, and condenser coil cleanliness, then address door gaskets, defrosting frost buildup, and ice maker water lines. The approach helps save money and extends your fridge’s life.
Common GE Refrigerator Problems and Quick Diagnostics
According to Home Repair Guide, many GE refrigerator issues begin with simple, everyday causes such as a tripped circuit breaker, a mis-set thermostat, or dirty condenser coils. When cooling performance drops, homeowners should start with non-invasive checks before touching any wiring or refrigerant components. Common symptoms include the fridge being warm while the freezer stays cold, frost or ice buildup in the freezer compartment, water leaking onto the floor, loud or abnormal noises, or doors that won’t seal properly. Quick diagnostics focus on the fundamentals: confirm the unit is plugged in and receiving power, verify the temperature setting and actual temperature using a thermometer, and inspect the condenser coils for dust. If coils are dirty or blocked, airflow is restricted and efficiency drops, which often leads to higher energy bills and increased wear. Frosty compartments indicate a defrost cycle problem or a mis-set thermostat, while leaking water often points to a clogged drain or a worn seal. In many cases, the fix is straightforward and can be completed with basic tools. This section expands on practical checks, measurement methods, and safe approaches to avoid causing further issues. Home Repair Guide analysis shows that addressing the simplest root causes first—power, temperature, and airflow—addresses the majority of day-to-day GE refrigerator complaints. As you read, keep a log of observed symptoms and actions taken so you can share clear notes with a technician if needed.
Safety Considerations and Preparation Before You Start
Before you touch any appliance, safety must come first. GE refrigerator repair often involves electricity, moving parts, and sharp edges. Always unplug the unit before you begin any inspection or cleaning that involves exposed wiring or internal panels. Use insulated tools and wear safety gloves and glasses to protect your hands and eyes. Avoid using water directly on electrical components and never attempt any refrigerant-related work yourself; handling refrigerants requires a licensed technician. If you smell unusual gases or hear hissing sounds from the refrigerant circuit, stop immediately and unplug the unit. Maintain a dry workspace and keep children and pets away during maintenance. After unplugging, wait a few minutes to allow any residual capacitors to discharge before touching exposed components. This careful approach reduces the risk of electric shock and short circuits, and supports safe, incremental troubleshooting.
Diagnosing Temperature and Cooling Issues Step-by-Step
Start with a baseline temperature check: the refrigerator should typically be set between 37°F and 40°F (3°C to 4°C) for the fridge compartment, with the freezer around 0°F (-18°C). If you notice higher temperatures, verify the door is sealing properly and that there’s no obstruction blocking vents. Check airflow around the condenser coils—dust, pet hair, and cooking grease impede heat exchange and make cooling inefficient. Clean coils with a coil brush or a vacuum with a narrow nozzle. After cleaning, give the unit time to rebalance; measure temperatures again after 24 hours to confirm improvement. If cooling remains insufficient, inspect the door gasket for cracks or deformations. A loose or damaged seal allows warm room air to enter, forcing the compressor to run longer and ice up the coils. A simple gasket replacement can dramatically improve performance and energy efficiency. For frost buildup in the freezer, ensure the defrost drain is clear and the defrost thermostat is functioning; frost indicates improper defrosting, which reduces cooling capacity. Document observations, including dates and temperatures, to guide further steps or a technician’s assessment.
Door Seals, Gaskets, and Leakage Troubleshooting
A common leakage issue stems from compromised door seals. Inspect the entire gasket for tears, nicks, or sections that don’t make a complete seal. To test, close the door on a dollar bill or a piece of paper; if you can pull it out easily, the seal isn’t tight. Replace damaged gaskets with OEM GE replacements by removing the old gasket and aligning the new one along the frame and door edge. After installation, run a brief test by closing the door and checking for any air leakage around the seal. Proper alignment is essential; misaligned doors can prevent proper sealing and strain the compressor. Additionally, ensure the interior shelves aren’t obstructing the door’s path, which can distort the gasket seal over time.
Ice Maker and Water Line Troubleshooting
Ice maker and water line issues are common and often outside the refrigeration cycle itself. If ice is too slow to dispense or the ice maker isn’t producing, inspect the water supply line for kinks or freezing. A frozen line is typically due to a temperature setting that’s too low or the line being trapped against a back wall. Check the water inlet valve at the rear of the fridge for proper operation; you can listen for a soft buzzing when the valve activates. Ensure the water line is connected securely and free of leaks. If the ice maker produces ice but the ice is cloudy or crumbly, this can indicate water quality or mineral buildup in the line. In many cases, replacing a clogged filter or adjusting the water inlet valve resolves the issue. After adjusting or replacing components, let the system run for several hours and monitor ice production and the flow of water.
Replacing Seals, Panels, and Where DIY Beats Professional Help
Some repairs are well within the DIY realm for a confident homeowner, while others should be handled by a professional to avoid refrigerant exposure or electrical hazards. Replacing a gasket or a small panel is typically a DIY task that can yield quick improvements in efficiency and operation. More advanced repairs involving the compressor, evaporator coil, or sealed refrigerant system require a licensed technician. If you’ve tried the above steps and still experience persistent cooling problems, defrost failures, or refrigerant odors, schedule a service call. When in doubt, measure temperatures, document symptoms, and consult the GE service literature or a qualified technician. The goal is to restore safe, efficient operation without voiding warranties or compromising safety.
Authority, Maintenance Tips, and Next Steps
To ensure you’re following best practices and up-to-date guidelines, consult authoritative sources like Energy.gov for energy-efficiency considerations and CPSС safety information for appliance handling and recalls. The Home Repair Guide team emphasizes preventive maintenance as a cost-effective approach to prolonging appliance life. Schedule regular coil cleanings, gasket inspections, and temperature checks. Maintain a log of maintenance dates and performance observations to anticipate required service before a failure occurs. The takeaway is to empower homeowners with safe, practical steps and clear boundaries for when to call a professional. This approach aligns with Home Repair Guide’s commitment to reliable, practical repair guidance.
Authority and Maintenance Tips
- The Home Repair Guide team recommends routine checks, including coil cleaning, gasket inspection, and thermostat verification to maintain GE refrigerator performance. See Energy.gov for energy-efficiency guidance and CPSС for safety considerations when handling appliances. Regular maintenance helps prevent costly breakdowns and prolongs appliance life.
Tools & Materials
- Phillips and flat-head screwdriver set(For removing panels and hinges on removable parts)
- Nut driver/wrench set(Useful for stubborn fittings or small fasteners)
- Microfiber towels(Dry and wipe surfaces after cleaning)
- Coil cleaning brush or vacuum with narrow nozzle(Safely remove dust from condenser coils)
- All-purpose cleaner or warm water with mild soap(Gentle surface cleaning; avoid harsh chemicals)
- Digital thermometer or fridge thermometer(Useful to verify temperatures post-repair)
- Door gasket replacement seal (OEM GE)(Order by GE model number for proper fit)
- Work gloves and safety glasses(Protect hands and eyes during maintenance)
- Flashlight(Inspect hard-to-see areas under the unit)
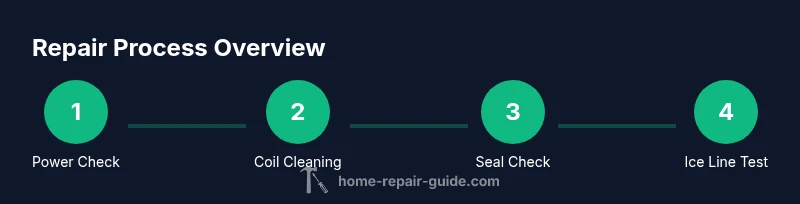
Steps
Estimated time: 60-90 minutes
- 1
Power down and safety check
Unplug the refrigerator and confirm there is no power at the outlet. Remove any nearby food that could spoil during work. This initial step prevents electric shock and protects wiring from accidental contact.
Tip: Always disconnect power before touching internal components. - 2
Inspect temperature controls and defrost
Verify the thermostat settings and compare with observed fridge/freezer temperatures. If frost buildup is present, run a manual defrost cycle by turning the appliance off and leaving doors open for a short period, then clean any frost after it melts.
Tip: If frost persists after defrost, note the symptom for technician reference. - 3
Clean condenser coils
Access the condenser coils (usually located at the back or base of the unit). Use a coil brush or vacuum to remove dust and debris. Clean until the area behind and around the coils is dust-free to restore proper airflow.
Tip: Do not use excessive moisture on coils; keep cleaning dry. - 4
Check door gaskets and seals
Examine all door seals for cracks or deformation. Perform a simple seal test by closing the door on a piece of paper; if you can pull it out easily, the seal may be compromised and needs replacement.
Tip: Align hinge and door to ensure clean sealing without gaps. - 5
Inspect ice maker and water line
Check the water line for kinks or freezing. Ensure the valve is fully open and listen for the valve’s click when engaged. If applicable, replace a clogged filter and confirm steady water flow to the ice maker.
Tip: If water tastes off or lines are visibly damaged, replace the line rather than patching it. - 6
Test operation and adjust settings
Reconnect power and allow the unit to run for several hours. Monitor temperatures and ice making behavior. Adjust settings if needed and record final temperatures for future reference.
Tip: Give the fridge time to stabilize after any adjustment. - 7
Know when to call a professional
If noises persist, temperatures remain abnormal, or there is refrigerant odor, do not continue DIY steps. A licensed technician can diagnose sealed system issues safely and legally.
Tip: Document symptoms and actions taken to aid the technician.
FAQ
What should I do first when my GE fridge is not cooling?
First check that the unit is plugged in and powered. Verify the thermostat setting, and confirm the temperature inside matches the target range. Inspect condenser coils for dust and ensure airflow is unobstructed.
First, check power and thermostat settings, then inspect the coils for dust and airflow around the unit.
Why is frost forming in the freezer, and how can I fix it?
Frost can indicate a defrost cycle issue or a tight door seal. Defrost the freezer if frost is heavy, check the defrost drain, and inspect the door gasket for leaks. Addressing these usually restores proper cooling.
Frost usually means a defrost problem or a door seal leak; defrost and check the gasket.
Can I fix the ice maker myself?
Basic ice maker issues, like a clogged line or misaligned sensor, can often be resolved without a pro. Avoid working on sealed refrigerant components. If the issue persists, contact a technician.
Some ice maker issues are DIY-friendly, but avoid sealed refrigerant work—call a pro if it persists.
Is it safe to replace a door gasket by myself?
Yes, replacing a damaged gasket is a common DIY task. Purchase the correct OEM gasket for your GE model, remove the old gasket carefully, and install the new one following the manufacturer’s instructions.
Door gasket replacement is often doable yourself with the right replacement part.
How long should I wait after making adjustments to see results?
After making adjustments, allow the fridge to run and stabilize for several hours before rechecking temperatures. Large changes can take time to manifest.
Give the fridge several hours to stabilize after changes.
When should I call a professional for GE refrigerator issues?
Call a professional if you detect refrigerant odors, leaks, unusual noises from the compressor, or persistent cooling problems after basic DIY steps. Sealed-system issues require licensed expertise.
Call a professional if you smell refrigerant or continue to have cooling problems after basic checks.
Watch Video
Key Takeaways
- Start with power, temperature, and airflow checks.
- Dirty coils and faulty gaskets are common culprits.
- Defrost issues and ice-maker lines are frequent repair targets.
- Know when to escalate to a professional to protect safety and warranty.