LG Fridge Repair: A Practical Step-by-Step Guide
Learn safe, step-by-step LG fridge repair techniques to diagnose common faults, replace worn parts, and maintain energy efficiency. This guide from Home Repair Guide covers tools, safety, troubleshooting, and practical tips for DIY fixes and informed decisions.

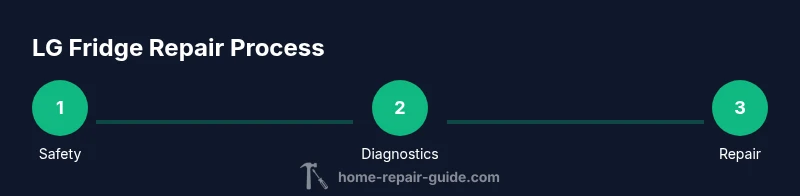
According to Home Repair Guide, you can safely diagnose and repair many LG fridge issues at home, avoiding costly service calls. This guide explains how to assess symptoms, identify common failures, and follow a safe, tool-ready plan, with clear steps and practical safety reminders. It also outlines essential tools, typical replacement parts, and a structured diagnostic flow you can follow in a weekend.
Understanding LG fridge repair basics
LG refrigerators are built with modular components, which means many common issues are caused by a few predictable parts. For homeowners, the goal is to quickly determine whether the fault is electrical, mechanical, or related to door seals and airflow. According to Home Repair Guide, safe, at-home diagnostics can save time and money when the problem is non-fundamental or user-serviceable. Start with basic checks, then decide if you can fix it or if a professional should handle complicated components like sealed refrigerant systems. In this section we cover typical symptoms, how the components interact, and the decision tree you’ll use as you work. Understanding the refrigeration cycle—evaporation, condensation, and metering devices—helps you identify where things go wrong. If your model has an ice maker or water dispenser, verify the supply line and filter condition, as these are common sources of malfunctions.
Common LG fridge issues and diagnosing them
Count on LG fridge repairs to involve cooling inconsistencies, frost buildup, water leaks, or unusual noises. The most frequent symptoms include warm compartments, frost on the evaporator, or dripping water inside the fridge. When diagnosing, start with easy fixes: check the door gasket for a tight seal, clean condenser coils if dusty, and replace the water filter if it hasn’t been changed recently. Home Repair Guide Analysis, 2026, suggests that many faults stem from airflow blockages or temperature sensor drift rather than major mechanical failure. For example, a noisy compressor is often normal at startup but persistent buzzing may indicate a failing relay or fan motor. If frost accumulates in the freezer, inspect the defrost drain and heater circuit. Ice maker problems usually come from a clogged water line or a frozen fill tube. Document symptoms with notes; this helps when you contact support or a technician.
Safety considerations and when to call a pro
Working on a powered refrigerator can pose risk of electric shock, leaks, and sharp metal edges. Always unplug the unit before inspecting electrical components, and never charge refrigerant yourself or attempt to seal a leak. If you detect a refrigerant smell or suspect a sealed system issue, contact a licensed technician immediately. For safety, wear gloves and eye protection, and keep children and pets away from working area. If you’re not sure about the issue, or you see signs of a failed compressor, you should stop and call a professional. A quick consult with a certified technician can save time and avoid damage to your home.
Tools and materials for LG fridge repair
Before you begin, gather essential tools and safe, compatible parts. Have a clean workspace, a labeled area to store screws, and a plan for reassembly. Typical projects involve testing electrical parts with a multimeter, removing service panels, and inspecting coils and seals. The exact parts depend on your LG model, but common upgrades include a replacement fan motor, defrost heater, thermostat, or door gasket. Always verify compatibility with your model number before purchasing. Safety gear—gloves and safety glasses—should be worn at all times during interior work. Keep a camera or notes handy to confirm wiring paths and component locations.
Diagnostics and repair flow overview
This section outlines a practical, homeowner-friendly flow for diagnosing the most common LG fridge faults. Start with safety and basic checks, then proceed to airflow and temperature-sensing evaluations. The goal is to identify non-invasive fixes you can execute in under an hour and to recognize when a professional is warranted for components like the sealed refrigerant loop or compressor circuitry. Following a structured flow reduces guesswork and helps you communicate clearly with technicians if you need to escalate the repair.
Maintenance and post-repair tips
After completing repairs, focus on preventive upkeep that extends the life of your LG fridge. Clean condenser coils every 6–12 months, ensure the door seals stay tight, and replace water filters per manufacturer recommendations. Maintain ambient temperatures around the appliance to prevent excessive cycling, which wastes energy. Document any service performed and note model details for future reference.
When to replace vs repair
Not every fridge repair makes economic sense. If the anticipated repair cost approaches or exceeds a substantial portion of a new LG model’s price, or if reliability and efficiency are consistently compromised, replacement may be the wiser option. Consider the age of your unit, energy use, and how often it has needed major work. The Home Repair Guide team recommends weighing long-term operating costs against upfront repair bills to decide the best path.
Tools & Materials
- Multimeter(Essential for testing electrical components and sensors.)
- Screwdriver set (Phillips and flathead)(Carry both Phillips and flathead; include a small precision set for electronics.)
- Nut driver / socket set(Useful for removing drain pans and service panels.)
- Torx bits(Some LG models use Torx screws in panels.)
- Replacement parts compatible with LG fridge model(Included parts vary by model; confirm compatibility before purchase.)
- Door gasket/seal set (if needed)(Improves sealing and energy efficiency if the door leaks.)
- Safety gear (gloves, safety glasses)(Always use protective equipment when handling electrical or metal parts.)
- Cleaning supplies (rags, brush, mild detergent)(Helpful for post-repair cleanliness and coil maintenance.)
Steps
Estimated time: 40-90 minutes
- 1
Power down and safety check
Unplug the refrigerator from the wall outlet and disconnect any accessories. Verify the area is dry and free of standing water. This prevents electric shock and protects you while you inspect panels and components.
Tip: Label cords and take a quick photo of wire connections before you unplug anything. - 2
Inspect door seals and airflow
Check the moisture and fit of door gaskets. A loose seal causes cold air leakage and temperature fluctuations. Clean the gasket surface and inspect for cracks or tears; replace if damaged.
Tip: Close the door gently to avoid distorting the gasket during inspection. - 3
Clean and inspect condenser coils
Dusty coils reduce efficiency and cooling performance. Vacuum or brush the coils from the back or underneath the unit. Look for bent fins and clear any obstructions near the fan.
Tip: Do not use water directly on electrical components; keep the area dry as you clean. - 4
Test the thermostat and temperature sensor
Measure resistance or voltage on the temperature sensor and verify the thermostat setting. Replace if readings are out of spec or if the sensor drifts over time.
Tip: If you’re unsure about spec ranges, consult your LG model’s service manual. - 5
Check the defrost system and drain
Inspect the defrost heater and defrost timer/board. A clogged defrost drain can cause frost buildup and water leaks; clear the drain and check for leaks.
Tip: Pour a small amount of warm water into the drain to check flow path. - 6
Ice maker and water line inspection
If the unit has an ice maker, inspect the water line for leaks or kinks. Clear any ice buildup in the tube and ensure the supply valve is fully open.
Tip: Ensure the fridge is level; an off-level unit can affect water flow. - 7
Check electrical connections and fuses
Inspect wiring connections behind access panels for secure fit. Look for damaged insulation or burnt smells. Replace blown fuses or damaged wires as needed.
Tip: Only handle exposed conductors with the unit unplugged. - 8
Reassemble and test performance
Reconnect power, restore any removed panels, and monitor cooling performance over the next several hours. Confirm even temperature and absence of leaks.
Tip: Document results and revisit any steps if temperatures remain unstable.
FAQ
What are the most common LG fridge problems?
Cooling issues, frost buildup, water leaks, and unusual noises are among the most frequent LG fridge problems. Start with basic checks like seals and coils before deeper diagnostics.
Common LG fridge problems include cooling issues, frost buildup, leaks, and noises. Start with simple checks like seals and coils before deeper diagnostics.
Can I fix an LG fridge myself?
Yes, for many basic issues you can perform simple diagnostics and fixes. Unplug before work, follow safety steps, and replace symptoms that don’t require special tools.
Yes, many simple issues can be fixed at home if you unplug first and follow safety steps.
How long does LG fridge repair take?
Repair duration varies by issue; simple fixes may take under an hour, while more complex problems can require several hours or a professional service visit.
Repair time varies. Simple fixes can be under an hour; complex issues may take longer or require a pro.
When should I replace rather than repair?
If repair costs are high relative to a new unit’s price or reliability is questionable, replacement may be the better option. Consider age and energy efficiency too.
If repairs are expensive or the fridge is old and unreliable, replacement may be the wiser choice.
What parts are commonly replaced in LG fridges?
Fans, defrost heaters, thermostats, door seals, and filters are among the parts commonly replaced during LG fridge maintenance.
Common replacements include fans, defrost heaters, thermostats, seals, and filters.
Is it safe to use a multimeter on a fridge?
Yes, if the unit is unplugged and you follow proper safety steps. Use the multimeter to test sensors and electrical connections without touching live components.
Yes, with the unit unplugged and proper safety steps, you can test sensors and connections with a multimeter.
Watch Video
Key Takeaways
- Identify the fault type before you start.
- Prioritize safety and unplug the unit first.
- Use the right tools and model-specific parts.
- Know when to stop and call a professional.
- Regular maintenance prevents future issues.