Oven Service Repair: A Practical Home Guide
A comprehensive 1800-word walkthrough on diagnosing and performing oven service repair safely, with tools, step-by-step actions, maintenance tips, and when to call a professional.

You will learn how to safely diagnose and perform oven service repair, addressing common heating problems, testing components, and replacing faulty parts. This quick guide highlights essential safety steps, the right tools, and practical tips to extend your oven’s life. Whether electric or gas, you’ll gain a clear path from trouble-shooting to a durable fix.
Why oven service repair matters
Oven service repair is about more than restoring heat; it protects your home, your wallet, and your family’s cooking routines. According to Home Repair Guide, addressing oven faults promptly can prevent electrical hazards, gas leaks, and energy waste, while keeping temperatures accurate for reliable meals. A well-maintained oven also runs more efficiently, which can save energy over the appliance’s lifetime. For most households, a modest repair now prevents larger, costlier problems later. This guide focuses on safe diagnosis, practical fixes, and durable improvements you can do yourself when appropriate, plus clear signs you should call a professional.
Key takeaway: start with safety, verify your model, and proceed with tested methods rather than guesswork.
If you’re facing an oven that won’t heat, cooks unevenly, or displays error codes, this article will walk you through practical checks, parts to consider replacing, and steps to a durable repair. Remember: safe, incremental progress beats risky improvisation, especially with electrical and gas appliances.
The Home Repair Guide team emphasizes that most fixes are manageable with the right tools and careful testing. See the step-by-step sections for a durable plan you can follow in a weekend and reference during future maintenance.
Common causes of oven malfunctions
Ovens fail for a handful of predictable reasons. Heating elements can burn out or develop hot spots, timers and control boards can drift out of calibration, and wiring connections can loosen with use or vibration. Gas ovens may exhibit weak ignition, inconsistent flame, or delayed light-off, while electric ovens can show no heat or uneven cooking. In many cases, smells like burning plastic or chemical odors indicate wiring insulation damage or overheated components. Recognizing these issues early allows you to choose the right repair path and avoid unsafe operation.
Common signs to watch for include: the oven not heating at all, heat that is inconsistent across racks, error codes on digital displays, or unusual smells during operation. If you notice any of these, document symptoms, check your model’s service manual, and proceed with targeted testing. Reliability improves significantly when small faults are addressed before they cause larger failures.
This section aligns with Home Repair Guide’s approach to practical diagnostics—focus on demonstrable symptoms, not vague hunches. Diagnosis becomes more accurate when you combine visual inspection with basic electrical checks and cross-checks against your oven’s specifications.
Diagnostic approach and safety precautions
Approach oven service repair with a plan and a focus on safety. Start by turning off power at the circuit breaker and disconnecting any gas supply if you have a gas oven and you are trained to do so. Gather model information and service manuals, then perform basic visual checks for loose wires, burnt connectors, or damaged insulation. Use a multimeter to test heating element continuity and verify thermostat readings against the setpoint. Document findings before disassembly so you can retrace steps if you need to revert parts.
Safety comes first: never bypass protection devices or operate a unit with the back panel removed. If you’re unsure about the electrical or gas setup, err on the side of caution and call a professional. A systematic approach—visual inspection, continuity testing, and calibration checks—reduces risk and helps you identify the actual failure without unnecessary part replacement.
Tools, parts, and when to replace
Essential tools include a multimeter for continuity tests, a screwdriver set, nut drivers, a non-contact voltage tester, and heat‑resistant gloves. A reliable oven thermometer helps you verify your oven’s actual temperature. Replacement parts should be model‑specific and only installed after confirming a fault with proper testing. Keep a few spare fuses or elements on hand if your model uses them, but avoid replacing parts without evidence they’re defective. If a part is aged or shows visible damage, replacement is often warranted.
Be mindful of compatibility: not all elements fit every oven. When in doubt, consult the model number against the parts catalog or contact the manufacturer for exact replacement part numbers. Carry the broken component to the store to ensure an exact match. This reduces the risk of mismatches that can cause safety issues or poor performance.
Maintenance and improvement strategies
After a successful repair, adopt a simple maintenance routine to extend the oven’s life. Clean the interior regularly to prevent food debris from affecting sensors, seals, and vents. Check door gaskets for wear and replace if loose or cracked. Schedule annual inspections if the oven is used heavily, and replace parts according to the manufacturer’s recommendations. Consider energy‑efficient practices, such as using the right rack position and preheating only as long as needed, to reduce heat loss and improve performance. This proactive care supports reliable oven service repair between major overhauls.
Regular cleaning helps sensors and fans operate as designed, while door seals prevent heat loss. A simple log of maintenance tasks can help you catch wear patterns early—an ounce of prevention beats a pound of frustration when the oven fails during holiday cooking or dinner rushes.
By investing in routine checks and respecting the appliance’s design limits, you’ll notice fewer emergency fixes and longer service life. The Home Repair Guide team notes that sustained upkeep is a cornerstone of durable home repairs.
When to call a professional
Some oven issues are beyond safe DIY scope. If you smell gas, hear unusual buzzing, see arcing, or cannot isolate the fault with basic tests, contact a licensed technician immediately. Gas ovens involve more complex safety concerns, and miswiring can create fire hazards. A pro can confirm the fault, perform advanced diagnostics, and source model‑specific parts with proper warranty coverage. Use this guide as a checklist to decide whether a repair is affordable and safe to attempt on your own.
If you’re unsure at any point—especially when the problem involves gas lines, carbon monoxide risks, or electrical boards—calling a professional is the prudent choice. A robust decision framework is to attempt simple, clearly defined tasks first, then escalate when the potential risk rises. The aim is a safe, lasting repair rather than a rushed fix that could fail later.
Tools & Materials
- Multimeter(Test heating element continuity and electrical components)
- Screwdriver set (Phillips and flat)(For removing panels and terminal covers)
- Nut driver set(For appliance fasteners and brackets)
- Non-contact voltage tester(Verify power is off before touching wires)
- Oven-safe thermometer(Verify actual oven temperature during testing)
- Heat-resistant gloves(Protect hands when handling hot racks or panels)
- Replacement parts (model-specific)(Heating element, thermostat, or control board as diagnosed)
- Replacement seals/grease(Oven door gasket or lube for seals if needed)
Steps
Estimated time: 60-90 minutes
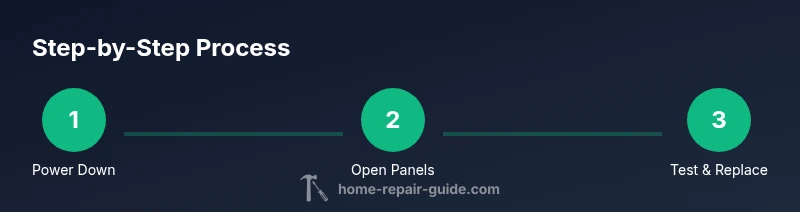
- 1
Disconnect power and verify absence of voltage
Shut off the oven’s circuit or unplug it if possible. Use a non-contact voltage tester to confirm no live voltage at wires and controls before you touch anything. This step protects you from electric shock while inspecting internal components.
Tip: Always verify power first, even if the oven seems off. - 2
Open service panels and gain access to components
Remove the back panel or control-panel trim as required by your model to expose heating elements, wiring, and the thermostat. Keep screws organized in labeled containers so reassembly is straightforward.
Tip: Take photos before disconnecting any wires to guide reassembly. - 3
Test heating element continuity and thermostat function
With power off, set up the multimeter to measure resistance and check each heating element for continuity. Compare thermostat readings to the factory specification or the setpoint using a calibrated thermometer. Look for obvious signs of damage or scorching.
Tip: A burnt element usually shows an open circuit; thermostat drift may show incorrect temperatures. - 4
Replace faulty component if tests indicate failure
Install the replacement heating element or thermostat that matches your model. Double‑check the fit and re‑secure connectors. Avoid overtightening and ensure insulation is intact before reassembly.
Tip: Document part numbers and take a final photo before closing up. - 5
Reassemble panels, restore power, and perform a test bake
Reattach panels, restore power, and run a controlled test bake at a moderate temperature. Use the oven thermometer to verify actual temperature tracks the setpoint and watch for normal heating without unusual noises.
Tip: Start with a 350°F (175°C) test and adjust based on results. - 6
Perform a final safety check and record results
Inspect door seal, hinges, vents, and any wiring for secure connections. If you detect gas odors or smoke, shut down and contact a professional immediately. Keep notes for future maintenance and warranty claims.
Tip: Maintain a repair log with dates and replaced parts.
FAQ
Is oven service repair safe for a homeowner to perform?
Oven service repair can be safe if you follow proper safety steps, power down fully, and use the correct tools. For gas ovens or unfamiliar electrical work, hire a licensed professional.
DIY can be safe if you’re careful, but gas ovens or complex boards should be handled by a pro.
What are the most common signs of a failing heating element?
Not heating at all, uneven temperatures, or a visible break are common signs. Use a multimeter to test continuity and inspect the element for damage.
If you notice no heat or uneven cooking, test the element with a meter.
Should I disconnect power before inspecting the oven?
Yes. Always disconnect power at the breaker and unplug the unit if possible before removing panels or touching electrical parts.
Power off first; safety matters.
How long does a typical oven service repair take?
Most home repairs take between 45 minutes and 2 hours, depending on the fault and parts availability.
Most jobs take under a couple hours.
Should I replace parts proactively rather than wait for a fault?
Only replace parts that are faulty or show wear. Proactive replacement can waste money and may not fix the root issue.
Only replace what’s actually faulty.
What safety gear should I use for DIY oven repair?
Wear safety goggles, heat-resistant gloves, and avoid loose clothing. Work in a well-ventilated area and keep a fire extinguisher nearby.
Wear proper safety gear and stay prepared for emergencies.
Watch Video
Key Takeaways
- Identify the faulty component with basic tests before replacement.
- Use an oven thermometer to verify accurate temperatures.
- Power off and verify no voltage before any disassembly.
- Keep track of screws and wiring for accurate reassembly.
- Document the work for future maintenance and warranty purposes.