Appliances Service Repair: A Practical Homeowner's Guide
Step-by-step, safety-first guide to diagnosing and repairing common home appliances, with practical tools, maintenance tips, and guidance on when to hire a professional for complex issues.

This guide helps homeowners diagnose common appliance problems and perform safe, do-it-yourself repairs on select models, from washers to ovens. You’ll learn to identify faults, gather the right tools, and follow a clear step-by-step approach, with safety reminders and practical maintenance tips to prevent future breakdowns. The Home Repair Guide team provides practical, non-technical explanations and tips you can apply right away.
What is appliances service repair?
Appliances service repair refers to the professional or DIY process of diagnosing, testing, repairing, and restoring household machines such as washers, dryers, refrigerators, dishwashers, ovens, and more. It combines troubleshooting methods, basic electrical and mechanical knowledge, and the right safety precautions to return an appliance to safe, functional operation. For homeowners, the goal is to resolve common faults at a reasonable cost, extend the appliance’s life, and avoid unnecessary replacements. The Home Repair Guide team emphasizes practical, skill-building steps rather than abstract concepts, so you can approach repairs with confidence while respecting safety limits. In this guide, we focus on non-destructive fixes, model-specific considerations, and when it’s wiser to call a licensed technician.
Common failures and quick fixes
Many household appliance problems fall into a few recurring categories. In a washing machine, you might see poor spinning, drains that don’t empty, or excessive vibration. A dishwasher can exhibit poor cleaning, leaks, or failure to start. Refrigerators may have temperature fluctuations, frost buildup, or unusual noises. Ovens and ranges often present with inconsistent heating, faulty igniters, or sensor errors. Quick checks include inspecting power supply, verifying door latches, and ensuring drainage paths are clear. While some issues are DIY-friendly, others require professional parts and calibration. Remember: always consult the model’s manual to identify the correct parts and any safety warnings specific to your unit.
Safety and preparation before you begin
Safety comes first when working with electrical devices or gas-powered appliances. Always unplug the unit and disconnect any water lines before opening panels. If the appliance is hard-wired, switch off the dedicated circuit breaker. Wear protective gear: safety glasses, insulated gloves, and closed-toe shoes. Work in a well-lit area and keep a fire extinguisher nearby. If you smell rotten gas or hear hissing from a gas appliance, evacuate and call the gas utility or emergency services. Having a clear workspace and a plan helps prevent accidents and makes the repair process smoother.
Tools and materials you’ll need
A well-chosen toolkit reduces frustration and protects you from harm. Common essentials include a multimeter for electrical tests, a non-contact voltage tester to verify power is off, a screwdriver set (Philips and flat), nut drivers or sockets, a flashlight, and a camera or notepad to document disassembly. A model-specific parts kit can save you time, but only if you’ve confirmed the exact part numbers. Keep an inclusive parts diagram or the user manual handy for reference. This section also covers safety gear such as goggles and insulated gloves, which are non-negotiable for many repair tasks.
A practical diagnostic approach: triage and tests
Triage begins with describing symptoms and reproducing the problem safely. Start by confirming power and checking for basic indicators like blown fuses or tripped breakers. Inspect accessible components (belts, filters, hoses) for wear, cracks, or leaks. Use a multimeter to test continuity, resistance, and voltage where appropriate. Document your findings with photos and notes. If the fault is not obvious after the initial checks, move to more targeted tests or consult the model’s service manual for wiring diagrams. This methodical approach reduces guesswork and speeds up the repair process.
Performing safe repairs and test runs
When you perform repairs, only proceed with components you’re confident you can handle and always re-energize the unit with the power isolated. Replace worn parts with compatible OEM or reputable aftermarket components. Reassemble the unit carefully, secure all fasteners, and reconnect water or gas lines exactly as they were before. Before a full test, perform a dry run with no load to listen for unusual noises or smells. If the unit runs but behaves abnormally, halt the test and review the diagnostics. A controlled, stepwise test helps prevent damage and ensures the repair is effective.
Maintenance to extend appliance life
Prevention is cheaper than repair. Regular cleaning of filters, ducts, and coils improves efficiency and longevity. Schedule periodic checks of seals, gaskets, and door latches, and replace worn components before they fail. Keep the area around appliances clear to improve ventilation and reduce heat buildup. Document maintenance tasks so you can reference them later, and set up an annual review of the appliance’s operation. The goal is predictable performance and fewer emergency repairs, which aligns with practical home maintenance.
When to call a professional and budget considerations
If the fault involves refrigerant leaks, gas connections, high-voltage components, or complex control boards, professional repair is recommended. Licensed technicians have calibrated tools and access to official parts, which improves safety and reliability. Budgeting for appliance repairs includes estimating the cost of parts and labor versus replacement. In many cases, a repair is cost-effective if the appliance is relatively new or still under warranty. The Home Repair Guide team recommends a proactive approach: weigh the repair cost against the appliance’s remaining lifespan and reliability. A professional consultation can help you decide the most economical path.
Authority sources and further reading
For readers who want deeper, formally reviewed information, consider consulting government and university resources on appliance safety, electrical testing, and home maintenance. The following sources provide authoritative, consumer-focused guidance you can compare with practical, hands-on advice: https://www.energy.gov/energysaver, https://www.osha.gov, https://www.cpsc.gov. These references help frame safe, responsible practices while you perform repairs at home. The Home Repair Guide team encourages you to verify any guidance with your specific appliance model’s manual.
Tools & Materials
- Non-contact voltage tester(Verify circuits are de-energized before touching components)
- Multimeter(Measure voltage, current, resistance; select correct ranges)
- Screwdrivers set (Phillips and flathead)(Precision driver set for appliance panels; magnetic tips help)
- Nut drivers or socket set(Use for appliance fasteners beyond screwdriver capacity)
- Insulating gloves(Protect hands when handling live components (where applicable))
- Safety goggles(Eye protection during disassembly and testing)
- Flashlight or headlamp(Improve visibility in tight panels)
- User manual for your model(Consult wiring diagrams and part numbers specific to your unit)
- Replacement parts kit (model-specific)(Only if you’ve identified a known failing part)
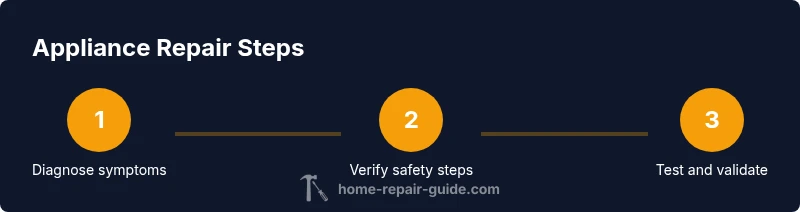
Steps
Estimated time: Estimated total time: 60-90 minutes
- 1
Power down and unplug
Verify the appliance is unplugged and, for hard-wired units, switch off the relevant circuit breaker. Use the voltage tester to confirm no live voltage is present at accessible terminals before you touch any components. This initial safety check prevents electric shock and equipment damage.
Tip: Keep a note of the main power switch location on a label near the outlet. - 2
Identify the fault and document symptoms
Describe the symptoms in your own words and capture photos of the control panel, wires, and any damaged parts. Check the manual for fault codes or diagnostic procedures. Clear documentation makes parts selection and future maintenance easier.
Tip: Take photos before unplugging or disconnecting any connector. - 3
Check basics: power, fuses, belts, and filters
Inspect the power cord for damage, verify fuses or breakers are intact, inspect belts for wear or cracks, and clean or replace filters as needed. These basic checks remove simple causes of failure and often restore function without disassembly.
Tip: A choking point like a clogged filter is a common, low-effort fix. - 4
Access panels and verification tests
Carefully remove access panels per the manual, noting screw locations and clip points. Use the multimeter to test continuity and supply voltage to suspect components. If readings don’t match expected values, replace or service the component before reassembly.
Tip: Label connectors as you disconnect them to simplify reassembly. - 5
Replace faulty parts and reassemble
Install the replacement parts with the correct orientation and secure fasteners to factory torque recommendations when available. Reassemble panels, reconnect hoses or wires, and ensure seals are tight to prevent leaks or misalignment.
Tip: Avoid over-tightening screws to prevent stripping threads. - 6
Test run and verify operation
Plug the unit back in and perform a test cycle. Listen for abnormal noises and watch for leaks or temperature irregularities. If the issue persists, recheck wiring and component connections or consult the model’s diagnostics.
Tip: Run a dry cycle first to confirm basic function before loading items.
FAQ
What does appliances service repair mean for homeowners?
Appliances service repair is the process of diagnosing, testing, and restoring household appliances to working condition. It can be done by a homeowner with basic skills or by a professional when the fault involves safety-critical systems. The goal is reliable operation and cost-effective maintenance.
Appliances service repair means diagnosing and fixing your home appliances, either yourself or with a pro, to get them working again safely.
Can I repair appliances myself safely?
DIY repairs are appropriate for straightforward problems and when you can safely access the components involved. Always consult the user manual, use proper safety gear, and avoid components that carry high voltage or refrigerant. If in doubt, seek professional help.
DIY is possible for simple fixes, but avoid risky parts and call a pro if you’re unsure.
What are the common warning signs that indicate professional help is needed?
Warning signs include refrigerant leaks, gas smells, burning odors, sparking, exposed wiring, or repeated failures despite basic checks. If the fault involves high voltage, refrigerants, or complex control boards, contact a licensed technician.
If you smell gas, see burning, or suspect high-risk issues, call a professional right away.
What safety precautions should I take before starting?
Unplug the appliance, disconnect water or gas lines where applicable, wear eye protection, and work in a well-lit area. Turn off the circuit breaker for hard-wired units and use insulated gloves when handling electrical components.
Always unplug, secure gas shutoffs if needed, and wear protective gear.
How do I know if a part needs replacement?
If a component shows visible damage, failed test readings, or persistent symptoms after basic checks, replacement is likely. Use OEM parts when possible and verify compatibility with your model number.
Look for obvious damage or failed test results, then replace with the correct part.
How long does a typical appliance repair take?
Repair duration varies by fault, part availability, and your experience. Simple fixes may take under an hour; complex issues can require several hours or a professional visit.
Most repairs fit into a few hours, though some issues need a pro and longer turnaround.
When should I consider replacing instead of repairing?
Consider replacing when repair costs approach or exceed a new unit’s price, the appliance is unreliable, or multiple issues recur after fixes. Evaluate energy efficiency, warranty status, and the expected remaining lifespan.
If the repair is costly or the unit is aging, replacement can be wiser.
What maintenance helps prevent future breakdowns?
Regular cleaning, filter changes, seal inspections, and scheduling annual checkups with a technician can prevent many common failures. Keep a simple maintenance calendar to track tasks.
Clean and inspect regularly to catch issues early.
Watch Video
Key Takeaways
- Power down fully before inspection.
- Document symptoms and parts before disassembly.
- Use proper safety equipment at all times.
- Follow model-specific manuals for parts and wiring.
- Know when to call a professional to avoid hazards.