Oven Repair in San Diego: Step-by-Step Guide
A practical guide to oven repair in san diego that covers common issues, safety checks, and when to hire a pro. Step-by-step troubleshooting for homeowners and renters.

By the end of this guide, you’ll be able to diagnose common oven issues in San Diego, perform safe basic repairs, and decide when to call a professional. According to Home Repair Guide, a well-maintained oven improves safety, energy efficiency, and appliance longevity. You’ll learn essential safety checks, what tools to gather, and a clear, step-by-step approach to DIY fixes while understanding local code considerations for homes in the area.
oven repair in san diego basics
In many homes across San Diego, oven repair in san diego isn't just about cooking; it's about safety, energy efficiency, and minimizing downtime. The Home Repair Guide team emphasizes that a well-maintained oven reduces fire risk, lowers energy bills, and prolongs appliance life. Local climate and electrical standards in Southern California influence common failure modes, so understanding the region helps guide diagnosis and fixes. Before you begin, confirm your model and power type, and ensure you have a safe workspace free of moisture and clutter. This guide helps homeowners and renters approach repairs with confidence and practical steps.
Common issues seen in San Diego ovens
San Diego homes face a handful of oven problems that recur across neighborhoods. Heating elements may burn out, thermostats can drift, and igniters may fail in gas ovens. Door seals can degrade in households with frequent thermal cycling, causing heat loss and longer bake times. Control boards can glitch after power surges, and racks or sensors may stick. The region's climate and frequent use during holidays can accelerate wear, so knowing these patterns helps prioritize checks and parts.
Safety first: DIY vs professional help in Southern California
Electrical and gas-related oven repairs carry real safety risks. In San Diego, local code requirements and utility regulations can influence how you approach a fix. The Home Repair Guide analysis notes that basic safety checks—power isolation, proper testing tools, and clean work practices—are essential for DIY, but complex issues like gas line work or control-board replacement should be handled by a licensed technician. If your oven is gas-powered or you smell gas, evacuate and call the utility or a licensed pro immediately.
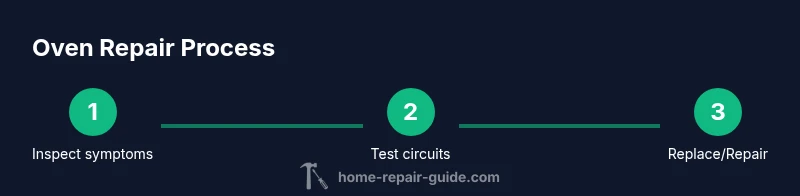
Diagnostic approach: quick checks you can perform
Start with non-invasive checks: unplug or switch off at the breaker, confirm the unit is de-energized, and inspect the exterior for damaged wiring. Listen for unusual hums or clicks, check the oven temperature using an external thermometer, and verify the display shows correct settings. If the oven heats at all, rule out power supply issues before opening the appliance. Document symptoms with photos to aid a professional.
Planning repairs: costs, parts, and scheduling in San Diego
Costs for oven repairs in San Diego vary with the scope, parts, and labor. Expect several factors: the type of oven (electric vs gas or convection), the model's accessibility, and whether replacement components are readily available. Get multiple quotes, ask for written estimates, and request a diagnostic visit before any major work. Keep in mind that energy-efficient or newer models may justify professional service for long-term savings, especially in heat-driven climates.
Next steps: when to DIY, and when to hire a pro
Use the diagnostic results and safety assessment to decide the path forward. Simple tasks like reseating connections, replacing a blown fuse, or cleaning elements may be doable with basic tools. More complex tasks—gas line work, high-voltage components, or a faulty control board—should involve a licensed technician. In San Diego, choosing a local pro with experience in residential ovens helps ensure compliance with code and reliability.
Tools & Materials
- Non-contact voltage tester(To verify power is off before touching electrical components)
- Multimeter(Measure continuity and resistance for elements and sensors)
- Screwdriver set (Phillips and flat-head)(Have a variety of sizes; use magnetic bits if possible)
- Nut driver/torx set(Optional for panel removal and connector screws)
- Needle-nose pliers(Useful for re-seating small connectors)
- Safety gear (gloves + safety glasses)(Insulated gloves recommended for heating-element work)
- Replacement parts (as needed)(Heating element, thermostat, igniter, or door switch based on diagnosis)
- Small magnetic tray for screws(Keeps fasteners organized and prevents loss)
- Model number and manual(Helpful for parts lookup and correct wiring diagrams)
- Flashlight or work light(Improves visibility inside the oven cavity)
Steps
Estimated time: 60-120 minutes
- 1
Power down and unplug
Locate the dedicated circuit or unplug the oven from its power source. If you can't unplug, switch off the corresponding breaker and verify the unit is de-energized with a tester. This is the first and most critical safety step to prevent shocks during any inspection.
Tip: Always double-check that power is off at both the outlet and the breaker panel. - 2
Locate model number and potential parts
Find the model and serial number on the label inside the door frame or back panel. Use this information to determine which heating element, thermostat, or control board parts are compatible with your unit. Photograph labels and wiring before removing any covers.
Tip: Having the exact model helps you source the correct parts quickly. - 3
Check power supply and breakers
Inspect the main breaker and any fuses associated with the oven circuit. If a breaker trips, reset after removing the cause. If trips recur, do not continue troubleshooting; consult a licensed electrician.
Tip: Repeated trips indicate an underlying electrical fault that requires professional attention. - 4
Test heating element or igniter with multimeter
Disconnect power and test the element or igniter for continuity. An open circuit or significantly high resistance indicates a faulty part that should be replaced. Document measurements for reference when sourcing a replacement.
Tip: Be mindful of safe handling and avoid touching live terminals during testing. - 5
Inspect thermostat and control board
If the element tests fine, test the thermostat for accurate readings and calibration. Look for burnt components or obvious damage on the control board. Replace or re-seat connectors if corrosion or loose contacts are found.
Tip: Thermostats can drift over time; calibration or replacement is common. - 6
Examine door switch and wiring
Test the door switch for continuity when the door is closed. A faulty switch can prevent baking cycles from starting. Check door seals for gaps that cause heat loss and uneven heating.
Tip: A simple mis-seated door switch can mimic more serious failures. - 7
Replace faulty component and reseat connections
Install the identified replacement parts and firmly reconnect any loose wires. Recheck all connections from power to the element, ensuring there are no stray strands or pinched cables. Keep screws organized to avoid miswiring on reassembly.
Tip: Label wires and use a diagram if you removed connectors. - 8
Run a test bake and document results
Power the unit back on and run a low-temperature bake to verify heat, timing, and stability. Monitor for accurate temperature readings and consistent operation. If issues persist, stop and consult a professional with your diagnostic notes.
Tip: Watch for unusual smells or smoke; shut down immediately if detected.
FAQ
What are the most common signs that an oven heating element has failed?
Common signs include no heat, uneven cooking, or a visible break in the element. Use a multimeter to test continuity; replace if the element shows open circuit or high resistance.
Look for no heat, uneven cooking, or visible damage. Test with a multimeter and replace the element if it shows an open circuit.
Is it safe to attempt DIY repair on a gas oven?
Gas ovens involve gas lines and ignition components; only perform DIY tasks that don’t require gas line work. If you smell gas or suspect a leak, evacuate and call the utility or a licensed technician.
Gas ovens require caution. Don’t work on gas lines yourself. If you smell gas, evacuate and call the gas company.
What should I have ready before calling a pro in San Diego?
Have the oven model number, a clear list of symptoms, photos of wiring if applicable, and information about power or gas issues. Obtain written quotes and ask about visit fees and labor rates.
Know your model, describe symptoms, and have photos ready. Ask for written quotes and any service fees when you call.
Do I need a permit for major oven repairs in San Diego?
Most appliance repairs do not require a permit, but any work involving gas lines or significant electrical changes may require licensed professionals and compliance with local codes.
Permits are usually not needed for basic appliance work, but gas or major electrical changes often require licensing and local code compliance.
How long do oven repairs typically take?
Durations vary based on diagnosis and parts availability. Simple reseats or part replacements can take under a few hours; complex issues may require scheduling and part sourcing.
It depends on what’s wrong and whether parts are in stock. Some fixes take a few hours, others may need a delay for parts.
Can I save money by repairing my oven myself?
DIY repairs can save money on labor, but misdiagnosis or unsafe work can lead to bigger costs or safety risks. Always weigh risk against potential savings and consider professional help for complex diagnostics.
DIY can save on labor, but it might cost more if mistakes happen. For complex issues, hire a pro.
Watch Video
Key Takeaways
- Identify symptoms early with a safety check.
- Prioritize safety and code compliance in all repairs.
- Document steps and parts to simplify sourcing.
- The Home Repair Guide team recommends professional help for complex or gas-related repairs.