Samsung Oven Repair: A Complete Step-by-Step Guide for Homeowners
Learn safe, practical Samsung oven repair with Home Repair Guide. This comprehensive guide covers common issues, tools, step-by-step troubleshooting, safety tips, and when to call a pro to keep your oven performing reliably in 2026.

This guide helps you diagnose and fix common Samsung oven issues at home using basic tools and safety practices. You’ll learn how to triage problems, test heating elements and sensors, and perform safe component replacements. The goal is reliable, safe heating without causing further damage or injury. By following these steps, you can restore performance and avoid unnecessary service calls.
Why Samsung Oven Repair Requires Careful Troubleshooting
According to Home Repair Guide, repairing a Samsung oven is a task best approached with deliberate safety checks and methodical diagnostics. Start with unplugging the unit or switching off the dedicated circuit breaker to remove all power before touching any components. Many common oven failures stem from simple issues like blown fuses, faulty sensors, or loose connections. A careful, staged approach helps you identify the real culprit without risking electric shock, gas leaks, or fire hazards. This is especially important for households with children or pets that may inadvertently interact with hot surfaces.
By treating the repair as a process rather than a guess, you’ll improve your chances of a lasting fix. Home Repair Guide emphasizes documenting each step, testing components before replacement, and verifying operation after reassembly. If a part shows visible damage or you encounter unfamiliar error codes, pause and reassess before continuing.
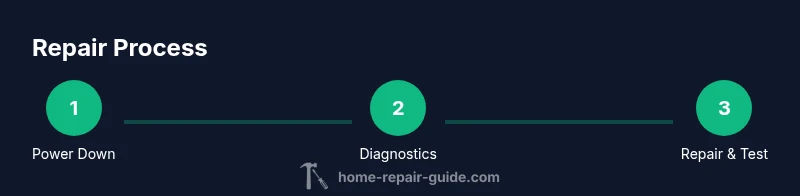
In this section we’ll outline the most common issues and how to approach them safely, so you can decide whether you can proceed yourself or should seek professional help.
Common Samsung Oven Issues and Quick Diagnoses
Samsung ovens are feature-packed, but certain failures recur across models. The most frequent problems include lack of heat, inaccurate temperature readings, and nuisance error codes that prevent normal operation. First, verify that the power cycle was completed and that the oven is receiving power. If the display is dark or unresponsive, the issue might be a blown fuse, a tripped breaker, or a faulty control board. If the oven powers on but won’t heat, the bake or broil element could be damaged, the thermal sensor/thermistor may be out of range, or the relay on the control board could be failing. If the oven heats unevenly, the sensor may be reading incorrectly, or the convection fan may be malfunctioning. When error codes appear, consult the user manual or manufacturer’s online resources to interpret the code before replacing parts. This guidance, based on Home Repair Guide analysis, helps you triage effectively without unnecessary replacements.
Note that some codes indicate safety shutdowns that require professional service or a recall authorization. Always check your model’s warranty status and official Samsung support pages for known issues and updates relevant to your oven. Keeping a log of symptoms, dates, and any tests you run will streamline any future repairs or service calls.
Tools and Safety Gear You’ll Need
Before you begin, gather essential tools and protective gear. A digital multimeter lets you test element continuity and sensor resistance. A screwdriver set (Phillips and flat-head) and a nut driver help access internal components. Non-contact voltage testers offer additional electrical safety checks, and insulated gloves protect your hands from hot surfaces. Have a flashlight, a heat-resistant mat or pad, and a small bin or tray to organize screws and small parts. If you suspect a faulty bake or broil element, you’ll need a compatible replacement part for your Samsung model. Finally, a user-friendly ambient thermometer can help you verify oven temperature against the display after reassembly. These items are typically sufficient for straightforward repairs and align with Home Repair Guide recommendations for safe, incremental diagnostics.
Safety Warnings and When to Call a Pro
Electrical repairs on ovens carry a risk of shock or short circuits if power is not fully disconnected. Always unplug or switch off the circuit breaker before touching any internal parts. If you detect gas odors, immediately shut off the gas supply and evacuate the area, then contact your gas company or a licensed professional. Self-cleaning cycles can be hazardous if the oven has underlying electrical or sensor faults; avoid using self-clean if heat delivery is inconsistent or if there are flashing codes. If you’re not confident with testing components or handling heating elements, the safest choice is to schedule a professional repair. This ensures your kitchen remains safe and compliant with local codes and warranty terms.
Authority Sources and Safety Resources
For safety guidelines and repair best practices, consult authoritative sources:
- Energy.gov: general energy and appliance safety considerations
- Consumer Federation of America: home improvement safety and consumer tips
- National Fire Protection Association (NFPA): electrical and heat-related safety guidelines
These references provide foundational safety principles and are aligned with industry standards. Always verify model-specific procedures in Samsung’s official support pages and your appliance’s user manual to avoid unsafe mistakes.
Getting Ready to Diagnose: What to Expect in a Repair Session
Tackling a Samsung oven repair involves systematic testing and careful observation. Expect to spend 30 minutes on initial checks, then progressively deeper diagnostics if the initial tests point toward a faulty component. If a part must be ordered, factor in delivery and installation time. Have a clear checklist to ensure you verify power, inspect visible wiring, test heating elements and sensors, and re-test after any replacement. Without a proper plan, it’s easy to misinterpret symptoms or overlook a simple loose connection.
Tools & Materials
- Digital multimeter(Test heating element continuity and sensor resistance; set for ohms and perform a gentle continuity check.)
- Screwdriver set (Phillips and flat-head)(Access back panels and internal components; keep track of screws with a labeled tray.)
- Non-contact voltage tester(Confirm there is no live current before touching any metal parts.)
- Insulated work gloves(Protect hands from hot surfaces and sharp edges during disassembly.)
- Replacement bake/broil element (model-specific)(Needed only if the old element is open or visibly damaged.)
- Thermistor/temperature sensor (model-specific)(Used to verify accurate oven temperature readings if sensor fault is suspected.)
- Heat-resistant mat or silicone mat(Place hot components on the mat to protect work surface.)
- Small parts tray or magnetic parts holder(Keeps screws and clips organized to prevent loss.)
Steps
Estimated time: 60-120 minutes
- 1
Power off and verify safety
Unplug the oven from the wall outlet or switch off the dedicated circuit breaker. If your kitchen has gas lines connected to the range, confirm the gas supply is turned off and there are no gas odors. This step prevents shocks, fires, and gas leaks during inspection.
Tip: Always double-check for residual power with the voltage tester before touching any component. - 2
Check for visible damage and error codes
Inspect wiring harnesses, connectors, and the back of the control panel for obvious damage or loose connections. Note any displayed error codes and refer to the Samsung manual or official support resources to interpret them accurately.
Tip: Take a quick photo of the display codes for reference if you need to search Samsung’s help pages. - 3
Test heating elements and sensors
With the oven powered down, use the multimeter to test the bake and broil elements for continuity. If an element reads open or the sensor shows out-of-range resistance, plan for replacement. Record readings to compare with model-specific specifications.
Tip: Do not touch heated metal parts during testing; allow the unit to cool before accessing elements. - 4
Inspect safety-related components
Check the thermal fuse or thermal cutoff (if accessible) and the control board relays for signs of failure. If you notice burnt smells, melted insulation, or visible scorching, treat as a potential safety hazard and proceed with caution.
Tip: Carry out any high-voltage work only if you are qualified or consult a professional. - 5
Replace faulty parts and reassemble
Install the replacement bake element or sensor if the tests indicate failure. Reconnect wiring securely, reattach panels, and ensure all screws are tightened. Restore power only after the interior is closed and safe.
Tip: Test the unit briefly with a low-temperature bake cycle to confirm operation before starting a full user cycle. - 6
Test operation and document results
Run a standard bake cycle at a moderate temperature and monitor for proper heating and stabilised temperature readings. If the oven still misbehaves, log the symptoms and contacted help options—this will guide a future professional visit.
Tip: Keep a repair log with dates and readings to aid future service or warranty claims.
FAQ
What are the most common causes of Samsung oven not heating up?
Common causes include a blown bake or broil element, a failed sensor (thermistor), a faulty relay on the control board, or a blown fuse that cuts power. Inspecting these parts with basic tools can indicate the proper fix. Always rule out power issues first to avoid unnecessary replacements.
Most heating problems come from the bake element, the sensor, or a faulty control relay. Check power first, then test components.
Can I replace oven parts myself, or should I hire a technician?
You can perform basic diagnostics and replace simple components if you’re comfortable with electrical work and follow safety steps. More complex board repairs, gas line concerns, or uncertain codes are better handled by a licensed technician to avoid safety risks and ensure warranty compliance.
Basic parts can be DIY if you’re careful, but complex repairs are best left to a professional.
Is it safe to use the self-clean feature if the oven won’t heat?
If the oven won’t heat, do not run the self-clean cycle. High temperatures can stress damaged components and pose a safety hazard. Resolve heating issues or consult a technician before attempting self-clean.
Don’t run self-clean if the oven isn’t heating properly.
How long does a typical Samsung oven repair take?
A straightforward element or sensor replacement can take about 30-60 minutes once parts are available. More complex board diagnostics or part ordering can extend the process to several hours or a follow-up visit.
Most quick fixes take under an hour once you have the parts, but some repairs take longer if boards are involved.
When should I replace the oven rather than repair it?
Consider replacement if the oven is old, the cost of multiple parts exceeds a practical amount, or the unit regularly fails despite repairs. Warranty coverage and energy efficiency improvements are also important factors.
If repairs keep piling up or the oven is very old, replacement may be the smarter choice.
Watch Video
Key Takeaways
- Verify power before any inspection
- Test elements and sensors with a meter
- Replace faulty components only after confirming failure
- Document findings to inform future service
- When in doubt, prioritize safety and professional help