How to Repair on Steam: A Practical Home Guide
Learn how to diagnose and fix common steam appliance issues at home with a safe, step-by-step approach. This guide covers cleaning, inspection, and part replacements, plus when to call a pro. How to repair on steam, with tips from Home Repair Guide.

You can learn to repair common steam appliance issues by inspecting the steam path, cleaning mineral deposits, reseating valves, and replacing worn seals. Start with safety checks, disconnect from power and water, then perform a controlled cleaning and basic part replacements. If you encounter pressure hazards, leaks, or cracked components, stop and consult a professional.
how to repair on steam: Understanding Steam Systems
Steam is used in a range of household devices, from irons to certain dishwashers and humidifiers. A typical steam path includes a water reservoir, a heating element, a steam generator chamber, and a delivery tube to the outlet. In iron-based devices, steam is produced with a heating coil that boils water; deposits from hard water can create clogs and inefficiency. According to Home Repair Guide, a methodical approach to this task starts with safety and a clear plan, then documents the path of water and steam to guide inspection.
Understanding these components helps you pinpoint where failures occur and what parts are most likely to wear out over time. By knowing where to focus your checks, you’ll save time and reduce the chance of collateral damage during disassembly and reassembly.
common problems that signal a repair need on steam systems
Steam-related problems fall into a few broad categories: reduced or inconsistent steam output, leaks at seals or joints, visible mineral buildup around nozzles, unusual noises during operation, and occasional error codes from smart appliances. If you notice dampness around the base or a distinct burning scent, interrupt use immediately and switch to non-steam operation until you diagnose the issue. These symptoms help narrow down whether the fix is a simple cleaning, a seal replacement, or professional service.
Keep a short log of symptoms and dates; this helps when you compare what changes after each maintenance step.
safety and preparation before you start
Before touching any steam appliance, ensure safety is your top priority. Unplug the unit and shut off the water supply. If the device uses a mains supply, turn off the circuit and allow it to cool completely to avoid burns. Wear safety glasses and heat-resistant gloves, and work in a well-ventilated area. Have a towel ready to catch drips and a bucket for any incidental spills. These steps prevent electric shock, scalding, and water damage during the repair process.
According to Home Repair Guide, preparing the area and using the right PPE significantly reduces risk and improves repair outcomes.
diagnosing the issue: visual checks and quick tests
Start with a visual inspection of the steam path for kinks, cracks, or obvious mineral deposits. Remove accessible panels to inspect seals, gaskets, and hoses for wear. Use distilled water for any test run to avoid introducing extra minerals that could obscure root causes. Perform a light flush to see if water exits cleanly and steadily; note any sputtering or uneven bursts of steam as clues.
Document findings and compare them to the user manual’s troubleshooting section to avoid unnecessary part replacements.
repair approaches: cleaning, replacing, and rebuilding
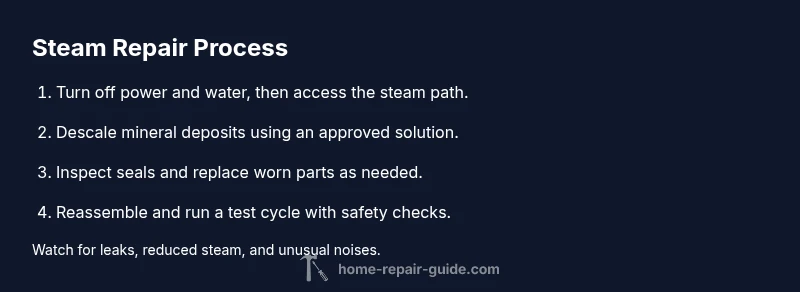
Descale mineral buildup using manufacturer-approved descalers or a simple vinegar solution if recommended by the appliance maker. Clean the steam path and nozzles with a soft brush to remove deposits without scratching surfaces. Inspect seals, gaskets, and fittings for wear; replace worn parts with model-specific components as needed. Reassemble, test, and observe for leaks or dry spots; ensure the unit returns to normal steam output before normal use. If parts show signs of fatigue or cracking, replacement is typically more reliable than continued cleaning.
Always follow manufacturer guidelines to avoid voiding warranties or causing hazardous conditions.
when to seek professional help
If you detect a cracked housing, a pressure-related issue, electrical fault, or persistent leaks after several cleaning cycles, stop and contact a qualified technician. High-pressure steam systems can pose serious burns or electrical hazards if mishandled. Warranty coverage may require service by an authorized technician for certain repairs. In these cases, the Home Repair Guide team recommends professional intervention to ensure safe and durable results.
Tools & Materials
- Safety glasses(Protect eyes from splashes and debris.)
- Heat-resistant gloves(Handle hot panels and parts safely.)
- Screwdrivers (Phillips and flathead)(Access panels and components.)
- Adjustable wrench(Loosen fittings and hose clamps.)
- Soft brush or old toothbrush(Dislodge mineral deposits from crevices.)
- Towel or protective mat(Catches drips and protects surfaces.)
- Bucket(For collecting condensate during disassembly.)
- Replacement seals/gaskets (model-specific)(Replace worn parts if cleaning isn’t sufficient.)
- Distilled water(Use for testing to avoid mineral buildup.)
Steps
Estimated time: 60-90 minutes
- 1
Power down and disconnect
Unplug the appliance and shut off the water supply. If applicable, switch off the circuit and allow the unit to cool completely. This prevents electric shock and scalding during inspection and disassembly.
Tip: Always unplug by grasping the plug, not the cord, to avoid damaging the cable. - 2
Gain access to the steam path
Remove covers or panels to expose the steam channel, reservoir, and valve areas. Keep track of screws and their positions so reassembly is straightforward. Use proper tools and avoid forcing parts.
Tip: Take a quick photo at each stage to help with reassembly. - 3
Inspect for scale and blockages
Check nozzles, passages, and filters for mineral buildup or debris. Note any discolored or sticky deposits and areas with restricted flow. This step helps determine whether cleaning, descaling, or part replacement is needed.
Tip: If you see heavy buildup, plan for a full descale before attempting other repairs. - 4
Descale and clean the steam path
Follow the manufacturer’s descaling guidance or use a compatible descaler solution. Rinse thoroughly and dry all components before reassembly. Ensure no lingering residue could foul the steam output.
Tip: Never mix descalers with other cleaners; follow the product’s instructions. - 5
Inspect and replace worn parts
Check seals, gaskets, hoses, and the steam valve area for signs of wear or cracks. Replace only with parts specified for your model. Recheck all connections for tightness after replacement.
Tip: Avoid overtightening fittings, which can damage threads or seals. - 6
Reassemble and test
Put the appliance back together in the correct order. Reconnect water and power, then run a short test cycle with the device empty and safe. Look for leaks and verify normal steam output.
Tip: Start with a low-pressure test to confirm basic operation before full use.
FAQ
What are common signs that a steam appliance needs repair?
Common signs include reduced steam output, leaks at seals, visible mineral buildup, unusual noises, and occasional error codes. If these appear, begin with a safe inspection and consider descaling before replacing parts.
Common signs include weak steam, leaks, and noises. Start with a safe inspection and try descaling before replacing parts.
Can I repair a steam appliance myself?
Basic maintenance and cleaning can often be done by homeowners with the right safety steps and tools. For complex issues or high-risk components, consult the manufacturer’s guidelines or a professional.
You can do simple maintenance yourself, but for complex problems, seek a professional.
What tools do I need for a basic steam repair?
Essential tools include screwdrivers, an adjustable wrench, safety gear, a soft brush, and towels. Depending on the model, you may also need replacement seals or gaskets.
You’ll generally need screwdrivers, a wrench, safety gear, a soft brush, and towels.
When should I replace parts instead of cleaning?
Replace worn seals, cracked hoses, or damaged valves rather than repeatedly cleaning them. If performance does not improve after cleaning, swapping parts is usually more reliable.
If cleaning doesn’t restore function, replace worn parts.
Is descaling safe for all steam appliances?
Descaling is safe when using manufacturer-approved products and following the manual. Some units prohibit certain chemicals, so always check guidelines first.
Descale only with approved products and follow the manual.
How long does a typical steam repair take?
A simple descale and inspection can take about an hour. More complex fixes with part replacement may require longer, especially if parts need ordering.
Most basic repairs take about an hour; complex fixes may take longer.
Watch Video
Key Takeaways
- Verify safety first before any disassembly
- Descale and clean the steam path to restore performance
- Inspect seals and hoses for wear and replace as needed
- Call a professional for high-risk issues or post-warranty repairs