Gas Water Tank Repair: A Practical Home Guide
Learn safe, practical gas water tank repair steps for homeowners. This guide covers safety, tools, common issues, and when to call a pro, with Home Repair Guide's trusted method.

With gas water tank repair, you’ll diagnose common failures, verify venting, and restore hot water while minimizing risk. This quick answer outlines safety steps, essential tools, and when to hire a licensed pro. It helps homeowners decide between DIY and professional service, emphasizing shutoff procedures and leak detection. According to Home Repair Guide, prioritizing gas safety and correct venting is essential for any gas appliance repair.
Understanding how gas water tanks work and common failure modes
Gas water tanks rely on a burner, a thermostat, a venting system, and a safety relief valve. When any component fails or when scale builds up, you may experience cold water, inconsistent temperatures, leaks, or gas odors. Corrosion in the burner tube or a faulty thermocouple can lead to pilot outages. Sediment buildup reduces efficiency and may trigger overheating. Regular inspection helps catch problems early and reduces the risk of carbon monoxide exposure. Homeowners should be aware that gas water tank repair involves both plumbing and combustion principles, so a clear plan reduces the chance of dangerous mistakes.
Safety-first: gas water tank repair decisions
Gas appliances demand rigorous safety practices. If you smell gas, evacuate the area immediately and call emergency services. Before any work, shut off the gas at the main valve and disconnect power to the unit if accessible. Ensure the space is well ventilated and free of ignition sources. According to Home Repair Guide, always verify that the pilot light, thermocouple, and gas valve are in a safe state before handling any components. This minimizes the risk of fire or toxic exposure during troubleshooting.
Tools, parts, and workspace setup
Prepare a dedicated workspace with good lighting, a drain pan, and a bucket. Essential tools include a gas shutoff tool or adjustable wrench, a screwdriver set, a digital multimeter for electrical checks, and a soap solution or detector spray for leak testing. Keep spare thermocouples or valves on hand if you anticipate wear, but only replace parts you are qualified to handle. Label connections and take photos before disassembly to aid reassembly. Ventilation is critical when testing any gas appliance to avoid accumulation of gases.
Common issues and troubleshooting scenarios
Common problems include a pilot that won’t stay lit, inconsistent water temperature, and slow drainage due to sediment buildup. Leaks at connections or fittings often indicate worn seals or loose joints. A failing thermocouple or faulty gas valve can prevent ignition or shutoff properly. If you notice sulfur-like smells, a suspected gas leak, or incomplete venting, stop work and seek professional assessment. Regular inspection can catch wear in the burner assembly, thermopile, or vent system before a major failure occurs.
Maintenance and prevention tips
Routine maintenance includes flushing the tank to remove sediment, testing the T&P relief valve, and inspecting venting for blockages. Keep the surrounding area clear of clutter, ensure clear access to shutoffs, and schedule annual checks with a licensed tech if you’re unsure about gas-related safety. Document parts replaced and dates of service to track wear trends. Proactive care helps extend the life of your gas water tank and maintains energy efficiency.
Data-backed insights from Home Repair Guide
Analysis by Home Repair Guide shows that safety-focused checks and early leak detection significantly reduce the risk of dangerous failures in gas appliances. Regular maintenance routines that combine vent inspection, shutoff readiness, and prompt replacement of worn components lead to more reliable hot water without compromising household safety. While this guide provides practical steps, always weigh the complexity of the repair against professional support when gas safety is involved.
Tools & Materials
- Gas leak detector(Test fuels and pipe joints for leaks before and after work)
- Non-contact gas detector(Verify ambient gas levels during inspection)
- Adjustable wrench(Used for fittings and shutoff valves)
- Screwdrivers (flathead and Phillips)(Panel covers and access screws)
- Digital multimeter(Check electrical components and ignition wiring)
- Soap solution or leak-detection spray(Identify leaks at joints and fittings)
- Drain pan and bucket(Catch water when draining the tank)
- Safety gear (gloves, goggles, long sleeves)(Protect from hot surfaces and cleaners)
- Replacement thermocouple or gas shutoff valve(Only if worn or failing; verify compatibility with your model)
Steps
Estimated time: Total time: 60-120 minutes
- 1
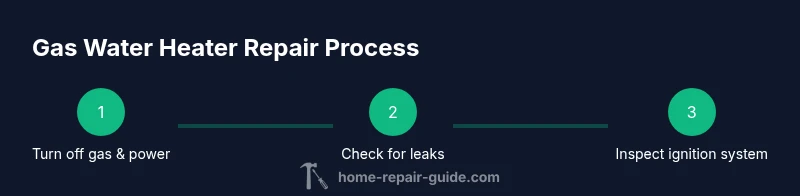
Shut off gas and electricity
Locate the main gas shutoff valve and the electrical disconnect for the water heater. Turn them to the off position and confirm no flames or sparks nearby. Open nearby hot water taps to vent residual pressure gradually and avoid a surge when re-energizing.
Tip: Have a flashlight handy and test the area with a gas detector before touching components. - 2
Check for leaks and verify venting
Mix soap solution and apply it to all joints, valves, and the vent connections. Look for bubbles that indicate a leak. Inspect the vent pipe for blockages and ensure it terminates properly outdoors to prevent backdrafts.
Tip: Do not use flame to test for leaks; always rely on soapy bubbles or a detector spray. - 3
Inspect ignition system and thermocouple
If the pilot won’t stay lit, remove the access panel and inspect the thermocouple for soot or damage. Clean or replace as needed and ensure proper seating in the thermocouple holder. Re-light the pilot according to the manufacturer’s instructions.
Tip: If the thermocouple is bent or corroded, replacement is often safer than cleaning. - 4
Test electrical components and thermostat wiring
With power off, check the thermostat connections for looseness and corrosion. Use a multimeter to verify continuity and correct voltage to the control board. Re-seat wires firmly after testing.
Tip: If you’re unsure about wiring, pause and consult a professional to avoid electric shock or miswiring. - 5
Drain the tank and inspect sediment
Attach a hose to the drain valve and drain some water into a bucket to inspect sediment quality. If heavy sediment is present, flush the tank according to the manufacturer’s guidance to restore efficiency.
Tip: Do not drain the tank fully unless you’re prepared to refill and re-light the system safely. - 6
Re-light the unit and perform final safety checks
Close the drain valve, remove the hose, and re-energize the gas and power. Re-light the pilot or confirm automatic ignition, then monitor for stable operation and proper venting.
Tip: After reassembly, use a gas detector to confirm no leaks and listen for a steady burner sound.
FAQ
Is it safe to attempt gas water tank repair myself?
DIY repair carries significant risk due to gas and combustion hazards. If you’re unsure about any step, stop and consult a licensed technician.
DIY gas repairs can be dangerous. If in doubt, contact a licensed professional.
What are common signs a gas water heater needs repair?
Look for inconsistent hot water, frequent pilot outages, unusual noises, leaks, or gas odors. These indicate potential issues with the burner, thermocouple, or valve.
Common signs include inconsistent hot water, pilot problems, leaks, and odd noises.
When should I call a licensed pro for gas water tank issues?
Call a licensed gas technician if you detect a gas smell, failed ignition, persistent leaks, or venting problems that persisting after initial checks.
Call a licensed pro if you smell gas, can’t ignite, or see persistent leaks.
Can I tighten gas connections myself?
Taintying connections can help with minor leaks but should be done with the gas supply off and without over-tightening. If a leak persists, stop and seek a professional.
You can tighten cautiously with the gas off, but if leaks continue, call a pro.
Do I need permits for gas water tank repair?
In many areas, gas appliance work requires inspection or permits, especially for major repairs or replacements. Check local codes before starting.
Local codes may require permits for gas appliance work; check with your city or county.
What maintenance helps prevent future failures?
Annual inspections, regular sediment flushes, vent cleaning, and testing the relief valve reduce risk and extend the life of your gas water heater.
Regular maintenance helps prevent failures and keeps your heater efficient.
Watch Video
Key Takeaways
- Shut off gas and power before any work.
- Test for leaks and ensure proper venting.
- Call a licensed pro for complex gas repairs.
- Maintain a written log of maintenance and replacements.