Well Pressure Tank Repair: A Complete How-To
Learn safe, practical steps to diagnose and repair a well pressure tank. Air charge, leaks, and when to replace—a Home Repair Guide tutorial for homeowners and renters.

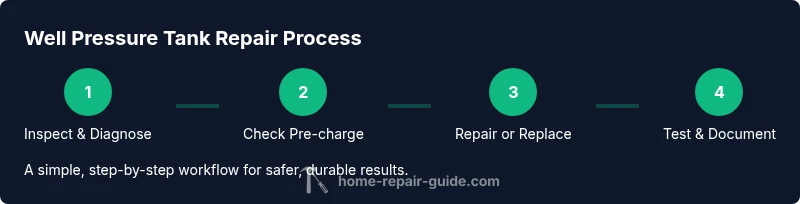
This guide helps you diagnose and repair a well pressure tank to restore reliable water pressure. You’ll need basic hand tools, a pressure gauge, and the correct air pre-charge. We cover safety, diagnosing leaks, adjusting air charge, repairing components, and knowing when replacement is wiser than repair.
What is a well pressure tank and why repair matters
A well pressure tank is a critical part of a private water system. It stores pressurized water and helps the pump cycle on and off smoothly, which protects the pump from short-cycling and extends its life. Over time, air charge can drift, seals can wear, and corrosion can form on metal tanks. When issues occur, you may notice pressure fluctuations, water hammer, or the pump running continuously. According to Home Repair Guide, addressing tank issues early can prevent more serious damage and reduce utility costs. Understanding how the tank works – including the bladder or diaphragm, the air charge, and the connection to the pressure switch – sets the foundation for safe, effective repairs.
Symptoms to watch for and why they happen
Typical signs of a failing well pressure tank include fluctuating water pressure, frequent pump cycling, loud banging (water hammer), and visible leaks at fittings or the tank body. A worn bladder or diaphragm reduces the tank’s ability to store energy, causing the pump to work harder. In some cases, the tank itself can be waterlogged, meaning air has escaped and the tank is filled with water. Home Repair Guide analysis shows that many homeowners first notice pressure inconsistencies when someone in the house uses multiple water outlets. Early detection helps you decide between a simple air-charge adjustment and a full tank replacement.
Safety first: isolate power, shut off water, and plan
Before touching any part of the system, turn off the well pump at the breaker to prevent accidental starts. Close the main water shutoff valve to stop water flow while you work, and drain the line so residual pressure is released. Wear eye protection and gloves, especially if you’ll be handling metal fittings or draining water into a bucket. Plan your steps, gather tools, and consider whether you’ll replace a bladder tank or a non-bladder tank based on the signs observed. If you detect high pressure or a gas-like smell, stop and seek a professional.
Air charge check: set the pre-charge correctly
Most well tanks require an air pre-charge set when the tank is empty of water. Use a Schrader valve on the tank to measure air pressure with a tire gauge. The pre-charge should be adjusted to be slightly below the cut-in pressure of your pressure switch. If you don’t know your cut-in range, refer to your pump’s settings or the system’s documentation. After adjusting, re-pressurize the tank slowly and check that the pump cycles normally without rapid cycling.
Inspect the tank for leaks, corrosion, and signs of waterlogging
Carefully inspect the tank body for visible cracks or rust, especially at the base and connections. Leaks at fittings may indicate a loose connection or failed seal; replace gaskets or tighten fittings as needed. A damaged tank that is actively leaking or visibly corroded should be replaced rather than repaired. Waterlogged tanks—where water fills the entire shell and air is no longer present—usually require replacement because they no longer store pressure effectively.
Repair vs replacement: a decision framework
If the tank shows minor leaks at threads, you might salvage it by resealing or replacing gaskets. Persistent water hammer, rapid cycling after an air-charge adjustment, or a tank that is visibly corroded or dented generally signals replacement. For bladder tanks, the bladder can fail; you may replace the bladder or the whole tank depending on availability and cost. If the tank has been in service for many years, a cost-benefit check favors replacement to restore reliable pressure and energy efficiency.
Step-by-step repair scenarios: bladder vs non-bladder tanks
For bladder tanks, depressurize, disconnect power, and remove the tank from the system. Replace the bladder and reassemble, then re-charge to the proper air pressure and test. For non-bladder (hydro-pneumatic) tanks, you’ll typically replace fittings or the entire tank if corrosion is evident. In both cases, verify all connections are tight, inspect the pressure switch for wear, and consider replacing the switch if it shows signs of arcing or inconsistent readings. After reinstall, slowly restore water flow and run the pump to verify stable pressure and no leaks.
Post-repair testing, maintenance, and troubleshooting
Once the repair or replacement is done, turn the power back on and run several cycles to confirm stable pressure and cycle timing. Check for leaks at every joint and valve. Keep a maintenance log with the tank type, date of service, and any parts replaced. Schedule annual or biannual inspections to monitor air charge, pressure switch settings, and overall system performance. If issues persist after a repair, re-check the air charge, re-test the switch, and consider consulting a professional for a pressure-titting evaluation.
Tools & Materials
- Safety glasses(Protect eyes from splashes and debris)
- Work gloves(Grip and protect hands during draining and fittings)
- Adjustable wrench(Loosen/tighten tank fittings and the pressure switch nuts)
- Screwdrivers (Phillips and flathead)(Access pressure switch and screws on fittings)
- Pipe wrench(Extra leverage for stubborn fittings)
- Schrader valve air pressure gauge (tire gauge works)(Measure pre-charge and operating pressure)
- Bucket, towels, and rags(Contain and clean up leaks or drips)
- PTFE thread seal tape (Teflon tape)(Seal threaded joints and prevent leaks)
- Replacement bladder kit or replacement tank(Only if you confirm bladder failure or tank corrosion)
Steps
Estimated time: 60-120 minutes
- 1
Power down and shut off water
Turn off the well pump at the breaker and close the main water shutoff. Drain the tank and lines to release residual pressure. This prevents water spray and reduces the risk of a sudden surge when loosening fittings.
Tip: Double-check the breaker before touching any electrical components to avoid shock. - 2
Relieve pressure and access the tank
Open a faucet at the lowest point to drain. Disconnect power and prepare your tools. If your tank is mounted in a confined space, clear the area and evaluate access for removal if needed.
Tip: Place a bucket under the drain to catch residual water. - 3
Check the air pre-charge with a gauge
Attach the gauge to the Schrader valve on the tank and read the current air pressure. Compare against the system’s cut-in pressure and adjust as needed. Recheck after a pause to settle the air.
Tip: If the gauge reads zero, the tank’s air chamber may be fully depleted—proceed with a careful re-charge or replacement. - 4
Inspect the tank condition
Look for rust, dents, cracks, or rust at the base and tank connections. Any sign of active leakage or severe corrosion usually means replacement is necessary rather than patching.
Tip: Take a photo of any damage for reference when consulting a professional. - 5
Replace bladder or tank if needed
If you confirm a failed bladder, replace it following the manufacturer’s instructions or replace the entire tank if corrosion or age suggests it’s more economical.
Tip: Keep spare gaskets and seals on hand to minimize downtime. - 6
Reassemble and re-pressurize
Reconnect all fittings snugly, apply thread seal tape where needed, and re-pressurize the tank to the recommended pre-charge. Reconnect power and slowly restore water flow.
Tip: Do not overtighten fittings; cross-threading can cause leaks. - 7
Test system and adjust as needed
Run multiple cycles to verify stable pressure and no leaks. Check the pressure switch for correct set points and listen for the pump cycling normally. Document measurements for future reference.
Tip: If the pump cycles frequently after repair, reassess air charge and switch settings.
FAQ
What causes a well pressure tank to fail?
Common causes include a failed bladder, air-charge drift, leaks at fittings, and corrosion. Most failures arise from wear over time. Inspect the bladder and pressure switch to identify the root cause.
Common causes are a failed bladder, air-charge drift, leaks, or corrosion. Inspect the bladder and switch to identify the issue.
Can I repair a bladder tank myself?
Yes, some bladder tank repairs can be done by homeowners with the right parts and safety measures. Replacing the bladder or the entire tank is often simpler and more reliable when the tank is old or severely corroded.
You can replace the bladder or entire tank if you’re comfortable with basic plumbing and safety steps.
How do I know if the tank is waterlogged?
If the tank can’t hold air and the system never builds proper pressure, it may be waterlogged. A waterlogged tank usually feels heavy, and the air pre-charge can’t be re-established.
If it can’t hold air and pressure is unstable, it might be waterlogged.
When should I replace instead of repair?
Replace when there’s extensive corrosion, persistent leaks, or the tank is older than several years. Replacement often offers better reliability and efficiency than patching a worn unit.
Replace when corrosion or age makes repair unlikely to last.
Is it safe to work on a pressurized tank?
Never work on a pressurized tank without depressurizing first. Use proper PPE and maintain a safe workspace. If unsure, consult a professional.
Only work after depressurizing; wear PPE and seek help if unsure.
Watch Video
Key Takeaways
- Identify whether the issue is air-charge, bladder failure, or a leak.
- De-pressurize safely before opening fittings and inspecting the tank.
- Choose repair or replacement based on tank condition and age.
- Document settings and schedule regular maintenance.
- Always prioritize safety and consider pro help for complex cases.