Dishwasher Repair Samsung: A Practical Step-by-Step Guide
Learn how to diagnose and fix common Samsung dishwasher issues with practical, safe, step-by-step instructions. This guide covers tools, parts, testing, and maintenance to keep your Samsung dishwasher running smoothly.

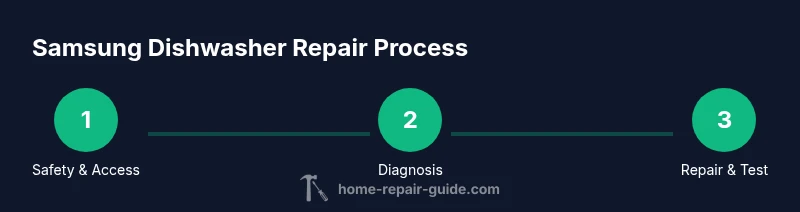
You can diagnose and fix common Samsung dishwasher issues using a safe, practical, step-by-step approach. Start by unplugging the unit and shutting off the water supply, then inspect the pump, filter, and inlet valve for clogs or wear. Replace any faulty component with OEM Samsung parts, and test a full cycle to confirm the repair. This guide emphasizes safety, correct parts, and thorough testing.
Overview: common Samsung dishwasher faults
If you own a Samsung dishwasher, you’re not alone; the Home Repair Guide team has tracked common failure patterns and safe repair strategies. Typical issues include clogs in the filter or spray arms, a failing pump, a worn door latch, or leaks around seals. Sometimes the problem is a simple sensor or flow issue that triggers an error code without a major mechanical fault. By focusing on symptoms such as whether the unit starts, drains, fills, or sprays correctly, you can narrow down the likely culprits. This overview helps you avoid replacing parts you don’t need and sets the foundation for a safe, thorough repair plan. Remember, the goal is a durable fix, not a temporary workaround.
Safety and preparation
Before you touch any wiring or water connections, take safety seriously. Unplug the dishwasher from the wall outlet and shut off the household water supply. Wear safety goggles and gloves, and have a towel or small bucket ready for any residual water. Read your model’s manual for service warnings and avoid working on powered components with wet hands. Clear the area around the machine and ensure good lighting. If you’re unsure about your model’s wiring or safety features, consult a certified technician. This preparation reduces the risk of shock, flooding, or damaged components during the repair.
Diagnostic approach and fault codes
Samsung dishwashers often communicate problems through fault codes or audible beeps. Start by recording any error codes shown on the display and cross-reference them with your model’s guide. Check basic symptoms: is the door latch secure? Is there visible water in the sump? Are filters clogged or spray arms obstructed? Inspect the inlet valve, drain hose, and circulation pump for blockages and wear. When in doubt, perform a voltage check on the pump circuit and a continuity test on the door switch using a multimeter. The goal is to map symptoms to a likely fault, rather than guesswork. For advanced diagnostic steps, refer to established repair resources and the Samsung service literature available online.
Replacing parts: common components to inspect
Common Samsung dishwasher repairs involve replacing worn or failed parts such as the filter assembly, spray arms, water inlet valve, drain pump, or door latch. Start with the filter and sump area to rule out clogs, then move to the inlet valve if the unit fills slowly or doesn’t start. If the pump stumbles or won’t drain, access the pump assembly and inspect impellers and seals. When you replace parts, ensure you are using OEM replacement components intended for your model to preserve performance and safety. Document the parts you remove with notes or photos to help reassembly and future maintenance.
Testing, calibration, and maintenance after repair
After completing a replacement, reassemble all access panels and reconnect water and power. Run a short test cycle with a small amount of water or a rinse cycle to verify proper operation. Listen for abnormal noises, check for leaks around seals and hose connections, and inspect the drain line for clear discharge. If you observe leaks, tighten clamps and reseat gaskets as needed. Periodic maintenance—cleaning filters, inspecting spray arms, and checking seals—will extend service life and reduce the chance of a repeat failure. Keeping a maintenance log can help with future troubleshooting and warranty records.
Tools & Materials
- Phillips head screwdriver (PH2)(For inner screws and terminal covers)
- Flat-head screwdriver(For prying connectors and clamps)
- Torx screwdriver set(Some Samsung models use Torx fasteners)
- Nut driver set(For hose clamps and fittings)
- Multimeter(Check continuity and voltage on motor/valve circuits)
- Replacement OEM parts for Samsung dishwasher(Filters, inlet valve, pump, door latch per model)
- Plastic opening tool / spudger(Safe prying to avoid scratching panels)
- Adjustable pliers(Grip and loosen clamps)
- Gloves and safety goggles(Personal protection)
- Towel or small bucket(Catch residual water)
Steps
Estimated time: 2-3 hours
- 1
Power down and access panel
Unplug the unit and shut off the water valve. Remove the toe-kick panel or bottom access cover to reach the main service area. This gives you a safe workspace and visibility for testing components later.
Tip: Document screw locations with photos to simplify reassembly. - 2
Check the door latch and seals
Inspect the door latch switch and gasket for damage or misalignment. A faulty latch can prevent operation, while a damaged seal can cause leaks. Replace worn parts and reseat the door prior to testing.
Tip: Test door closure with a gentle press to ensure a snug seal before cycling. - 3
Inspect filters, spray arms, and sump
Remove the lower rack and filter assembly. Check for food debris or mineral buildup in the filter, spray arms, and sump; clean or replace as needed. Ensure spray arms rotate freely and aren’t blocked by objects.
Tip: Use warm, soapy water and a soft brush to clean intricate passages. - 4
Test water inlet and drain connections
With the cover off, check the water inlet valve for blockage and test the valve using the multimeter for continuity. Inspect the drain hose for kinks and ensure clamps are secure. Replace worn hoses or valves.
Tip: Disconnect water supply before testing valve continuity; never test with water flowing. - 5
Evaluate the pump operation
Access the pump impeller and check for wear or obstruction. Spin the impeller by hand to confirm freedom of movement; replace if it binds or makes grinding noise. Reassemble with care.
Tip: If you hear grinding during a cycle, inspect the impeller for damage and seize to avoid further motor wear. - 6
Run a test cycle and observe
Reattach panels, reconnect power and water, and run a short cycle to observe operation. Check for leaks, proper draining, and complete washing. If issues persist, revisit the pump or inlet assembly.
Tip: Record anything abnormal (sounds, leaks, or error codes) to guide further work.
FAQ
What is the most common cause of a Samsung dishwasher not starting?
A faulty door latch or a tripped breaker are common culprits. Verify the door latch is engaging properly and that the circuit is powered. If the display remains dark, check the control board fuse and wiring for damage.
Most often, a door latch or a tripped circuit causes a Samsung dishwasher not to start. Check the latch and power source, then inspect the control board if needed.
How do I reset a Samsung dishwasher?
Most Samsung models reset by turning the unit off at the circuit breaker for a few minutes or by using a dedicated reset procedure in the user manual. After reset, run a test cycle to confirm normal operation. Always consult your model’s manual for exact steps.
To reset, turn off at the breaker for a few minutes or follow your model’s reset procedure, then test a cycle.
Can I fix a leak myself or should I call a pro?
Small leaks around door seals or hoses can often be addressed by reseating gaskets and tightening clamps. Larger leaks or leaks behind panels may require professional service to avoid water damage and ensure proper sealing.
You can fix small leaks by reseating seals and tightening clamps, but big leaks are best left to a pro.
Where can I find replacement parts for Samsung dishwashers?
OEM Samsung parts can be found through authorized dealers, official Samsung support, or reputable appliance parts suppliers. Verify compatibility with your model number before ordering to ensure proper fit and function.
Check official Samsung parts, authorized dealers, or trusted suppliers to find compatible replacements.
Is it safe to run a cycle if the inlet valve is suspected faulty?
No. A faulty inlet valve can cause overfill, leaks, or water damage. Do not run cycles until the valve is tested and replaced if failing. Use caution with electrical components near water.
Do not run cycles if you suspect the inlet valve is faulty. Test and replace as needed.
Watch Video
Key Takeaways
- Identify the fault from symptoms before replacing parts.
- Prioritize safety: power off, water off, PPE on.
- Use OEM parts for reliable, durable repairs.
- Test thoroughly and observe for leaks or misbehavior.