Appliance Repair Frigidaire: A Step-by-Step Home Guide
Learn safe, practical Frigidaire appliance repairs with a clear, step-by-step approach. This guide covers common failures, tools, safety precautions, and decision points on DIY vs professional service.

Learn how to diagnose and repair common Frigidaire appliances, from refrigerators to dishwashers. This guide covers essential safety checks, when to DIY versus call a pro, and a clear step-by-step process for basic fixes you can complete with common tools. Start with safety, verify power, and methodically inspect components. You'll be guided through troubleshooting, part identification, and safe disassembly.
Why Appliance Repair Frigidaire Matters
According to Home Repair Guide, Frigidaire appliances are common in many households, and timely repairs save energy, reduce waste, and extend the life of the machines. This guide explains why self-directed care matters and how a methodical repair mindset can prevent expensive failures. You’ll gain confidence diagnosing issues across refrigerators, ovens, dishwashers, and laundry machines, with a focus on safety and efficiency. The Home Repair Guide team found that worn seals, clogged filters, and aging control boards are frequent culprits—symptoms you can troubleshoot with basic tools in a well-lit workspace. Frigidaire’s reputation for reliability makes it worth the effort to repair rather than replace when possible, especially for components like gaskets, coils, and simple control modules. Remember: small fixes today can prevent larger, costlier problems tomorrow.
Common Frigidaire Appliance Issues
Frigidaire appliances show a range of symptoms that homeowners can interpret with basic checks. Fridges may fail to cool or frost coils; ice makers stall; dishwashers leak or fail to clean; ovens may not heat evenly; and washers may not spin. In many cases the root cause is simple: a dirty filter, a worn gasket, or a faulty relay. This section describes typical signs, described in plain language, and which parts are most often implicated. You’ll learn strategies for prioritizing issues, avoiding unnecessary disassembly, and choosing safe, inexpensive fixes first. The goal is to build a clear diagnostic mindset so you don’t chase phantom faults and waste time.
Safety and Prep Before You Begin
Safety is non-negotiable when repairing appliances. Begin by unplugging the unit and turning off any associated breakers. Read the user manual for model-specific cautions, then collect the model number, service tag, and a parts list. Keep kids and pets away from the work area, wear eye protection, and work on a non-slip surface. This block emphasizes risk awareness, proper labeling, and the importance of disconnecting power before any inspection. If you’re unsure about a refrigerant-containing system or high-voltage components, pause and consult a professional. Proper safety gear, good lighting, and a clean workspace reduce mistakes and injuries.
Diagnostic Mindset: How to Troubleshoot
Adopt a systematic approach to diagnose issues. Start by reproducing the fault in a controlled way, making note of any error codes or blinking lights. Listen for unusual sounds, feel for cold air leaks, and check door gaskets, hinges, and seals for integrity. Inspect electrical connectors for corrosion or loose terminals and confirm that power is reaching the control board. Use a multimeter to test fuses, switches, and thermistors where applicable. Record observations and compare them to the model’s service manual to narrow down the likely causes. This section emphasizes documenting findings to avoid repeating steps.
Basic Repairs You Can Do at Home
Many Frigidaire repairs involve reversible steps that don’t require specialized equipment. For example, replacing a worn door gasket can restore cooling efficiency and prevent leaks. Cleaning condenser coils improves heat dissipation and efficiency in refrigerators and freezers. Replacing a clogged water filter or a faulty ice-maker module is often straightforward and inexpensive. Simple fixes like reseating a loose connector or replacing a light bulb won’t require professional tools. Always confirm the model’s exact part numbers before ordering replacements to avoid compatibility issues. These at-home repairs can extend appliance life when performed carefully and correctly.
When to Replace vs. Repair
Not every problem is worth fixing, and some issues signal impending failure. If a compressor or refrigerant line shows signs of leakage, or if control boards exhibit persistent faults after multiple tests, replacement or professional service may be the better option. Consider the appliance’s age, energy efficiency impact, repair cost versus replacement cost, and the likelihood of recurring failures. A quick calculation can help: estimate repair parts and labor versus the cost of a new unit with better energy efficiency. Home Repair Guide recommends weighing long-term reliability and safety alongside upfront costs when making this decision.
Maintenance Habits to Extend Lifespan
Preventive maintenance is cheaper than unexpected breakdowns. Schedule regular cleaning of filters, coils, and drainage systems. Keep appliances level and properly loaded to avoid stress on components. Inspect door seals for wear and replace them when necessary to maintain efficiency. Periodically test safety features and keep a spare parts list on hand for quick replacements. These practices reduce energy use and help you catch issues early before they become major failures.
Sourcing Parts and Staying Within Budget
When shopping for replacement parts, always verify compatibility with the exact Frigidaire model number. Prefer genuine or OEM-compatible parts to ensure fit and performance; beware of low-cost imitations that may fail prematurely. Compare prices across authorized dealers and reputable retailers, and consider whether a part can be refurbished or reused. Plan ahead by listing the parts you need and ordering them in advance to avoid delays during a repair window. With careful planning, you can manage costs while maintaining appliance performance.
Tools & Materials
- Multimeter(Test voltage, resistance, and continuity in circuits)
- Screwdriver set (Phillips and flat-head #2)(Remove panels and fasteners)
- Nut driver set(Handle appliance fasteners and clamps)
- Needle-nose pliers(Grip small components and connectors)
- Torx driver set(Some Frigidaire models use Torx screws)
- Non-contact voltage tester(Verify power before touching wires)
- Safety gear (gloves, safety glasses)(Protect hands and eyes during disassembly)
- Flashlight or headlamp(Better visibility inside cabinets)
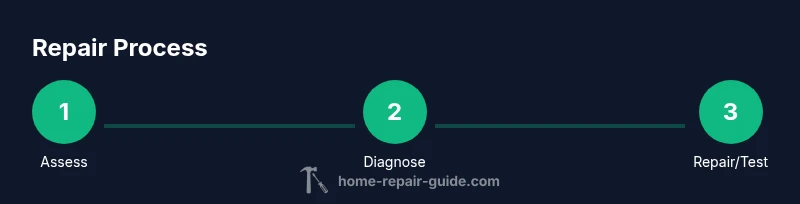
Steps
Estimated time: 60-90 minutes
- 1
Assess safety and gather information
Begin by unplugging the appliance and turning off any connected breakers. Look up the model and serial number, then pull the service manual or parts list for reference. This helps you plan the repair and avoid ordering incorrect parts.
Tip: Label wires and take photos before disconnecting anything to simplify reassembly. - 2
Unplug and isolate power
Disconnect power at the outlet or circuit breaker. Use a non-contact tester to confirm there is no live voltage before handling internal components. This reduces shock risk during inspection.
Tip: Double-check the main power switch on the appliance if present. - 3
Access internal components safely
Remove outer panels or access doors using the appropriate driver bits. Keep track of screws and reuse mounts where possible. Work in a clean, uncluttered space to avoid losing small parts.
Tip: Work slowly and avoid forcing panels open; check for hidden screws behind logos or trims. - 4
Inspect common fault points
Check gaskets, seals, hoses, and obvious wiring issues for wear or damage. Look for condensation, frost, or leaks that point to a specific fault. If a component looks damaged, test or replace it before proceeding.
Tip: Replace worn gaskets promptly to restore efficiency and prevent leaks. - 5
Test components with a meter or known-good part
Use the multimeter to test fuses, thermistors, and relays. If you have a spare compatible part, swapping it in can confirm whether the original is defective. Record readings and compare them to the service manual’s specifications.
Tip: Only test components you can safely access; stop if readings are unclear. - 6
Reassemble and verify operation
Reconnect wiring, tighten fasteners, replace panels, and restore power. Run a short test cycle to confirm operation and look for abnormal sounds or leaks. If issues persist, reassess the fault or seek professional help.
Tip: Run initial tests with a lower load to observe behavior before normal use.
FAQ
Is it safe to repair Frigidaire appliances yourself?
DIY repairs can be safe for basic tasks if you follow precautions, unplug power, and use proper tools. Avoid refrigerant work or high-voltage circuits unless you’re trained. When in doubt, consult a professional.
DIY repairs are safe for simple tasks if you unplug and use the right tools; avoid high-risk work and refrigerants. When unsure, call a pro.
What are the most common Frigidaire repairs homeowners can do?
Common fixes include gasket replacement, cleaning condenser coils, changing filters, and reseating loose connectors. These steps often restore performance without professional service.
Most fixes are gasket swaps, coil cleaning, filter changes, and reconnecting loose wires.
How do I identify the model number for parts?
Locate the model and serial number on the appliance label, usually inside the door frame or near the back. Use these identifiers when ordering parts to ensure compatibility.
Look for the model and serial on the label near the door or back, and use them to get the right parts.
When should I call a professional for a Frigidaire appliance?
Call a technician for refrigerant leaks, compressor issues, or persistent control-board faults after basic troubleshooting. If energy efficiency is severely compromised, professional assessment is wise.
If you suspect a refrigerant leak or a faulty control board, or the repair seems beyond basic fixes, call a pro.
Where can I buy replacement parts for Frigidaire appliances?
Use authorized dealers or Frigidaire-supported retailers and compare part numbers to ensure correct fit. Avoid generic parts that may not meet spec.
Shop through authorized dealers and match exact part numbers for best compatibility.
How can I prevent future issues with Frigidaire appliances?
Perform regular cleaning, replace filters on schedule, and avoid overloading. Keeping coils and seals clean reduces the chance of breakdowns.
Clean coils, replace filters regularly, and avoid overloading for longer appliance life.
Watch Video
Key Takeaways
- Identify root cause safely and methodically
- Power off before any inspection or disassembly
- DIY for simple, safe fixes; professional help for complex issues
- Document steps and part numbers to prevent mistakes