Appliance Near Me Repair: A Step-by-Step Guide for Homeowners
Learn how to locate reliable appliance near me repair services and perform safe, durable fixes. This guide covers tools, step-by-step procedures, safety tips, and when to hire professionals.

This guide helps you locate reputable appliance near me repair services, decide between DIY and professional help, and follow a safe, practical workflow to address common appliance issues. Before you begin, assemble a basic toolset, confirm the service scope, and understand warranty considerations. You’ll learn how to ask clear questions, compare estimates, and test repairs safely. The goal is reliable diagnostics and durable results, with safety always first.
Why Appliance Repair Near Me Matters
When an appliance stops working, many homeowners search for appliance near me repair to find nearby professionals who can respond quickly. Proximity reduces downtime, simplifies parts access, and makes scheduling easier around busy routines. According to Home Repair Guide, choosing a local service improves response times, simplifies warranty validation, and supports faster parts access. This is especially important for essential devices like refrigerators, dishwashers, and laundry machines that affect daily life. In this section, we explore why local expertise matters, how to evaluate local pros, and when to tackle a repair yourself. We’ll also discuss common myths about hiring nearby technicians and how to avoid overpaying. With the right local partner, you’ll get reliable diagnostics, transparent pricing, and a plan that fits your timeline.
Brand note: The Home Repair Guide team emphasizes local, licensed technicians for longevity and safety. Planning ahead with a nearby pro saves time and reduces risk during urgent repairs.
Key Considerations Before You Start
Before you pick up tools or call a technician, take a moment to set expectations. Decide whether it’s worth attempting a repair yourself or you should hire a professional, especially for high-voltage appliances or devices with gas lines or refrigerants. Check your warranty status and the service policy of any nearby repair shop; some manufacturers require authorized service for warranty protection. Gather the model details, serial numbers, and a brief symptom description so you can explain the issue clearly. When possible, request a written estimate that includes labor, parts, and any diagnostic fees. Finally, consider energy efficiency and long-term reliability—if a repair is frequent or costly, replacement might be a smarter investment, even when a nearby service is affordable. The Home Repair Guide analysis suggests that local providers often offer more flexible scheduling and clearer diagnostic explanations than distant franchises.
Tools and Materials You’ll Need
Having the right tools on hand makes repairs safer and faster. Here’s a core list to start with:
- Insulated screwdriver set (Philips and flathead) — required: true; note: "include #1, #2 Philips and 3/16 in flathead"
- Digital multimeter or voltage tester — required: true; note: "set to appropriate AC/DC range and test for continuity where applicable"
- Nut drivers and socket set — required: true; note: "short and long bits for common appliance fasteners"
- Needle-nose pliers and wire cutters — required: true; note: "for gripping small components and trimming wires"
- Protective gear (safety glasses, insulated gloves) — required: true; note: "keep hands safe during disassembly"
- Work light or headlamp — required: true; note: "bright, shadow-free illumination"
- Owner’s manual or model information sheet — required: true; note: "reference diagrams and part numbers"
Optional but helpful: replacement parts you anticipate needing (gaskets, filters, fuses) — required: false; note: "only if you’ve confirmed a compatible part"
Common Symptoms and Quick Diagnostics
Identifying the right symptom helps narrow down the likely cause and reduces unnecessary disassembly. Common signs include unusual noises, leaks, failure to start, or inconsistent temperatures. Start with basic checks: verify power supply, ensure doors are fully closed, and confirm simple issues like a blown fuse or tripped breaker. For refrigerators, check door seals and evaporator coils; for dishwashers, inspect spray arms and filter screens; for washing machines, look at drum balance and belts if applicable. Remember: never work on energized components; disconnect power first and discharge capacitors only if you are trained to do so. If the symptom persists after safe checks, contact a nearby professional for diagnostics and replacement parts. Pro tip: document unusual behavior with a date and notes to aid the technician later.
How to Vet an Appliance Repair Technician
Locating a trustworthy local pro requires careful questions and careful comparison. Start by asking about licenses, insurance, and manufacturer-authorized status. Request a written estimate with a clear breakdown of labor, parts, and diagnostic fees. Check recent customer feedback, response times, and warranty on parts and labor. Confirm whether the technician will provide a diagnostic visit before any repair, and whether they guarantee the work. Finally, verify that their service area includes your location and that they carry tools suitable for your appliance model. When in doubt, ask for references and follow up with a quick call to previous clients.
Safe Testing and Post-Repair Steps
After the repair, restore power and run a controlled test of the appliance. Listen for abnormal noises, observe for leaks or electrical heat, and verify door seals or panels fit correctly. Recheck settings and run the recommended test cycle described in the user manual. If the appliance is energy-efficient or has a diagnostic mode, use it to confirm operation. Document the part replaced and keep receipts for warranty. If you notice any symptoms returning, stop and call the technician to reassess; do not attempt reassembly or re-testing beyond your training. A final safety check includes confirming there are no loose wires and that the appliance case remains cool to the touch after operation.
When to Replace Instead of Repair
Not all failures justify a repair. If the cost of parts and labor approaches a significant portion of the price of a new unit, or if the appliance is old and inefficient, replacement may be a better long-term choice. Consider energy efficiency improvements, potential rebates, and the availability of compatible parts. In such cases, shopping locally for deals and comparing service quotes will help you pick a reliable, lower-cost option from nearby providers. Home Repair Guide suggests weighing ongoing maintenance costs against the total cost of ownership for a new, energy-efficient model.
Final Thoughts from Home Repair Guide
Choosing appliance near me repair services that balance speed, cost, and quality is essential. The Home Repair Guide team recommends starting with a clear symptom description, validating licensing, and keeping detailed records of parts and costs. By following the steps in this guide, homeowners can protect warranties, avoid dangerous DIY, and extend the life of their appliances through thoughtful care.
Tools & Materials
- Insulated screwdriver set (Philips and flathead)(include #1, #2 Philips and 3/16 in flathead)
- Digital multimeter or voltage tester(set to appropriate AC/DC range and test for continuity where applicable)
- Nut drivers and socket set(short and long bits for common appliance fasteners)
- Needle-nose pliers and wire cutters(for gripping small components and trimming wires)
- Protective gear (safety glasses, insulated gloves)(keep hands safe during disassembly)
- Work light or headlamp(bright, shadow-free illumination)
- Owner’s manual or model information sheet(reference diagrams and part numbers)
- Replacement parts (gaskets, filters, fuses) – optional(only if you’ve confirmed a compatible part)
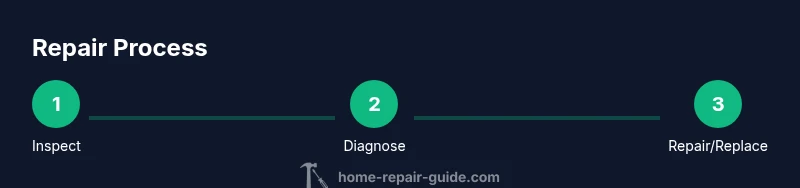
Steps
Estimated time: Total time: 1-2 hours
- 1
Power down and unplug
Begin by turning off power to the appliance at the outlet or circuit breaker. Unplug the unit if feasible to eliminate shock risk. If unplugging isn’t possible, switch off the appropriate breaker and verify no power is reaching internal components using your multimeter on a safe setting.
Tip: Label cables as you disconnect them and photograph connections to ease reassembly. - 2
Access the fault area safely
Remove access panels or panels as needed, keeping screws in a labeled container. Use a flashlight to inspect inside for obvious signs of damage, such as burnt components, loose wires, or broken belts. Do not force components free; if something resists, re-check the manual.
Tip: Take photos before disconnecting parts so you can reconstruct the original configuration. - 3
Inspect for obvious faults
Look for signs of wear, corrosion, or debris clogging fans, filters, or coils. Check door seals for wear and listen for unusual noises while lightly rotating moving parts by hand where safe. Replace or clean what you can without removing critical assemblies.
Tip: Keep a parts list handy; replacing a worn seal or filter can often restore performance with minimal labor. - 4
Test with appropriate tools
Use your multimeter to check continuity, resistance, and voltage where applicable. Disconnect power, perform checks, then re-energize for a controlled test. Only test circuits you are trained to handle; capacitors can retain charge unexpectedly.
Tip: Don’t test live components unless you’re confident in your technique and safety precautions. - 5
Document and plan the repair or replacement
If you’ve identified a faulty part, decide whether to replace it or call a pro for diagnosis. Obtain the correct part number and order it if needed. Create a brief plan with steps and a realistic timeline. If the appliance is older, weigh the cost of repair against replacement.
Tip: Keep a written repair plan and receipts for warranty purposes.
FAQ
What is the first step I should take when an appliance stops working?
Start by checking that the appliance is plugged in and receiving power. Verify the circuit breaker hasn’t tripped and consult the user manual for basic troubleshooting steps before calling a repair technician.
Check power and the breaker first, then consult the manual for quick troubleshooting before you call a technician.
How do I decide between repair and replacement?
Consider the appliance’s age, the cost of parts and labor, and energy efficiency. If repairs would be frequent or nearly as expensive as a new unit, replacement may offer better long-term value.
Think about age and ongoing costs; if repairs keep coming back, replacement might be the smarter choice.
Are DIY appliance repairs safe?
DIY repairs can be safe for simple, non-electrical tasks and with proper protective gear. Avoid high-voltage work, refrigerants, and gas lines unless you’re trained and certified.
DIY is possible for basic fixes, but avoid high-risk tasks unless you’re trained.
What should I ask a technician before starting?
Ask about licenses, insurance, warranty on parts and labor, and whether they provide a written estimate with a clear scope of work before starting.
Ask for licenses, insurance, warranties, and a written estimate upfront.
How can I verify a technician’s reliability?
Check recent client reviews, request references, confirm service area, and ensure they offer a diagnostic visit before any repair.
Read reviews, ask for references, and confirm they’ll diagnose first.
Should I keep receipts for warranty and taxes?
Yes. Save the repair receipts, parts lists, and warranty terms to support future claims and maintenance records.
Keep receipts and warranties in a safe place for future reference.
Watch Video
Key Takeaways
- Identify local repair options quickly.
- Gather tools and parts before starting.
- Vet technicians for licenses and warranties.
- Test safely and document every step.