Washer Dryer Repair Near Me: A Practical Guide
Find trustworthy washer dryer repair near you with practical steps, safety tips, and budgeting guidance from Home Repair Guide. Learn how to choose pros, what to expect, and how to care for your appliances.

Goal: Find reputable washer dryer repair near you, understand common issues, and know what to expect from a service visit. You’ll learn how to verify credentials, compare quotes, and prepare essential information for the technician. This quick guide helps homeowners and renters make safer, informed decisions without overspending or surprises.
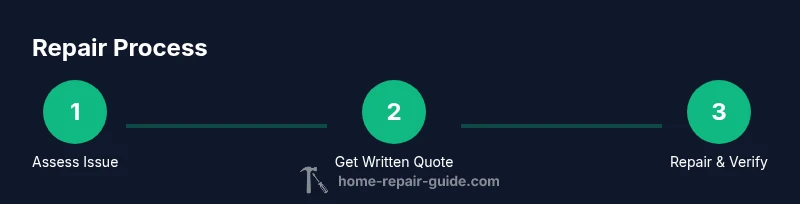
How to find washer dryer repair near me
Finding reliable washer dryer repair near you starts with a clear plan. Start by identifying options within a reasonable radius and compare what they promise to deliver: quick diagnostics, transparent pricing, and a written warranty on parts and labor. According to Home Repair Guide, reputable local pros publish clear credentials, maintain proper insurance, and respond within a predictable time frame. Use a mix of search engines, local directories, and trusted review sites to assemble a short list. Call or chat with two or three technicians to gauge responsiveness and communication. Ask for references from recent customers and confirm they service your model and brand. Remember that the cheapest option isn’t always the best; look for a balance of value, reliability, and availability. Some technicians offer same-day or next-day service windows, and most will provide a no-obligation diagnostic estimate. Keep in mind that a good repair partner will explain what’s likely causing the issue, outline potential parts and labor costs, and present you with a repair plan before you commit. Home Repair Guide analysis shows that proximity, warranties, and clear communication are strong predictors of a satisfactory repair experience.
Common issues signaling repair needs
Washer and dryer problems come in many forms. Common signs include clothes not spinning or draining properly, unusual noises, and obvious leaks. Dryers may fail to heat, take too long to dry, or stop mid-cycle. Modern machines display error codes that point toward specific modules, sensors, or blocks in the drainage system. Before you call a pro, note the symptoms, when they occur (load size, cycle type, temperature), and any recent changes (detergents, drainage, or venting). This information helps the technician diagnose faster and often reduces diagnostic fees. For renters and homeowners, understanding whether the issue involves the drum, belts, hoses, pumps, or electrical connections is essential for making a smart repair decision. As you compare options, look for technicians who can translate codes into plain-language explanations and provide a written estimate for parts and labor. Home Repair Guide emphasizes documenting symptoms with dates and photos when possible to streamline the process.
Safety first: prerequisites before hiring a pro
Safety is the priority when dealing with laundry appliances. Always unplug the machine and shut off the water supply before inspecting. If you smell gas with a gas-powered dryer, evacuate the area and call the utility provider. Do not attempt to disassemble electrical components or repair the power cord yourself. Wear protective gloves and eye protection, especially when handling hoses or components that may contain hot water. Ensure the area around the machine is dry to prevent slips. If you’re unsure about electrical or gas connections, it’s safer to hire a qualified technician who can diagnose and repair without risking personal injury or property damage. This section is about creating a safe environment that enables an accurate diagnosis and a warranty-backed repair.
How to evaluate local repair pros: credentials, warranties, and communication
When evaluating local pros, verify licenses, insurance, and warranty terms on both parts and labor. Look for technicians who offer a written estimate, a clear scope of work, and a warranty on the completed repair. Timely communication matters: a quick appointment window, clear arrival times, and a phone-friendly approach reduce stress. Read recent customer reviews with a critical eye for consistency and responsiveness. Ask about whether they use OEM or compatible parts and what the return policy is if the repair fails within the warranty period. Budget-conscious homeowners should request a diagnostic option even if they plan to proceed with the repair and insist on a detailed, itemized bill. As you gather quotes, compare not only the price but also the service terms and estimated turnaround.
What to expect during a typical repair visit: steps, timing, and transparency
A professional repair visit usually begins with a diagnostic assessment to confirm the root cause. Expect a written estimate outlining parts, labor, and any travel fees. If parts are required, the technician will confirm availability and timing; some repairs can be completed in the first visit, while others may require a return trip for parts. Reputable technicians keep you informed of progress, ask for your approval before replacing major components, and test the unit after the repair to ensure proper operation. If a warranty applies, make sure the technician documents it on the repair receipt. In the end, you should receive a clear explanation of what was fixed, why it was necessary, and any recommended preventive maintenance to extend the life of your washer or dryer. Throughout, Home Repair Guide reminds readers to document the visit and keep records for future service needs.
Do-it-yourself maintenance that is safe and effective
Some maintenance tasks are safe for homeowners to perform without professional help. Regular lint trap cleaning, hose checks for cracks or leaks, and leveling the machine to reduce vibration are straightforward. Cleaning the drainage pump filter (where applicable) can prevent nods to clogs and help the unit run more efficiently. Always unplug the appliance and shut the water supply before attempting any maintenance that involves internal parts or belts. Use a mild cleaner and a soft brush for exterior panels to avoid scratches. For anything involving electrical components, motors, or the control board, it’s best to call a professional. DIY maintenance can reduce the likelihood of minor issues but is not a substitute for professional service when complex repairs are needed.
Budgeting and pricing expectations for washer/dryer repairs
Budget planning for washer and dryer repairs requires understanding typical cost drivers, including diagnostic fees, labor, and parts. While exact numbers vary by region and model, expect that the diagnostic assessment is a separate charge that may be credited toward the repair if you proceed. Parts costs depend on the specific component, with common items such as belts, hoses, pumps, and sensors contributing to the bill. Travel charges and service call fees may apply for remote locations. Get multiple written estimates and compare the warranty terms for both parts and labor. Remember that a high upfront price does not always guarantee quality, and the lowest bid may come with limited coverage. The aim is to balance price with reliability, speed, and long-term value, as emphasized by Home Repair Guide’s budgeting guidance.
Maintenance habits that extend washer/dryer life and prevent common breakdowns
Preventive care is cheaper than repairs. Schedule routine maintenance like lint trap cleaning, vent cleaning for dryers, and checking hoses for wear at least twice a year. Use the right detergents for your machine and avoid overloading, which strains motors and belts. Keep the area around the appliances dry to prevent corrosion and moisture damage. If you rely on warranty protections, ensure you follow the manufacturer’s maintenance requirements to preserve eligibility. Brand-agnostic guidance emphasizes keeping a log of service visits and any part replacements to track performance over time. Adopting these habits reduces the likelihood of sudden failures and can extend the life of your washer and dryer.
Authority sources and verification: where to learn more and how to verify experts
For safety and consumer protection, consult trusted sources when evaluating repair options. The Federal Trade Commission provides guidance on avoiding scams and ensuring fair service practices. The Consumer Product Safety Commission highlights safety considerations for household appliances and how to respond to potential hazards. The U.S. Department of Energy offers energy-saving tips and performance considerations for laundry equipment. When in doubt, verify credentials, ask for written warranties, and consult the manufacturer’s service network for authorized repair options. These steps help you choose a trustworthy service near you and protect your investment.
Tools & Materials
- Safety gear (gloves and goggles)(Protect hands and eyes from sharp edges and chemicals)
- Basic hand tools (screwdrivers, pliers)(Phillips and flat-head; include nut driver)
- Multimeter(For basic electrical checks; use caution)
- Bucket and towels(Contain leaks and keep area clean)
- Flashlight or headlamp(Illumination for dark corners)
- Owner's manual and model number(Important for correct parts and steps)
- SAR or service manual (optional)(Model-specific guidance if available)
Steps
Estimated time: 60-120 minutes
- 1
Power down and secure the area
Unplug the washer/dryer and shut off the water supply where applicable. Move the machine away from walls to access hoses and connections. This prevents accidental shocks and water spills during inspection.
Tip: If cords or hoses are difficult to reach, use a breaker switch to ensure total power cut before starting. - 2
Note symptoms and check basic indicators
Record what you observe (cycling behavior, error codes, leaks, noises). Verify the machine is level and check for obvious blockages in the drain hose or pump filter. This information helps the technician diagnose faster.
Tip: Take a short video of a spin or drain cycle to share with a pro for accuracy. - 3
Consult model documentation
Review the manual or online model resources to understand safety warnings and common failure points for your unit. This step clarifies which fixes you can safely attempt yourself and which require a pro.
Tip: Note any serial numbers and part numbers that may be needed when ordering replacement components. - 4
Decide whether to DIY or hire a pro
Based on symptoms and your comfort level, determine if the issue is within safe DIY scope or requires professional service. For electrical, gas, or sealed components, always call a licensed technician.
Tip: If in doubt, err on the side of safety and contact a pro to avoid damage or injury. - 5
Request service and prepare information
Reach out to a local repair service near you with model details, symptoms, and requested service window. Ask for a written estimate and warranty terms before agreeing to any work.
Tip: Have your accessibility notes ready (stairs, elevator, or narrow doorway) to prevent scheduling issues. - 6
Prepare the space for the technician
Clear the area, remove fragile items, and ensure safe access to electrical outlets and water shutoffs. If venting or drainage is involved, ensure clear paths and safe disposal for any waste.
Tip: Provide the technician with a copy of any manuals or previous service receipts if available. - 7
Test after repair and document
Once repairs are completed, run a complete cycle and observe for proper operation. Confirm no leaks, noise, or error codes. Keep the receipt and warranty information for future use.
Tip: If the problem recurs within the warranty period, contact the service provider promptly.
FAQ
Do I really need a professional to fix my washer or dryer near me?
Most repairs involve electrical or water connections and require specialized tools. A licensed technician ensures safety, correct parts, and proper warranty coverage.
For safety and proper repair, it's best to hire a licensed professional.
How do I pick the right repair service near me?
Look for licensed technicians with insurance, clear written estimates, and warranty terms. Read recent reviews and verify they service your model.
Choose a pro with credentials, clear quotes, and a solid warranty.
What information should I gather before scheduling?
Have the model and serial numbers, a detailed description of symptoms, dates of issues, and access details for your home. This helps the tech diagnose quickly.
Collect model details and symptoms before you call.
What if my appliance is under warranty?
Check the warranty terms and contact the manufacturer or an authorized service provider. Unauthorized repairs can void coverage.
If it’s under warranty, contact the maker or an authorized repair service.
Can DIY fixes save money?
Simple maintenance tasks can help, but major repairs should be left to professionals to avoid costly mistakes.
DIY can help with small tasks, but big fixes belong to pros.
How long does a typical repair take?
Diagnosis and repair times vary. Expect some jobs to be completed in one visit, while others may require parts on backorder or a follow-up visit.
Most repairs wrap in a day or two depending on parts.
Watch Video
Key Takeaways
- Identify issues safely before calling a pro
- Evaluate pros by credentials, warranties, and responsiveness
- Prepare model info and symptoms to speed service
- Ask for a written, detailed repair plan before work
- Maintain routine care to extend appliance life