When Can You Repair a Windshield Crack: A Practical Homeowner's Guide
Learn when you can repair a windshield crack, how location and size affect repair vs replacement, and a step-by-step approach for a safe, cost-effective home assessment.

Windshield cracks can often be repaired when they are small, do not extend into the driver's line of sight, and do not reach the edge of the glass or branch into multiple cracks. If the crack grows, is near the edge, or after impact, replacement is usually the safer option.
Why timing matters for windshield crack repair
Cracks in a windshield are not just cosmetic issues; they affect safety and structural integrity. Temperature shifts, road vibration, and moisture can cause cracks to propagate over time. Acting sooner rather than later typically preserves more of the original glass and can reduce repair cost. According to Home Repair Guide, early evaluation helps homeowners avoid costly replacements and ensures road readiness. In general, the sooner you assess a crack, the more options you have for repair rather than replacement. This section sets the stage for understanding the practical limits and practical steps you can take as a homeowner or renter to address windshield damage confidently.
When can you repair a windshield crack? Key criteria
You can usually repair a windshield crack if it is small, does not travel through the driver’s line of sight, and remains away from the edge of the glass. Cracks that originate from a chip or bullseye may be sealed or filled, while long cracks near the edge or those that spider outward toward the frame often compromise structural integrity and require replacement. The crack’s depth matters too: superficial surface flaws respond better to resin injections, whereas deeper cracks or those that expose web-like patterns tend to fail under stress. Weather and moisture also influence repair viability: moisture-laden glass can hinder resin bonding, while extreme heat or cold can cause further cracking. A professional assessment is recommended if you are unsure about any of these factors.
DIY vs professional repair: pros and cons
DIY repair kits offer a cost-effective option for small, well-contained cracks, particularly when they are not in the driver's sight line. These kits typically include resin, an injector, curing film, and simple cleaners. They require careful preparation and attention to instructions, and results can vary based on crack geometry and ambient conditions. Professional repair, by contrast, uses specialized equipment to inject resin under controlled pressure and achieve a stronger bond with the glass. Pros emphasize consistent results, safer outcomes, and a higher likelihood of restoring structural integrity. Cons may include higher upfront costs and scheduling time, but many policies cover professional repairs with minimal out-of-pocket expense.
How a professional repair works (and when it might fail)
In a professional repair, a technician cleans the crack, then injects a resin that fills micro-voids and bonds to the glass. Curing is typically achieved with UV light or controlled heat. When done correctly, the repair can restore visibility and reduce the crack's progression. However, repairs may fail if the crack is long, near the edge, or if multiple cracks converge. In cases of severe damage, a replacement is the safer option to ensure structural integrity and long-term safety. If the crack is in the line of sight or compromises the windshield’s integrity, a replacement is often recommended by technicians.
Preparation steps before repair
Prepare a clean, dry workspace and gather your tools. Park in shade away from direct sun if possible, and limit movement near the windshield to minimize vibration. Before starting, wipe the area around the crack with isopropyl alcohol to remove oils and dirt, then dry with a lint-free cloth. If you are DIY-ing, read the kit manual thoroughly, and avoid attempting repairs on auto glass with existing edge damage, large chips, or spidering that exceeds the kit’s scope. This fuss-free preparation helps ensure resin bonding and a smoother, more durable finish.
What if repair isn’t possible? Replacement planning
If the crack is too long, near the edge, or has propagated to multiple areas, repairing may not restore structural integrity. In these cases, glass replacement is the safer and more reliable option. A replacement involves removing the old glass and installing a new pane, which may be reimbursed by insurance depending on your policy. When planning replacement, compare shop quotes, check for certification, and ask about the warranty on the install. Timely replacement minimizes safety risks and often protects against more expensive leaks or failures down the line.
Authority sources
For readers who want to dig deeper, consider consulting established sources that discuss windshield repair guidelines and safety standards. These sources provide independent, third-party perspectives on when repairs are appropriate and how to differentiate repair from replacement. They can help homeowners make informed decisions about vehicle safety and maintenance.
Common pitfalls to avoid
Avoid relying on guesswork alone. Do not drive long distances with a crack that is growing or in the driver’s line of sight. Don’t DIY if the crack is near the edge or shows spidering toward the frame; this can compromise safety. Finally, avoid unrealistic expectations about DIY repair results; professional assessment often yields the most reliable outcome.
Tools & Materials
- Windshield repair kit (resin-based)(Should include resin, injector, curing film, and instructions.)
- Razor blade or scraper(For smoothing cured resin and removing excess.)
- Isopropyl alcohol wipes(Cleans oil and dirt from the repair area.)
- Microfiber cloths(Lint-free for drying and polishing.)
- Gloves(Protect hands during cleaning and resin handling.)
- Safety glasses(Eye protection in case of resin splashes.)
- Masking tape(Useful to shield surrounding glass during curing.)
- UV light source or sunlight(Some resins cure with UV exposure; plan accordingly.)
Steps
Estimated time: 60-90 minutes
- 1
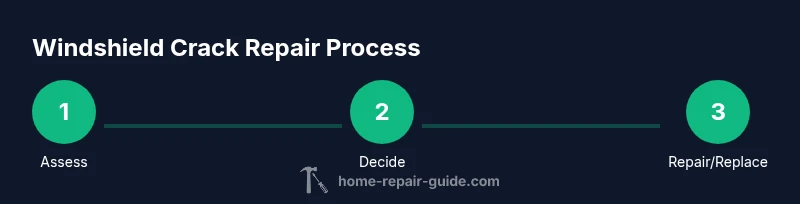
Assess the crack
In good daylight, measure the crack length and observe its pattern. Note whether it travels toward the edge or into the driver's line of sight. This initial assessment helps decide between repair and replacement.
Tip: Document location and approximate length with a tape measure or ruler. - 2
Decide on repair vs replacement
If the crack is small, centered, and away from the edge, repair is worth trying. If it spans toward the edge or exhibits spidering, plan for replacement. When in doubt, err on the side of safety and seek a professional opinion.
Tip: Ask your technician to explain whether the crack would likely propagate after repair. - 3
Prepare the workspace
Park in a shaded, dust-free area. Clean the windshield surround with alcohol wipes, dry with a microfiber cloth, and ensure the glass surface is completely dry before applying any resin.
Tip: Avoid cleaning agents with oils that can interfere with resin bonding. - 4
Apply temporary stabilization (if DIY)
If you’re using a DIY kit, apply a curing film and cover the crack to prevent dust entry during curing. This step helps maintain a clean bonding surface.
Tip: Keep the area free of moisture during curing to optimize adhesion. - 5
Inject resin and cure
Follow the kit instructions to inject resin into the crack. Apply UV or heat according to the resin’s curing method, and allow the specified time for solidification.
Tip: Wipe away excess resin promptly to prevent a rough finish. - 6
Assess the repair
Inspect the repaired area for smoothness and visibility. If the crack remains visible or flexible, additional passes may be needed, or a professional repair should be considered.
Tip: Do not drive immediately after a repair if you notice ongoing movement in the crack. - 7
Decide on next steps (if needed)
If the crack worsens or is unsuitable for repair, schedule a windshield replacement. Obtain quotes and check warranty terms.
Tip: Record the repair or replacement details for insurance or future service reminders. - 8
Post-repair care
Avoid car washes and rough turbulence for at least 24–48 hours. Monitor the windshield for new cracks or spreads and contact a pro if any changes occur.
Tip: Inspect after temperature swings to ensure the resin remains bonded.
FAQ
Can a windshield crack be repaired after it starts to spider?
Spider cracks can sometimes be repaired if caught early and the pattern is contained, but many cases require replacement for safety.
Spider cracks can be repaired if caught early, but often replacement is safer.
Will my car insurance cover windshield crack repairs?
Many policies cover windshield repairs with minimal or no deductible. Coverage varies, so check your policy or contact the insurer for specifics.
Insurance often covers repairs, but it depends on your policy—check with your provider.
Can I repair a windshield crack myself?
DIY kits exist for small cracks away from the edge, but results vary. If in doubt, consult a professional to avoid waste and wasted effort.
DIY kits work for small, safe cracks, but professional help is best if you're unsure.
What if the crack is near the edge or in the driver’s line of sight?
Cracks near the edge or in the line of sight typically require windshield replacement to ensure safety and structural integrity.
Edge or driver-line cracks usually mean replacement is the safer option.
How long does a windshield repair take?
Most repairs take about 30–60 minutes, plus curing time. Scheduling around a single visit is common, depending on the kit and weather.
Repair generally takes about half an hour to an hour, plus curing time.
Watch Video
Key Takeaways
- Assess crack promptly to avoid propagation.
- Repair is viable for small, non-edge cracks.
- Professional assessment improves safety and outcomes.
- Consider replacement if crack nears the edge or is in the line of sight.