Chip Window Repair Kit Guide: Fix Cracks at Home Quickly
Learn how to use a chip window repair kit to seal cracks, extend the life of your home windows, and prevent leaks. This guide covers kit selection, prep, application steps, safety, and maintenance.

With a chip window repair kit, you can stabilize a chipped or cracked pane at home. Start by cleaning the area, then apply the resin or epoxy, and cure per the kit’s instructions. Finish with polishing and an edge seal to prevent moisture intrusion. This DIY approach can delay replacement and extend window life.
What is a chip window repair kit and when to use it
Chip window repair kits are designed to mend small chips and shallow cracks on annealed glass commonly used in residential windows. They typically include a resin or epoxy, a curing agent, applicators, and surface finishing tools. These kits are best suited for minor damage that does not threaten the pane's structural integrity; for larger fractures, edge cracks, or tempered glass, replacement is safer. Using a kit can delay replacement and restore a clearer surface, reducing wind-driven air leaks and visible light distortion. When to choose a kit? If you notice a chip less than a few millimeters wide, no long cracks extending from the chip, and if the pane is securely seated in the frame. According to Home Repair Guide, starting with proper sealing and finishing improves longevity and prevents moisture intrusion.
Kit components and why each matters
Most chip repair kits provide: 1) Resin or epoxy for filling the chip; 2) A curing agent or UV accelerator; 3) Mixing tray and applicator; 4) Cleaning solution and lint-free cloth; 5) Masking tape and glazing putty for edge sealing; 6) Safety gear like gloves and goggles. The resin fills voids and bonds to glass; the curing agent hardens the mixture; the masking tape protects surrounding glass; safety gear prevents exposure to fumes. Some kits include a UV lamp or sunlight exposure to cure faster. It’s important to verify compatibility with your glass type and climate. Home Repair Guide analysis shows adherence to directions yields the best outcome.
Prep work: safety, cleaning, and protection
Before starting, set up in a well-ventilated area. Put on safety glasses, gloves, and a mask if fumes are present. Remove unnecessary items from around the window and cover furniture with drop cloth if needed. Clean the chipped area with isopropyl alcohol and a lint-free cloth until dry. Any dust or oils on the glass will prevent resin bonding. If the damage extends to the edge of the pane, catch and tape the edge to minimize resin leakage. Stabilize the glass if the frame wiggles.
Choosing the right resin or epoxy: epoxy vs resin differences
Some kits use a simple resin that cures with ambient air, others use UV-curable resin. Epoxy-based formulations typically provide stronger filling but take longer to cure, while UV-curable resins cure quickly but may require direct light exposure. Consider depth of chip, surrounding lighting, and whether you want a permanent or temporary fix. Read the kit instructions for cure time and safety. If you have tempered or laminated glass, a repair kit may be less effective and replacement may be safer.
Surface prep and glass stabilization
A flat, clean surface is essential. Use masking tape to protect the immediate perimeter around the chip. If the kit includes a leveling tool, place it to ensure the resin sits flush with the glass surface. Do not overfill; you want a smooth, even surface that mirrors the original curvature. After applying, gently remove excess material with a plastic scraper before curing begins. A small amount of resin should extend slightly beyond the chip to ensure a proper seal.
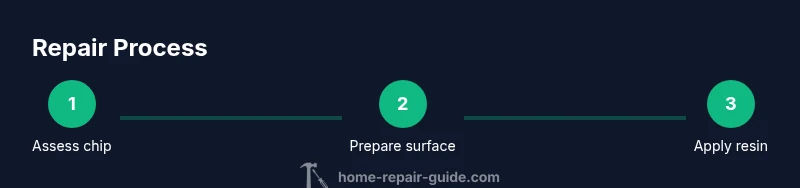
Step-by-step overview (high-level)
While the detailed steps are provided in the dedicated Step-by-Step section below, here is a high-level outline: clean and dry the area; mix resin and hardener; apply the mixture into the chip; remove air bubbles; cure for the recommended time; finish with polish and edge sealing; inspect for leaks and re-seal if necessary. Safety first: keep the area ventilated, wear gloves, and avoid skin contact.
Troubleshooting common issues
Common issues include air bubbles, resin overflow, and poor adhesion. If bubbles form, gently rework the surface while it is still tacky (per kit), or apply a second thin layer after curing. Overflow can be trimmed with a plastic scraper; avoid metal tools that scratch the glass. If adhesion is weak, re-clean and reapply a fresh layer after proper cure. If moisture appears behind the repair, you may need to re-seal after the area dries.
Maintenance and when to replace
Inspect the repaired area after heavy rain or temperature swings. If cracks reappear or expand, or if the chip is near the edge, replacement is the safer option. Regularly clean glass with a non-abrasive cleaner to prevent residue build-up that can affect sealant. A timely check helps prevent leaks and drafts.
Quick tips to remember for DIY success
- Always follow the kit instructions precisely for best results. - Wear safety goggles, gloves, and a mask if fumes are present. - Work in a clean, dust-free area and keep a small workspace organized to avoid contamination. - Consider having a pro assess larger panes or tempered glass to avoid safety risks.
Tools & Materials
- Chip window repair kit(Ensure kit is labeled for glass repair and compatible with your glass type (annealed vs tempered).)
- Isopropyl alcohol (70%+)(For cleaning the chipped area and ensuring a dry surface.)
- Lint-free cloths(Use to wipe and dry the glass without leaving fibers.)
- Safety glasses(Protect eyes from splashes and fumes.)
- Nitrile gloves(Prevent skin contact with resin/epoxy.)
- Mask or respirator(Required if the kit emits noticeable fumes.)
- Mixing tray and plastic spatula/applicator(for measuring and applying resin.)
- Masking tape(Protects surrounding glass and creates a clean edge.)
- Plastic scraper(Useful for removing excess resin without scratching glass.)
- UV light or direct sunlight(Needed only if using UV-curable resin.)
Steps
Estimated time: 60-90 minutes
- 1
Prepare the work area and don safety gear
Set up in a ventilated space. Put on safety glasses, gloves, and a mask if fumes are present. Move furniture away and lay a drop cloth.
Tip: Ventilation reduces fume exposure; a fan can help but avoid blowing dust onto the glass. - 2
Inspect the chip and plan the repair method
Assess chip size, depth, and location relative to edges. Decide whether to fill with resin or epoxy and if UV curing is available.
Tip: If the chip is near a border or on tempered glass, assess replacement risk first. - 3
Clean the area around the chip
Wipe the glass with isopropyl alcohol and a lint-free cloth until completely dry. Remove oils and dust to improve adhesion.
Tip: Do not touch the cleaned surface after drying. - 4
Mix resin/hardener per kit directions
Measure components precisely in the provided tray and stir until homogeneous. Avoid-air mixing by slow, steady motion.
Tip: If bubbles form, pause and let surface settle before proceeding. - 5
Apply resin into the chip
Fill the chip with a thin, even layer. Use a spatula to distribute and avoid overfill.
Tip: Leave a slight excess to account for shrinkage during curing. - 6
Remove air bubbles and level the surface
Gently pass a tool over the surface to collapse bubbles. Ensure resin sits flush with the glass surface.
Tip: Work quickly if using UV-curable resin to maximize cure efficiency. - 7
Cure as directed by the kit
Allow the resin to cure fully as specified; this may be air cure or UV-accelerated.
Tip: Keep the area undisturbed during cure. - 8
Finish and test the repair
Polish the surface if needed and seal the edges with masking tape. Inspect for leaks and perform a gentle water test.
Tip: If moisture is detected behind the surface, re-clean and re-seal after drying.
FAQ
Can a chipped window be repaired with a chip window repair kit?
Yes, for small chips away from edges on annealed glass. Large damage, chips near edges, or tempered glass may require pane replacement for safety and durability.
Yes, for small, non-edge chips on standard glass; larger damage usually needs replacement.
Is a repair kit a permanent fix?
A repair kit can restore surface integrity temporarily and reduce leaks, but it does not restore the pane’s original strength. Long-term durability depends on chip size and glass type.
It’s not a permanent fix; it improves surface integrity for a time.
How long does curing take?
Curing time varies by kit and resin type. Always follow the package directions for the exact duration and post-cure handling.
Cure time varies; check your kit’s directions.
Should I try this on tempered glass?
Repair kits work best on annealed glass. Tempered or laminated glass is often not suitable for DIY chip repairs and may require replacement.
Tempered glass often needs replacement; check kit guidance.
What safety gear is required?
Wear safety goggles, nitrile gloves, and a mask if fumes are present. Work in a well-ventilated area to minimize exposure.
Goggles, gloves, and a mask if fumes are present.
Watch Video
Key Takeaways
- Choose the right kit for your glass type and damage size
- Prepare thoroughly with ventilation, safety gear, and a clean surface
- Follow resin mixing and curing instructions precisely
- Inspect for leaks and edge sealing after cure