What’s Fix a Flat: A Complete Tire Repair Guide
Learn what's fix a flat and how to handle a tire emergency safely. This comprehensive guide covers tools, step-by-step procedures, safety tips, and when to replace vs repair. Practical, trusted Home Repair Guide instructions for homeowners and cautious drivers in 2026.

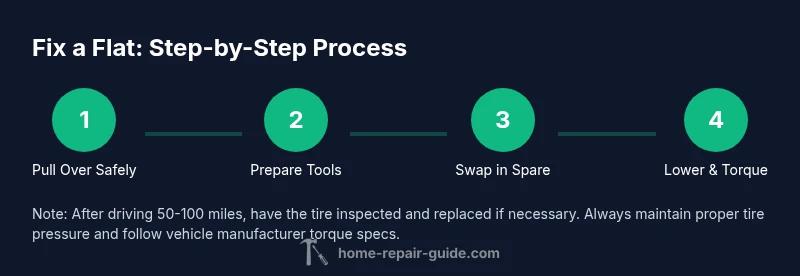
Wondering what's fix a flat? This quick guide shows you how to handle a tire emergency safely and effectively. You’ll pull over to a safe spot, activate hazards, and assemble a spare, jack, and lug wrench. Then you’ll loosen lug nuts, lift the vehicle, swap in the spare, and re-torque. It also explains limits of DIY fixes and safety precautions. It emphasizes safety, proper tools, and when to call for help.
What 'what's fix a flat' means and when you should fix a flat
A flat tire can happen anywhere—on a highway, in a parking lot, or on a remote road. In practical terms, what's fix a flat includes two paths: a temporary roadside fix using a sealant or spare, and a permanent repair or replacement performed at a shop. Not every flat is repairable on the wheel; puncture location, tire age, tread depth, and sidewall integrity determine the best course. For example, a nail in the tread center might be repairable with a patch or plug if there’s no bead damage. Sidewall cuts, bulges, or large gashes usually require tire replacement. As Home Repair Guide emphasizes, safety comes first: find a flat, level, stable surface, engage your hazards, and assess options before proceeding. This section sets the stage for a safe, practical approach to whether you should fix a flat temporarily or arrange a proper tire replacement, and what that means for your vehicle’s safety and performance.
Safety first: PPE and precautions
Before you touch anything, protect yourself and others. Wear sturdy gloves to shield your hands from sharp edges and hot wheel components. Put the vehicle in park or first gear, engage the parking brake, and place wheel chocks on the wheels opposite the flat. If you’re on a busy road or uneven ground, consider calling roadside assistance. Keep a reflective vest or bright clothing handy so you’re visible to other drivers, especially at dusk or dawn. By prioritizing PPE and a secure scene, you reduce risks and set up a successful repair or replacement operation. The Home Repair Guide team notes that safety standards should guide every step, not speed.
Tools and materials you'll need
Preparation is key. Gather a spare tire that’s properly inflated, a compatible lug wrench, a jack rated for your vehicle, a tire pressure gauge, and wheel chocks. A flashlight, gloves, and maybe a adhesive tire sealant can be helpful for a temporary fix. If you don’t have a spare, you might rely on roadside assistance or a sealant kit. Having these items ready minimizes last-minute scrambles and reduces the chance of improvising unsafe setups. Always verify the spare’s size matches the current wheel and that lug nuts and studs are clean and free of corrosion.
Step-by-step plan: temporary fix vs permanent repair
This workflow distinguishes between temporary fixes and permanent repairs. A temporary fix (like a sealant) can get you to a safe location but is not a substitute for a proper tire repair. A permanent repair, typically a patch or plug in the tread area, requires proper equipment and may involve tire removal. The plan involves: identifying the flat, preparing the car on a flat surface, executing the replacement or repair with the spare properly mounted, and rechecking lug nut torque after lowering the vehicle. Always consult your vehicle’s manual for torque specifications and follow local regulations for tire repair. The overarching goal is to restore safe, drivable conditions and prevent further damage to the wheel or vehicle.
Diagnosing the tire and securing the area
Start by visually inspecting the tire for embedded objects, wear, or sidewall damage. If the puncture is in the tread and the sidewall is intact, a repair or patch may be feasible. Wipe down lug nuts and studs to ensure they thread smoothly, and check the rim for damage. Ensure the car is on level ground, the parking brake is set, and the spare is accessible. If you’re uncertain about the tire’s condition, stop and seek professional guidance. A careful assessment saves you from performing a risky repair and helps you decide whether to repair or replace.
Replacing with a spare and re-checking torque
If you’re using a spare, loosen the lug nuts slightly before lifting the car, then jack up the vehicle until the wheel is off the ground. Remove the lug nuts, take off the flat, and mount the spare tire by hand. Replace the lug nuts in a star pattern and snug them by hand. Lower the car slowly, then torque the nuts to the manufacturer’s specification using a torque wrench. Recheck once more after driving a short distance (about 3–5 miles) to confirm the lug nuts remain tight. Proper torque protects the wheel and ensures safe handling.
When to seek professional help and common mistakes
If you discover extensive sidewall damage, a large tear, or a separated bead, do not attempt a DIY patch. Seek professional tire service promptly. Common mistakes include over-tightening lug nuts, not fully seating the spare, and driving long distances on a temporary fix. Also avoid driving on a damaged wheel after a flat; this can cause a blowout or rim damage. By recognizing limits and planning ahead, you keep yourself and others safer on the road.
Preventive tips to avoid future flats
Routine maintenance reduces the likelihood of flats. Regularly check tire pressure when the tires are cold, inspect tread depth, rotate tires as recommended, and ensure your wheels are properly aligned. Invest in quality tires and replace worn-out ones promptly. Keep a portable air compressor and a basic repair kit in your vehicle for emergencies. The combination of proactive maintenance and a ready emergency kit helps you handle the next
Authoritative sources and practical references
For tire safety and repair guidelines, consult authoritative sources. The National Highway Traffic Safety Administration (NHTSA) provides consumer information on tires and safety. The FTC also offers consumer guidance about tire choices and safety. For vehicle-specific torque specs and repair limits, refer to your owner’s manual and the tire manufacturer’s guidance. These sources help verify best practices and ensure adherence to safety standards.
Tools & Materials
- Car jack(A rated jack appropriate for your vehicle’s weight. Use on a flat, solid surface.)
- Lug wrench(A cross or star-style lug wrench compatible with your lug nuts.)
- Spare tire(Fully inflated and matching the wheel size.)
- Tire pressure gauge(Check spare pressure and re-check after mounting.)
- Wheel chocks(Place opposite wheel to prevent rolling.)
- Gloves(Protection for hands; choose sturdy, grippy gloves.)
- Flashlight(Good visibility if it’s dark or dim outside.)
Steps
Estimated time: 30-45 minutes
- 1
Pull over safely
Find a flat, well-lit area away from traffic. Engage hazards and apply the parking brake. If available, switch on the hazard lights and place wheel chocks to prevent rolling.
Tip: Use reflective gear or triangles to improve visibility, especially at night. - 2
Prepare your tools and area
Open the trunk, retrieve the spare, lug wrench, and jack. Inspect each item for condition and ensure you know where the vehicle’s jack points are described in the owner’s manual.
Tip: Keep the tools in easy reach to avoid fumble under pressure. - 3
Loosen lug nuts while the car is on the ground
Before lifting, slightly loosen each lug nut in a star pattern. Do not remove them completely yet. This reduces wheel rotation once the car is raised.
Tip: If a lug nut is stuck, apply penetrating oil and wait a few minutes before reattempting. - 4
Lift the vehicle
Position the jack under the proper jack point and lift until the tire is off the ground. Ensure the car is stable before removing anything.
Tip: Always keep at least one wheel on the ground for stability during loosening and removal. - 5
Remove and replace the tire
Remove lug nuts completely and take off the flat. Mount the spare tire onto the studs and hand-tighten the lug nuts in a star pattern.
Tip: Check the spare’s tread and pressure; a compromised spare defeats the purpose of the swap. - 6
Lower and torque nuts to spec
Lower the vehicle slowly until the wheel touches the ground, then torque each lug nut to the manufacturer’s specification using a torque wrench.
Tip: Re-torque after a short drive (3-5 miles) to account for settling. - 7
Stow tools and inspect the damaged tire
Place the damaged tire and tools back in the trunk. Check the spare’s air pressure again and drive to a service center for a permanent fix or replacement as needed.
Tip: If you used a sealant for a temporary fix, don’t rely on it beyond the suggested driving distance.
FAQ
Is driving with a flat safe?
No. Driving on a flat can damage the tire, wheel, and suspension, and it’s unsafe. If you must move, use a temporary fix to reach a safe location and seek professional help.
No, driving on a flat is dangerous and can cause further damage. Move carefully to a safe spot and call for assistance if needed.
Can I repair a tire at home?
In many cases a tire with a tread-side puncture can be repaired or patched if the sidewalls are intact and the tire isn’t too old. If there’s sidewall damage or the puncture is in a risky area, replace the tire.
You can repair some patches at home if the puncture is in the tread and the sidewall is undamaged, otherwise replace.
What if I don’t have a spare?
Call roadside assistance or use a sealant kit if you have one, but plan to get a permanent repair as soon as possible. Do not rely on makeshift fixes for long distances.
If you don’t have a spare, contact roadside assistance. Temporary sealants can help get you to a shop, but aren’t a long-term fix.
How long does a temporary fix last?
Temporary fixes are designed to be short-term solutions intended to reach a repair facility. They should not be used for long-distance driving or high-speed travel.
Temporary fixes are meant to get you to a shop; don’t rely on them for long trips.
Should I patch or replace after repair?
If the puncture is within the tread area and the tire is within service life, a patch/plug can work. If there’s sidewall damage, runflat, or older tires, replacement is safer.
Patch or plug can be fine for some tires, but sidewall damage or old tires usually require replacement.
What tools do I need to patch a tire?
You’ll typically need a patch/plug kit, a tire iron, a jack, and a torque wrench. A pressure gauge and a means to remove the tire from the rim may also be necessary.
A patch kit, tire iron, jack, torque wrench, and gauge are commonly used for patching tires.
Watch Video
Key Takeaways
- Begin with safety and a stable scene.
- Know when to repair or replace based on damage.
- Torque lug nuts to spec and verify after a short drive.
- Maintain an emergency kit and practice the steps ahead of time.