Repair Driveshaft: Step-by-Step DIY Guide for Safe Fixes
Learn to diagnose and repair driveshaft components with a practical, DIY-friendly approach. This guide covers U-joint wear, shaft balance, safety steps, parts selection, and a step-by-step workflow you can follow.

By following this guide, you will diagnose and perform a safe repair on a driveshaft, including inspecting U-joints, checking balance, and reassembling correctly. You’ll learn when to replace parts, how to support the shaft during service, and safety steps to avoid personal injury or further damage. This DIY approach aims to save time and cost while preserving vehicle reliability.
Understanding Driveshaft Basics
A driveshaft is a tubular metal bar that transmits torque from the transmission to the differential so the wheels can drive. In most vehicles, the shaft is a single tube or two-piece assembly with joints at each end. The most common failure points are the Universal joints (U-joints) and the center bearing. When the shaft is damaged or out of balance, you will feel vibrations, hear clunks, and may experience power loss or unusual noises. According to Home Repair Guide, driveshaft health is critical to drivetrain reliability and overall vehicle safety. Regular inspection helps catch wear early and reduces the risk of roadside failures. The goal of repairing a driveshaft is to restore proper balance, alignment, and joint function, without creating new issues. Key terms to know include: torque, U-joint, slip yoke, balance, shaft diameter, and axle orientation. If you see rust or bent sections, plan to replace rather than repair. This guide focuses on practical, DIY-friendly steps for common home repairs, emphasizing safety, proper tool use, and verifying the repair with a controlled test drive.
bodyBlocks2_placeholder
Identifying Symptoms That Signal a Repair is Needed
Vibration at highway speeds, a rhythmic clunk when shifting or accelerating, or a growling noise coming from under the vehicle are typical signs the driveshaft needs attention. A shaking steering wheel or seats that rattle at certain RPMs can also point to balance issues or worn U-joints. In many cases, the root cause is a failing U-joint or a damaged center bearing. According to Home Repair Guide analysis, early signs of wear often appear as play in the joint or minor corrosion at the bearing wrap. If the driveshaft shows scoring, broken supports, or a bent tube, replacement is usually the safest path. While some issues can be addressed with a U-joint refresh, other conditions require more extensive repair. This section helps you distinguish between minor lubrication needs, joint wear, and significant shaft damage so you can decide whether to repair or replace.
Safety First: Before You Start
Safety is non-negotiable when working on a driveshaft. Park on a flat, level surface and engage the parking brake. Use wheel chocks on the wheels that remain on the ground. Lift the car with a floor jack and secure it with approved jack stands; never rely on a jack alone to hold a raised vehicle. Wear eye protection, gloves, and sturdy clothing. Disconnect the battery when working near electrical components or sensors to avoid short circuits. Clear the workspace of bystanders and carry a fire extinguisher within reach. This block highlights essential safety steps and why they matter for a repair you perform at home.
Repair Options: When to Replace Versus Rebuild
Repair strategies vary with the condition of the driveshaft. If U-joints are worn but the shaft is straight, replacing the U-joints is often sufficient. A bent or cracked driveshaft should typically be replaced rather than repaired, to avoid imbalances and future failures. If a center bearing is failing but the tube is intact, you can often replace the bearing and re-balance the assembly. Full shaft balancing is recommended if diagnostic tests indicate vibration persists after basic joint service. In most DIY scenarios, the choice comes down to cost, availability of parts, and whether the shaft shows any visible damage or corrosion. The goal is a safe, balanced drivetrain that preserves vehicle handling and noise levels. Home Repair Guide emphasizes that complex shaft damage is usually beyond a homeowner’s scope and may require a professional service.
A Diagnostic Roadmap: From Symptoms to Solution
Begin with a visual inspection of the driveshaft, U-joints, and center bearing for rust, wear, or missing clips. Grab each U-joint and move it; noticeable play signals wear. If you can, mark the orientation of the driveshaft so you can reinstall it in the same position. Road testing should be done after the initial inspection, starting at low speeds to listen for changes in vibration. If vibrations persist after reassembly, check the joint caps and balance, and consider having the shaft balanced. This section provides a practical sequence to identify root causes and decide between repair or replacement, supported by Home Repair Guide’s practical approach to safe, DIY repairs.
Maintenance and Preventive Tips for Driveshaft Health
Regular inspections can catch wear before it becomes a hazard. Lubricate serviceable U-joints with the appropriate grease if specified by the manufacturer and your local code. Keep connections clean and dry to prevent corrosion. Replace worn hardware and clips, and ensure the shaft is properly aligned during reassembly. After any driveshaft service, perform a controlled test drive to verify there are no unusual vibrations or noises. Proactive maintenance saves time and money and reduces the risk of roadside failure, according to Home Repair Guide.
Tools & Materials
- Floor jack(Use on a solid, level surface)
- Jack stands(Support vehicle; never rely on a jack alone)
- Wheel chocks(Place on the wheels opposite the lifted side)
- Socket set & ratchet(Metric and SAE sizes; include extensions)
- Torque wrench(Dial in manufacturer torque specs)
- U-joint press or bearing press(For installing/removing U-joints)
- Pry bar / screwdrivers(Leverage without damaging parts)
- Hammer & punch set(For aligning or staking joints)
- Replacement U-joints or driveshaft assembly(Select compatible parts for your vehicle)
- Grease gun & lubricant(Only for serviceable joints; follow spec)
- Gloves & eye protection(Personal protective equipment)
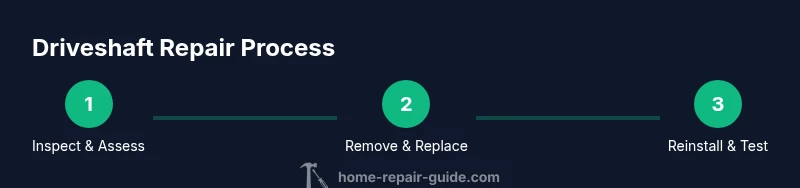
Steps
Estimated time: 2-4 hours
- 1
Prepare workspace and safety gear
Clear the work area, gather tools, and put on PPE. Review the task, ensure you have spare parts and a reliable plan before lifting the vehicle.
Tip: Take photos of each step to reference orientation during reassembly. - 2
Lift the vehicle and support securely
Loosen lug nuts, raise the vehicle with a floor jack, then place sturdy jack stands under the frame or pinch welds. Chock the opposite wheels to prevent movement.
Tip: Never rely on a jack alone to hold the vehicle; use stands as a safety backup. - 3
Inspect driveshaft and joints for wear
Visually inspect for rust, cracks, and missing clips. Check U-joints for play by moving the yokes; excessive movement indicates replacement.
Tip: If you feel gritty resistance, the joint may be seized—do not force it. - 4
Remove driveshaft from the vehicle
Mark the orientation of the driveshaft relative to the flange, then unbolt the mounting points and separate the shaft carefully. Support the shaft during removal to prevent drops.
Tip: Label fasteners and note any distinct hardware for reinstallation. - 5
Inspect shaft and decide on repair path
Check for bends, cracks, or heavy corrosion. If the shaft is bent or cracked, replacement is safer than repair.
Tip: Even if the shaft looks straight, hidden damage can cause imbalances after reinstall. - 6
Install new joints or replacement driveshaft
If replacing U-joints, press them in squarely, align the caps with grease grooves, and stake or clip as required. If installing a new driveshaft, align it with the marks you made earlier.
Tip: Use a proper press tool to avoid damaging joint components. - 7
Reinstall driveshaft and torque fasteners
Slide the driveshaft back into position, connect U-joints, and torque all fasteners to the manufacturer spec. Recheck alignment marks before fully tightening.
Tip: Double-check torque specs to prevent over-tightening or loosening. - 8
Test drive and verify repairs
Lower the vehicle, clear tools, and take a cautious test drive. Listen for vibrations, and re-check for leaks or abnormal noises; balance may be needed if issues persist.
Tip: If vibration remains, consider professional balancing or diagnostic follow-up.
FAQ
Is it safe to drive a vehicle with a damaged driveshaft?
Driving with a damaged driveshaft risks drivetrain damage and loss of control. Have the vehicle inspected and repaired before highway use.
No—driving with a damaged driveshaft is unsafe. Get it checked first.
What parts typically fail on a driveshaft?
The most common failures are worn U-joints, a failing center bearing, and damaged balance rings. Inspect all joints and the shaft for wear.
U-joints and bearings fail most often.
Can I fix a driveshaft myself?
Yes, for skilled DIYers with the right tools. Complex bends or cracks may require a professional shop.
It’s doable for competent DIYers with the right tools.
How do I tell if the driveshaft is out of balance?
Vibration that correlates with road speed or an audible thump can indicate imbalance. A professional can balance the shaft.
Vibration at speed often means imbalance.
How long does a driveshaft repair take?
Time varies with damage and parts availability; plan for several hours if parts are on hand, longer if sourcing is needed.
Typically a few hours, depending on damage.
What safety steps are essential?
Secure the vehicle on stable stands, wear PPE, and never work under a vehicle supported only by a jack.
Always use jack stands and PPE.
Watch Video
Key Takeaways
- Identify root cause before replacing parts.
- Follow torque specs to avoid over-tightening.
- Balance and test-drive after install.
- Regular inspections prevent costly failures.